


Every estimate, invoice and appointment starts with a client. Adding clients takes under a minute: this guide shows how to add a customer — and their first vehicle — so you can manage your customer list effortlessly.
- 1
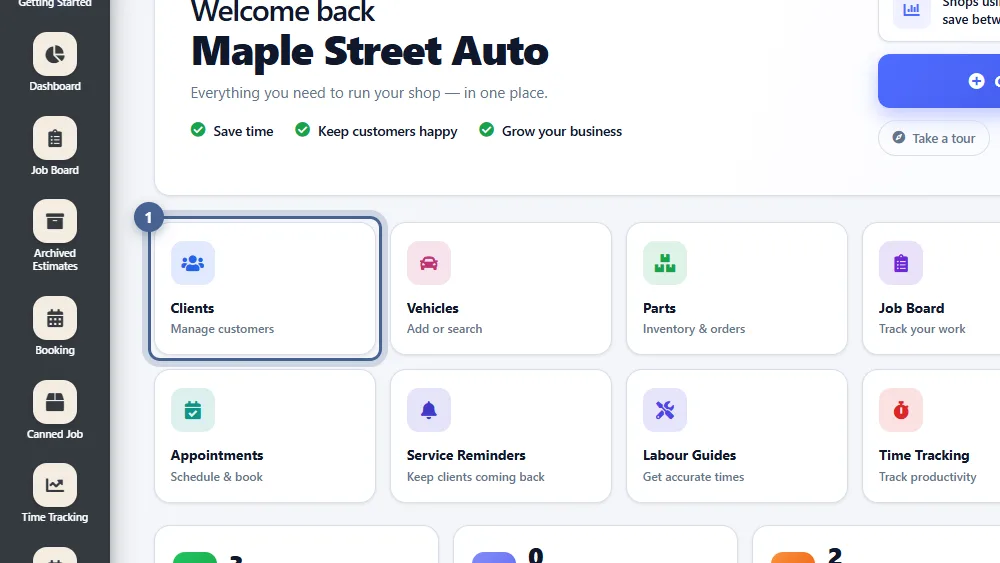
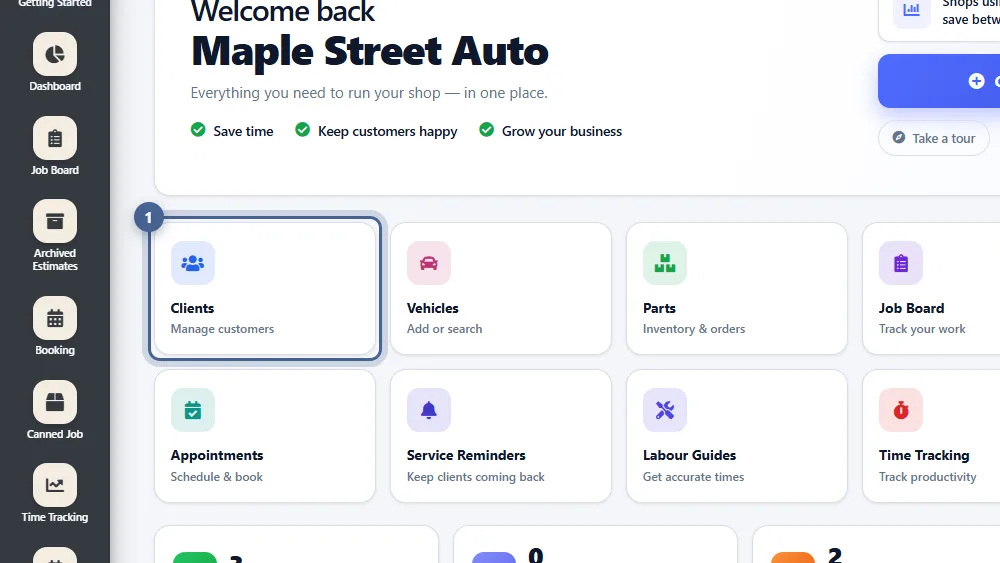
Open Clients
From the Getting Started page, click the Clients tile. (You can also reach it from the menu at any time.) The Clients list shows every customer in your shop with their phone, email and status.
- 2
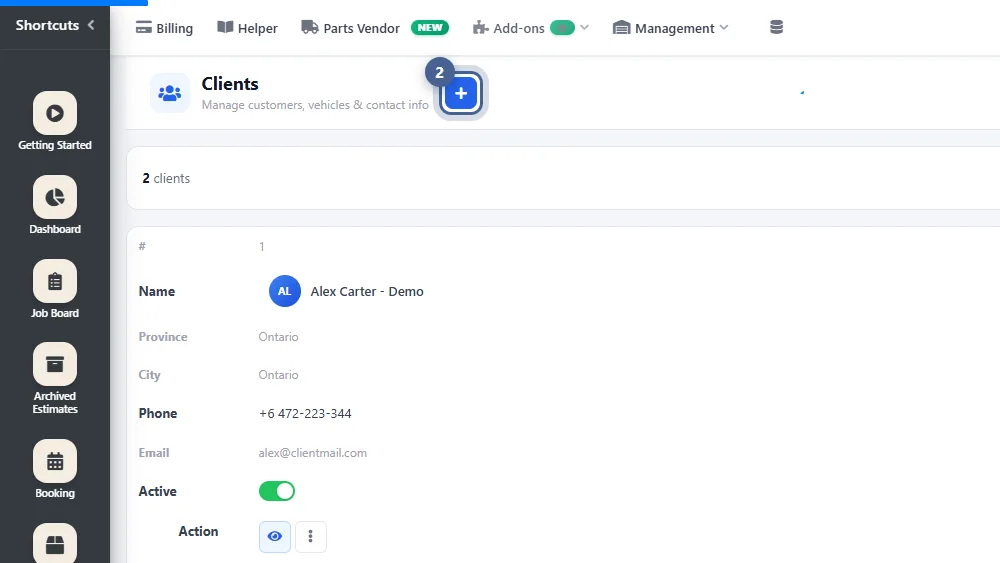
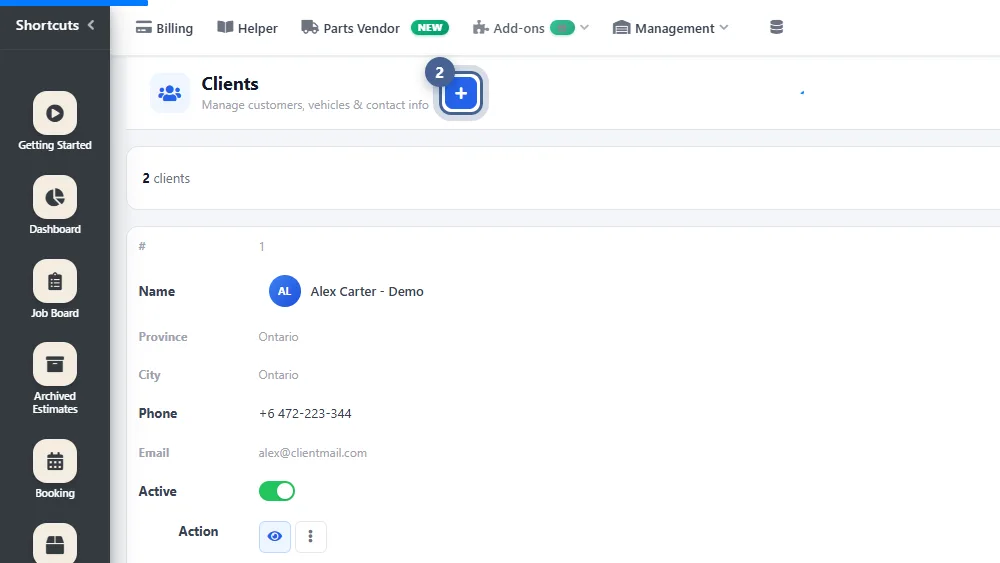
Click “Add client”
Click the blue + button next to the page title. The Add Client panel slides in from the right.
- 3
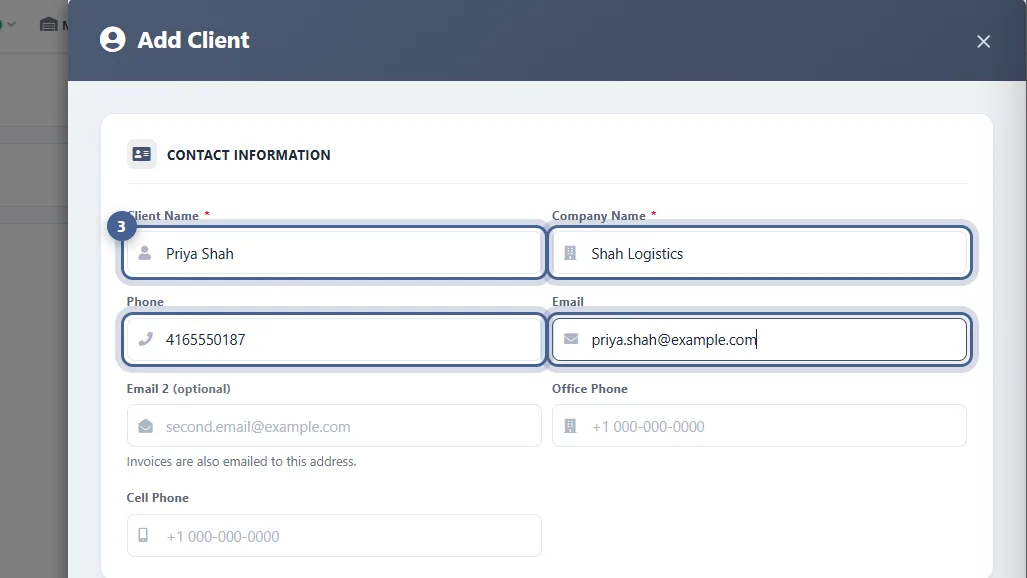
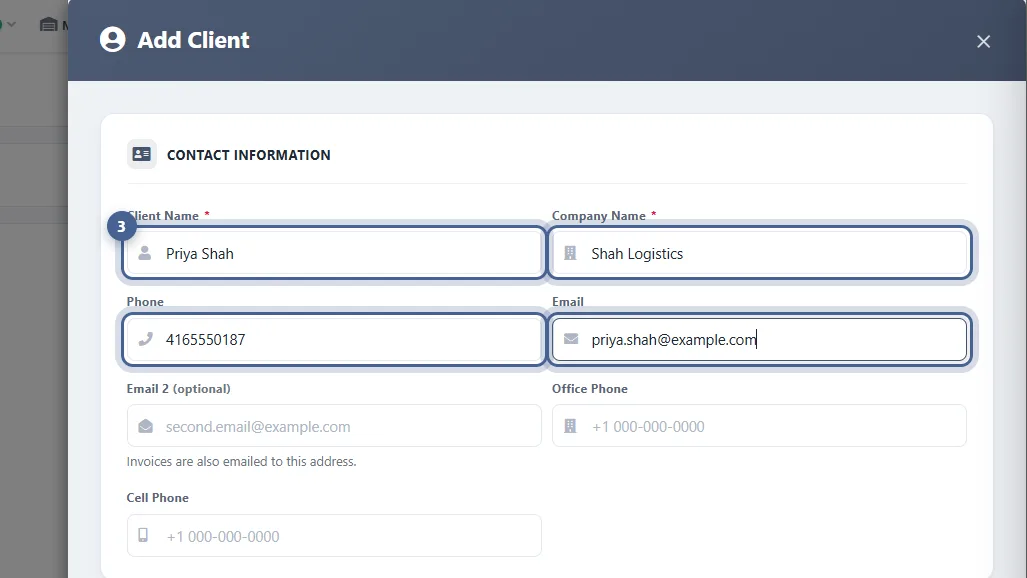
Enter the contact information
Client Name and Company Name are required (for a private customer, repeat their name as the company). Add a phone number and email — AutoSoftWay emails estimates, invoices and reminders to the customer. Email 2 is optional: invoices are copied to that address too, handy for fleet or accounting contacts.
- 4
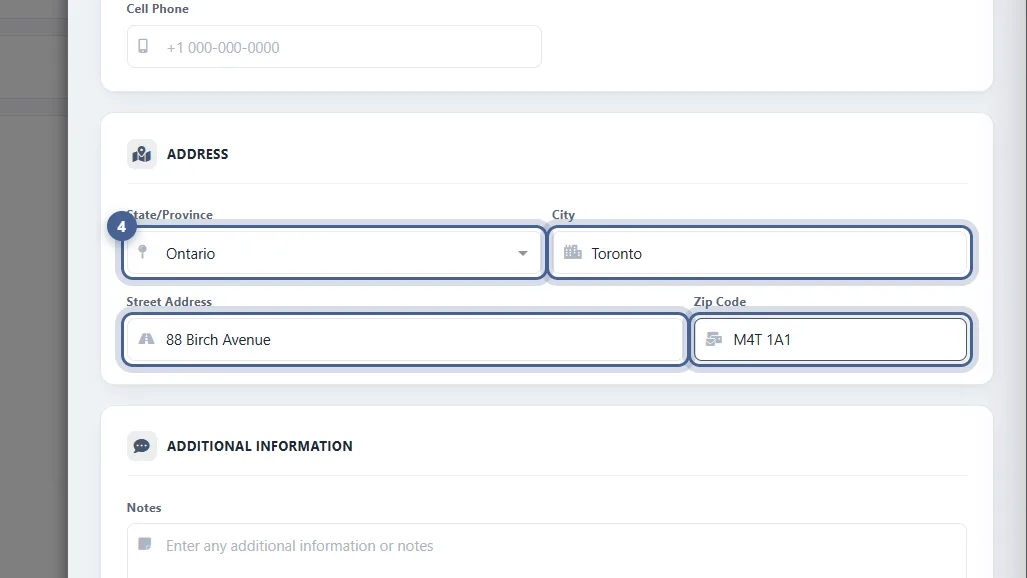
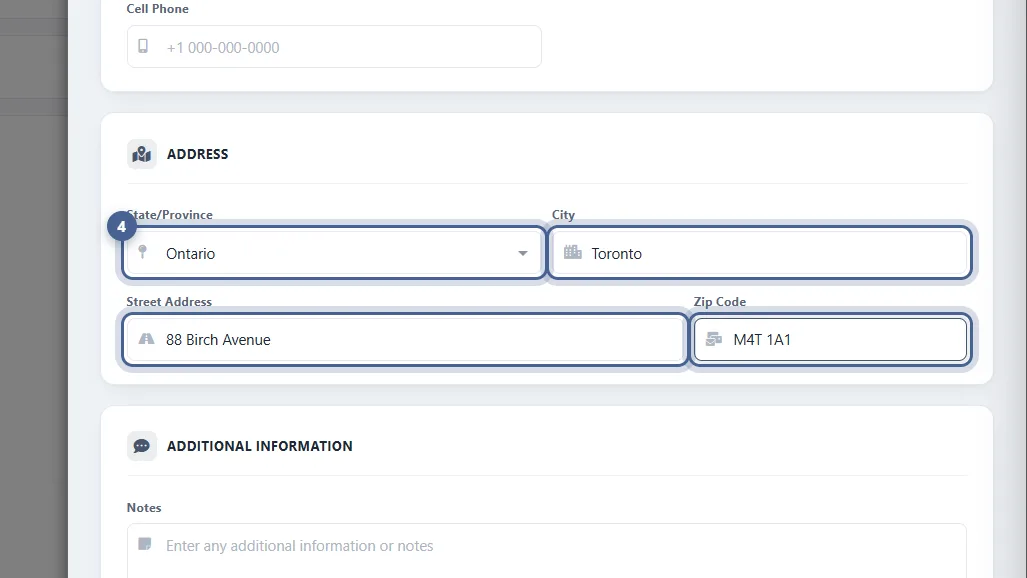
Add the address
Fill in the street address, city and postal code. VAT on this customer’s estimates and invoices uses the rate you set in Setup → Tax.
- 5
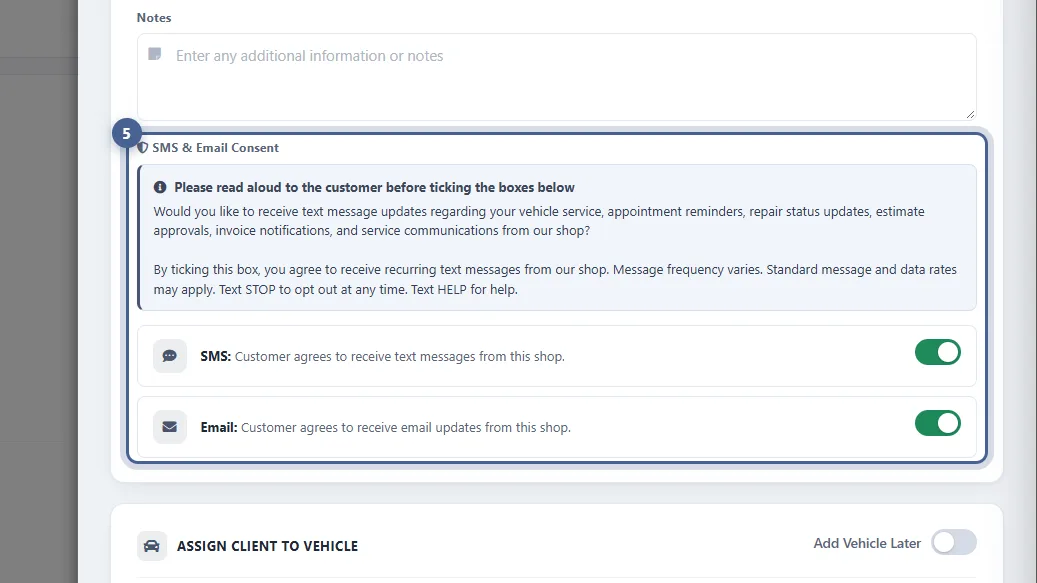
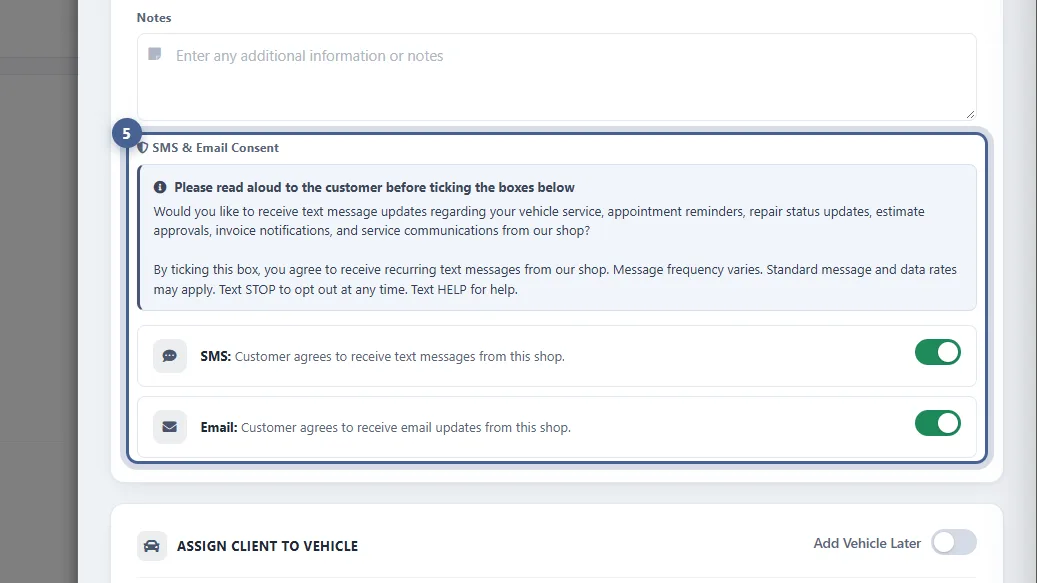
Record the customer’s consent
In the consent section, read the short statement aloud to the customer, then tick the boxes they agree to. AutoSoftWay only emails estimates, reminders and follow-ups to customers who have given consent.
- 6
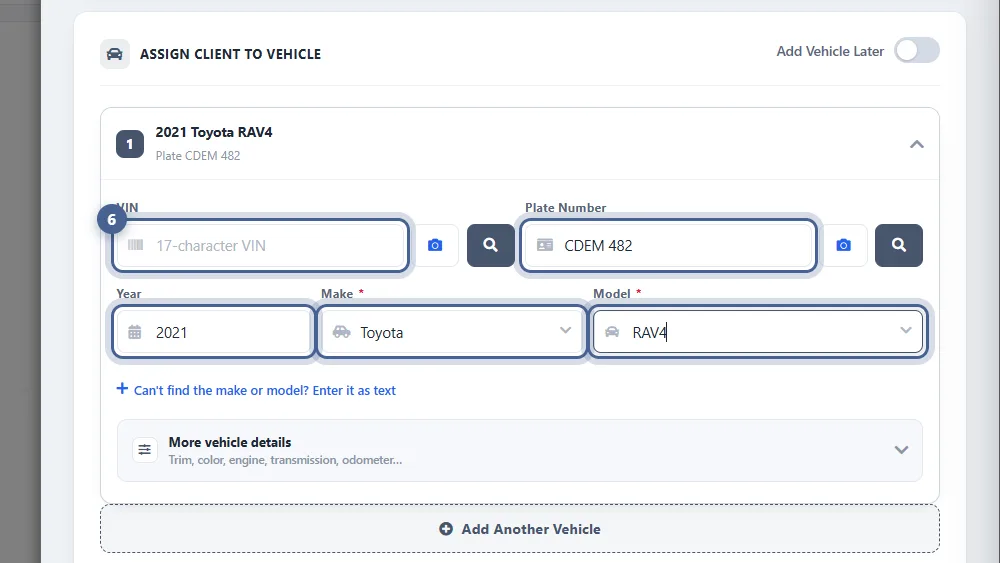
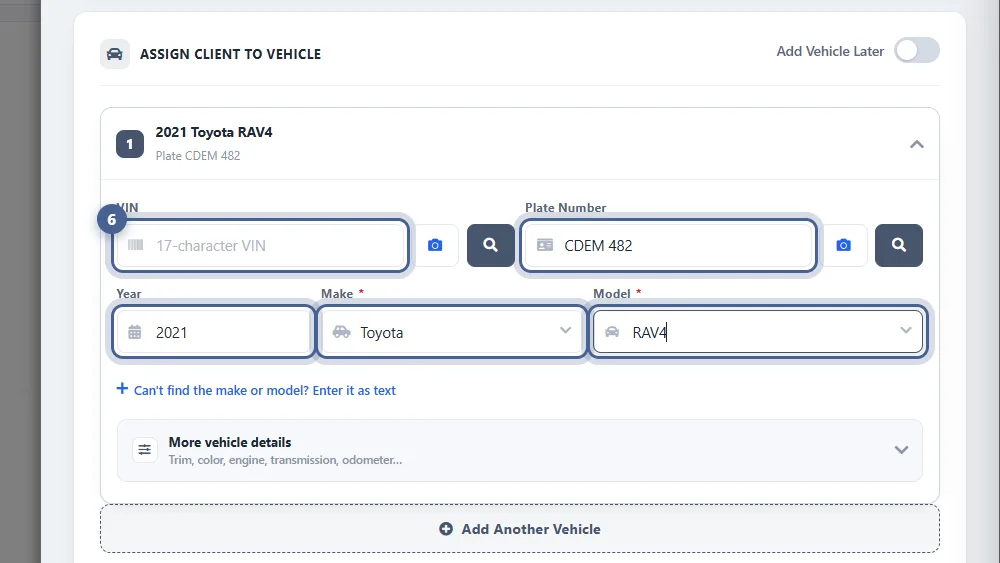
Add the customer’s vehicle (optional)
You can add the first vehicle right here: enter the VIN (or the plate number), year, make and model — start typing and pick from the list. Use Add Another Vehicle for more cars, or tick Add later to skip this for now.
- 7
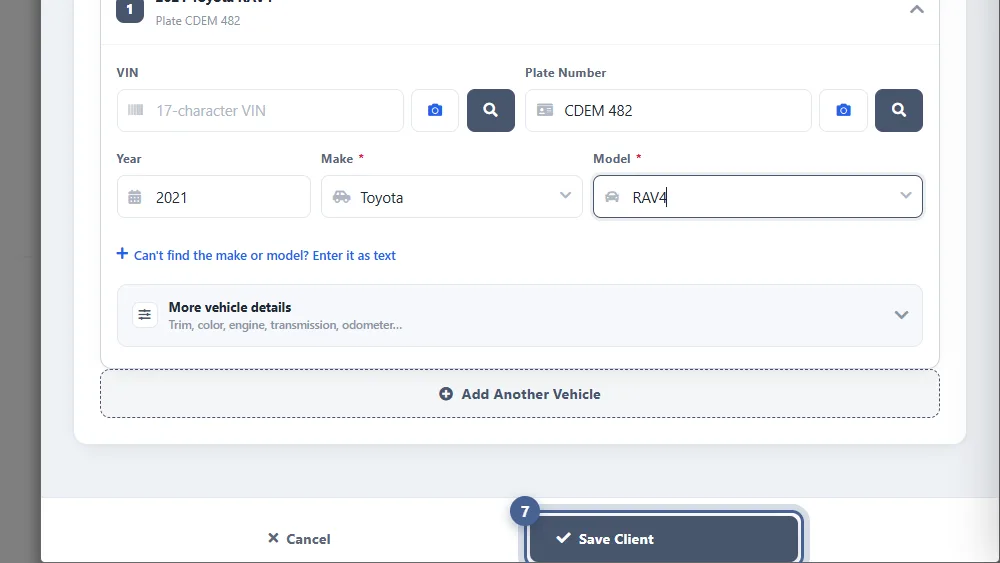
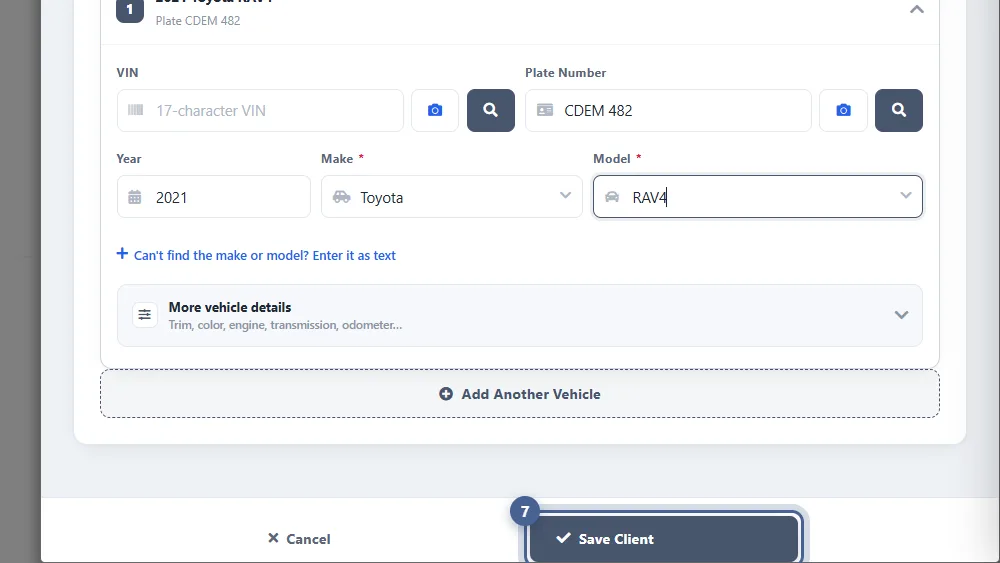
Save the client
Click Save Client. The panel closes and the customer is ready to use on estimates, invoices, appointments and inspections.
- 8
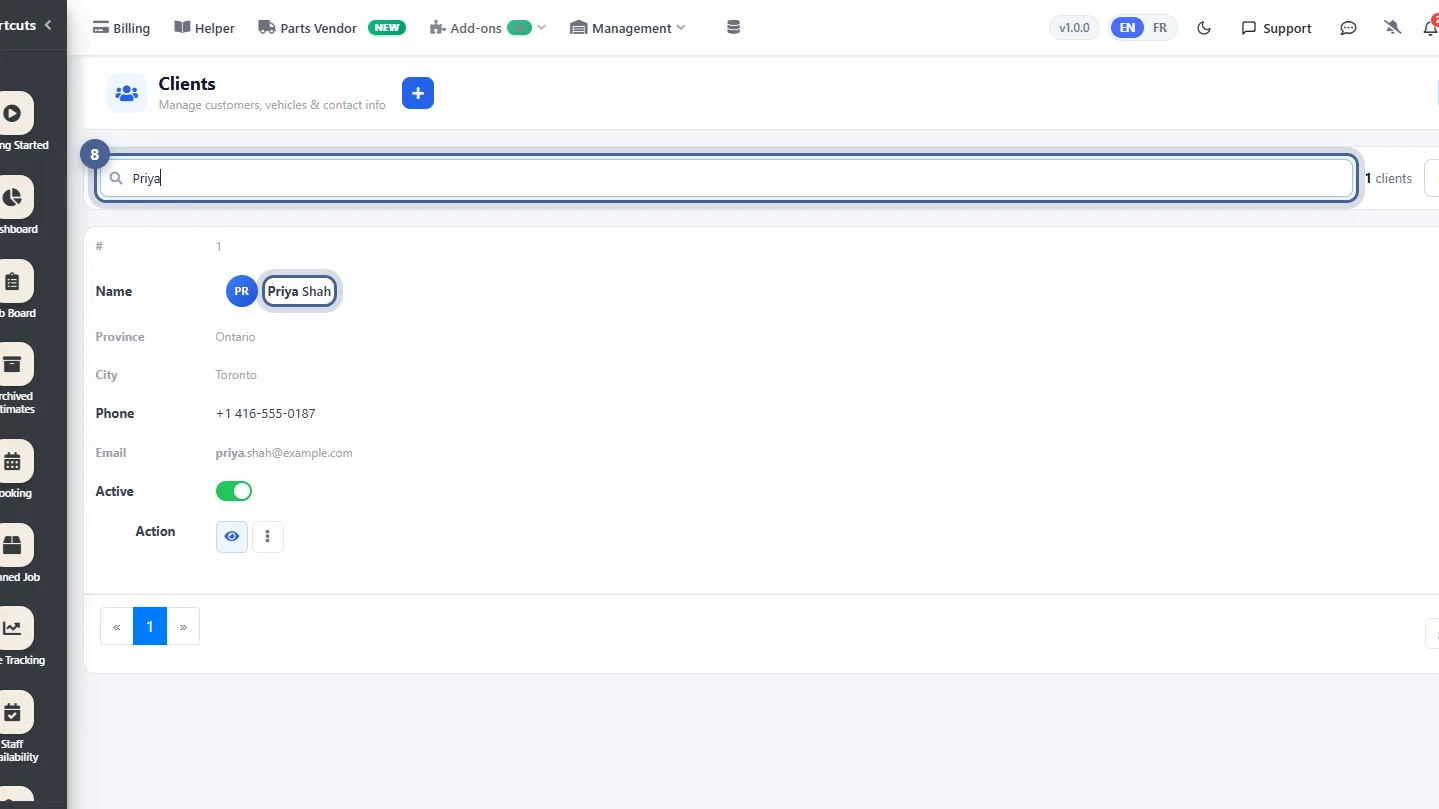
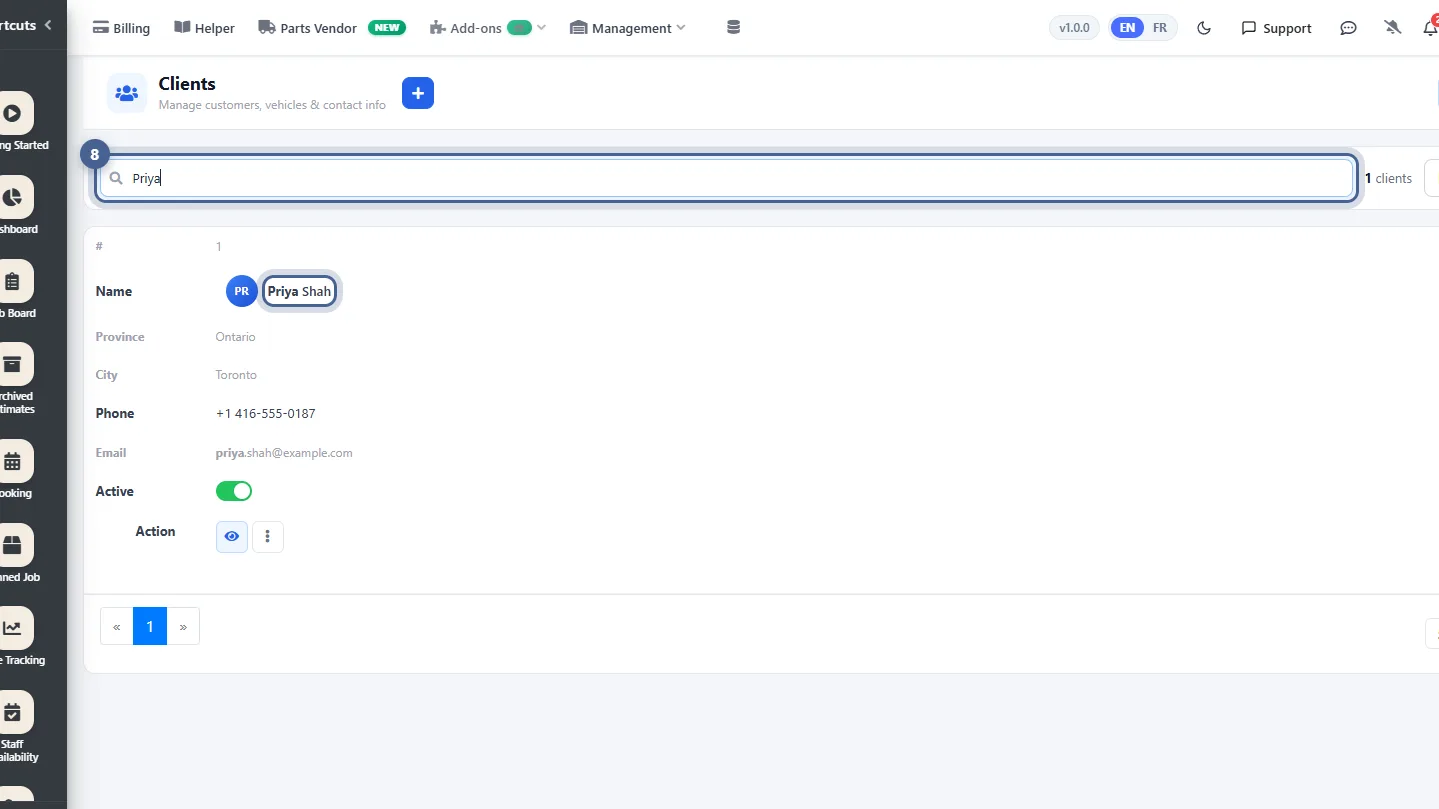
Find the new client in the list
The new client appears in the Clients list — use the search icon to find anyone by name, phone or email. Click the eye icon to open their profile, where their vehicles, estimates and invoices are all in one place.
Screenshots taken from AutoSoftWay in September 2026 using a demo shop with sample data.