


Coordinating your shop starts with the Job Board: your shop floor on one screen — every job, every technician, every stage — so everyone knows what’s next.
- 1
Your shop at a glance
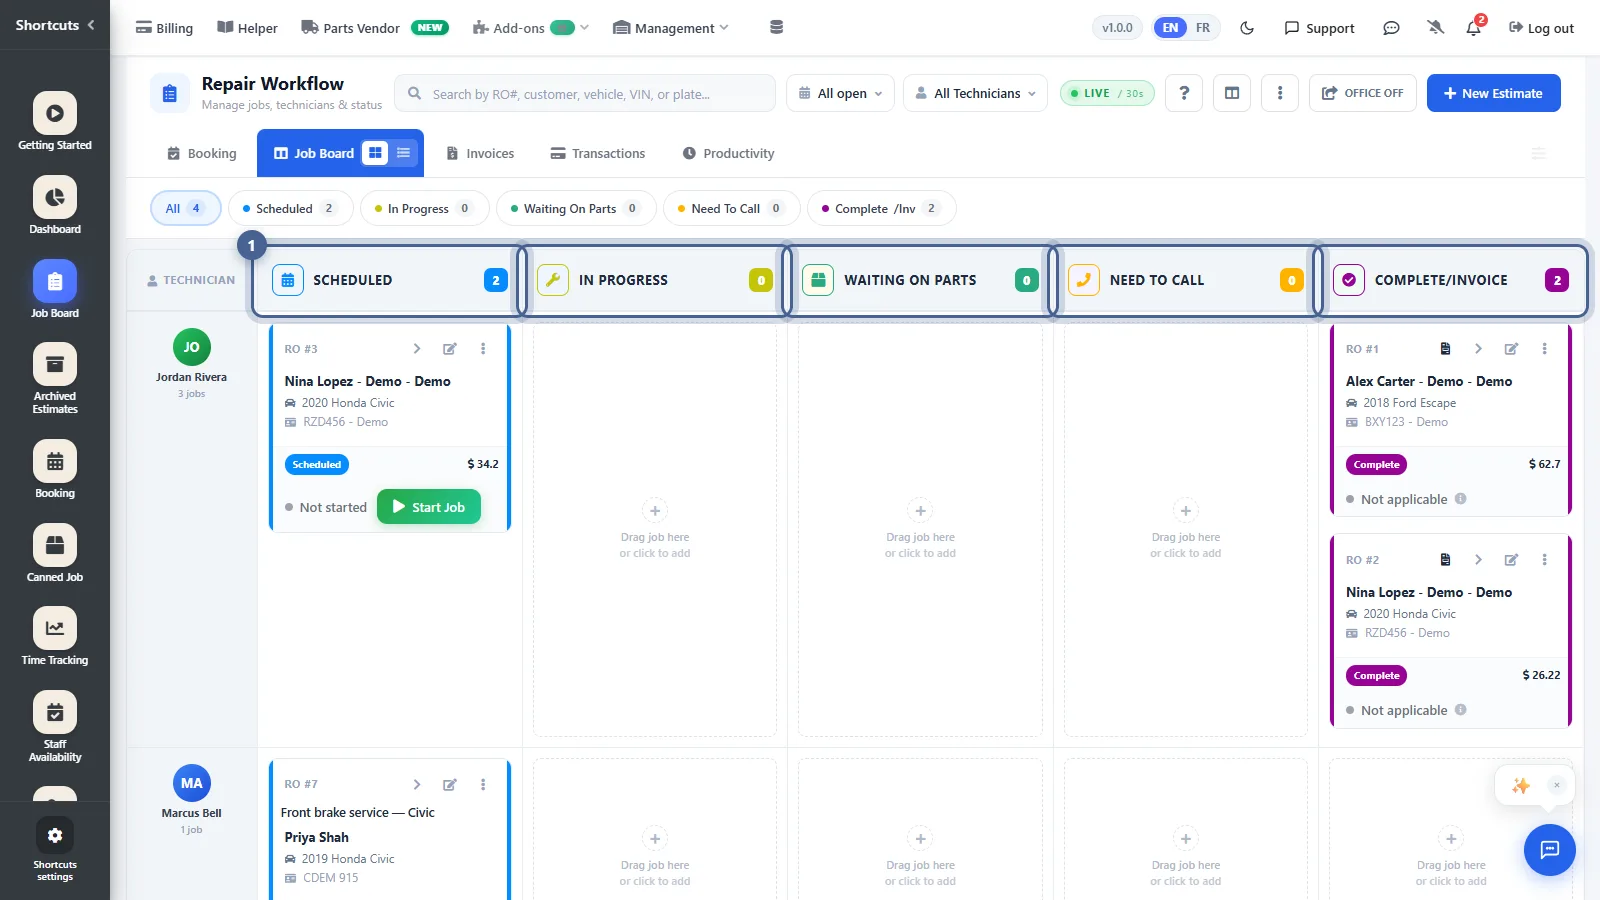
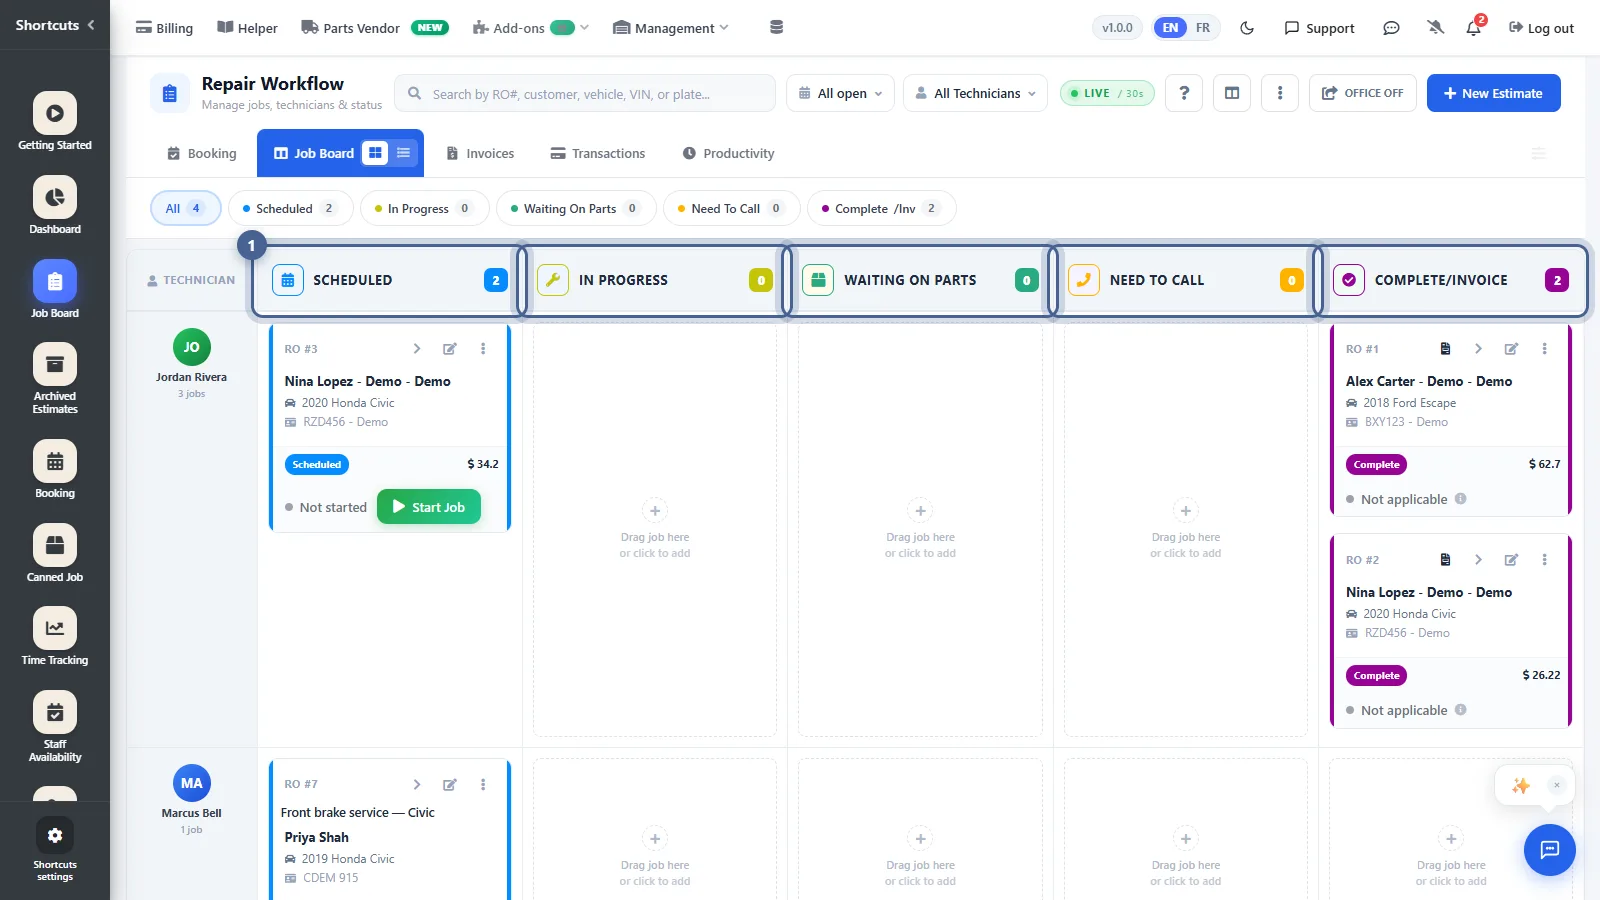
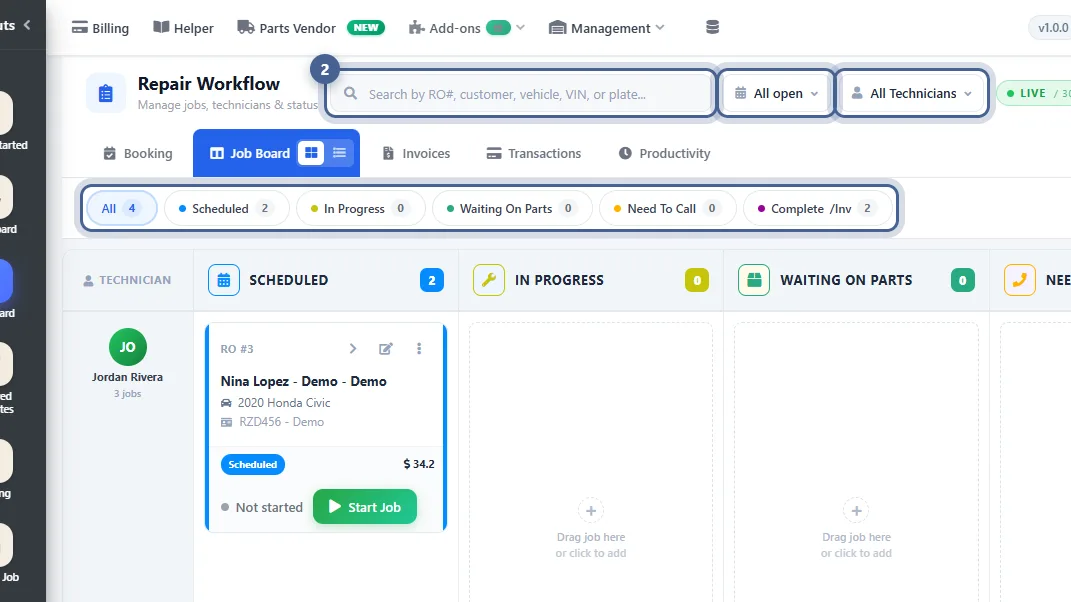
Open the Job Board. Every open job is a card. The columns are the stages a job moves through — Scheduled, In Progress, Waiting On Parts, Need To Call and Complete/Invoice — and each technician has their own row, so you can see who is working on what.
- 2
Find any job fast
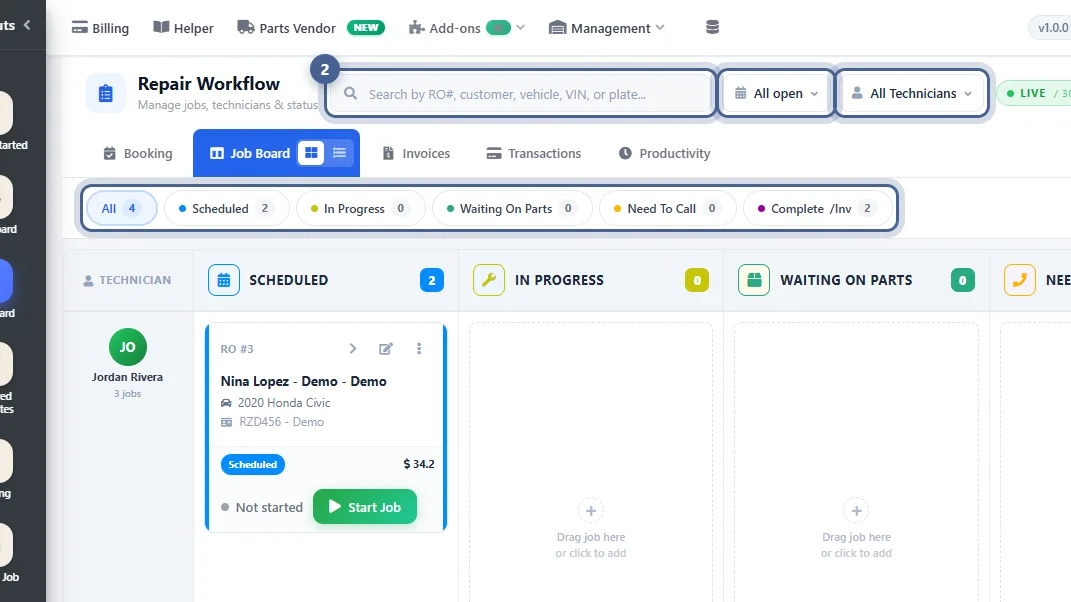
Search by RO number, customer, vehicle, VIN or plate. Narrow the board with the All open and All Technicians filters, or click a stage chip — the number shows how many jobs are in it.
- 3
Read a job card
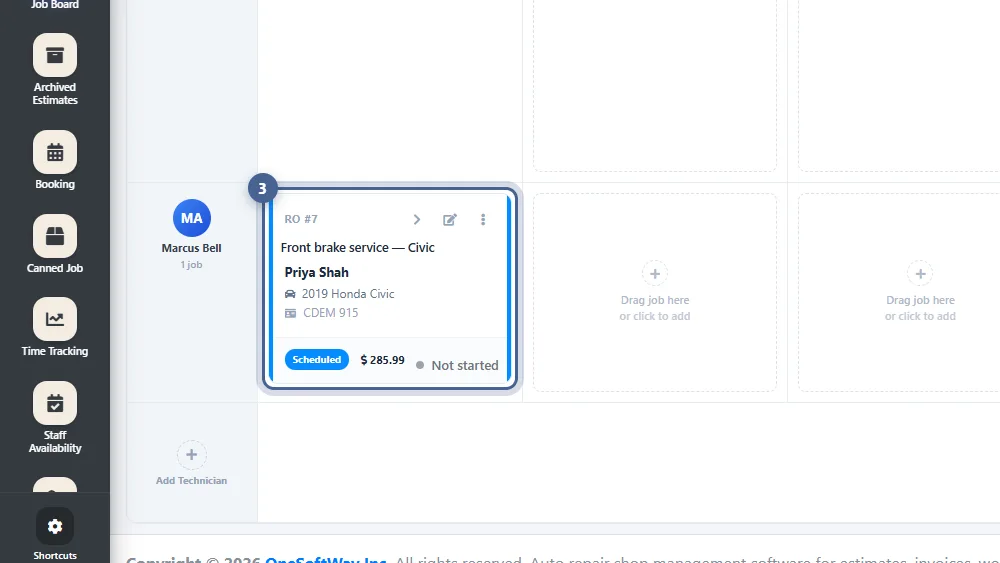
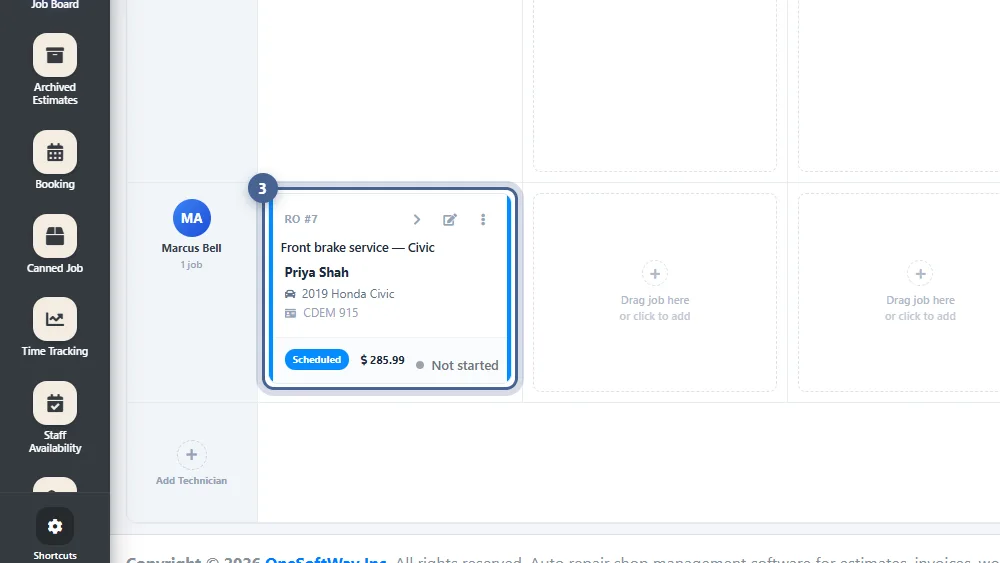
Each card shows the RO number, job name, customer, vehicle and plate, its status and total. Use › to open the job, the pencil to edit it, and ⋮ for more actions.
- 4
Move a job to the next stage
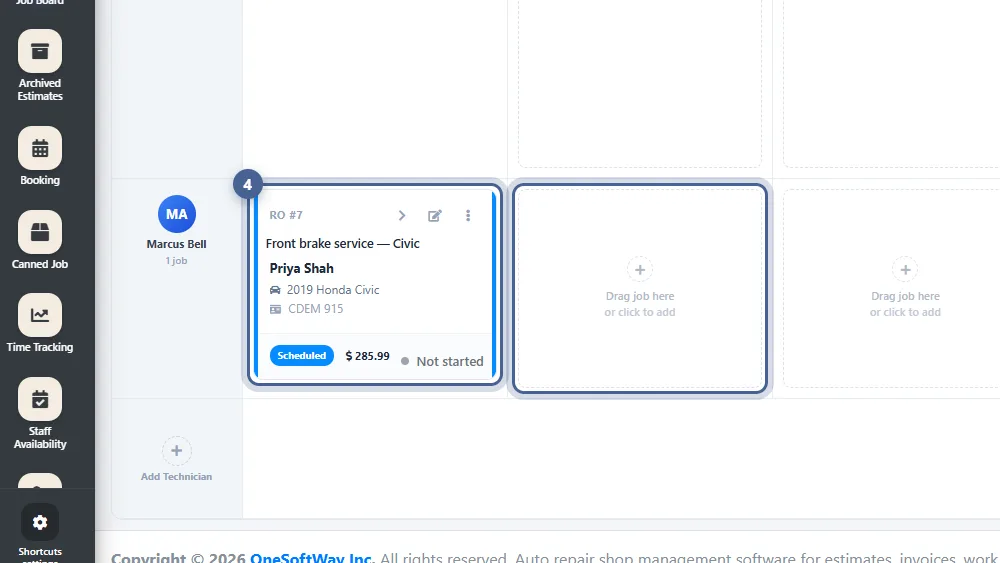
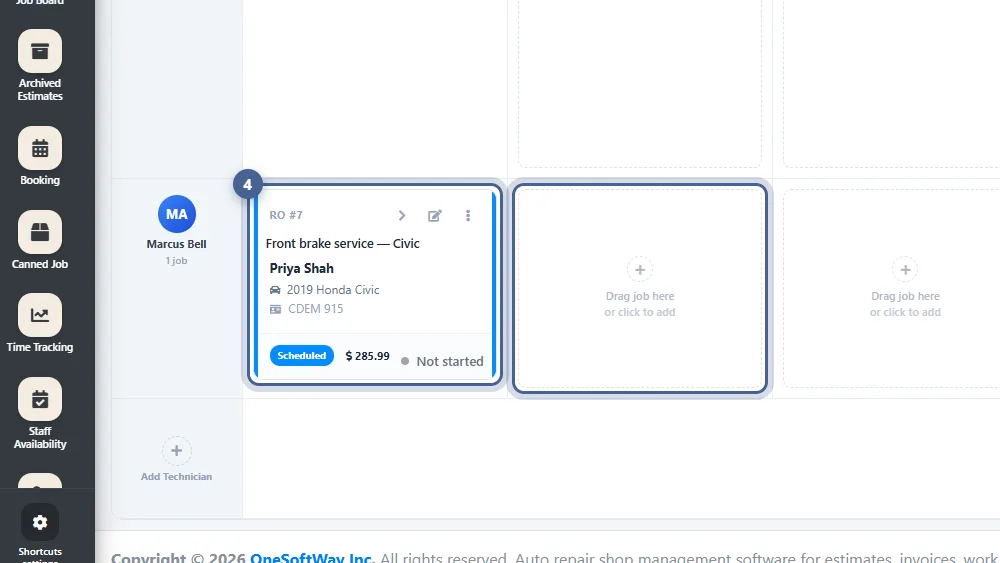
Drag the card into the next column as the job progresses — here from Scheduled to In Progress. You can also drop it on another technician’s row to reassign it. The status updates for everyone instantly.
- 5
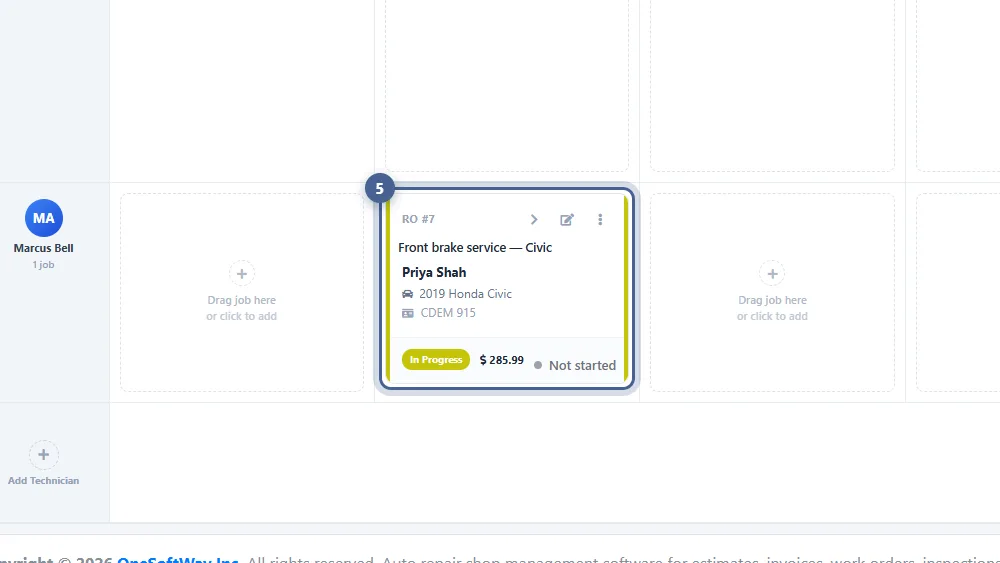
The job is now in progress
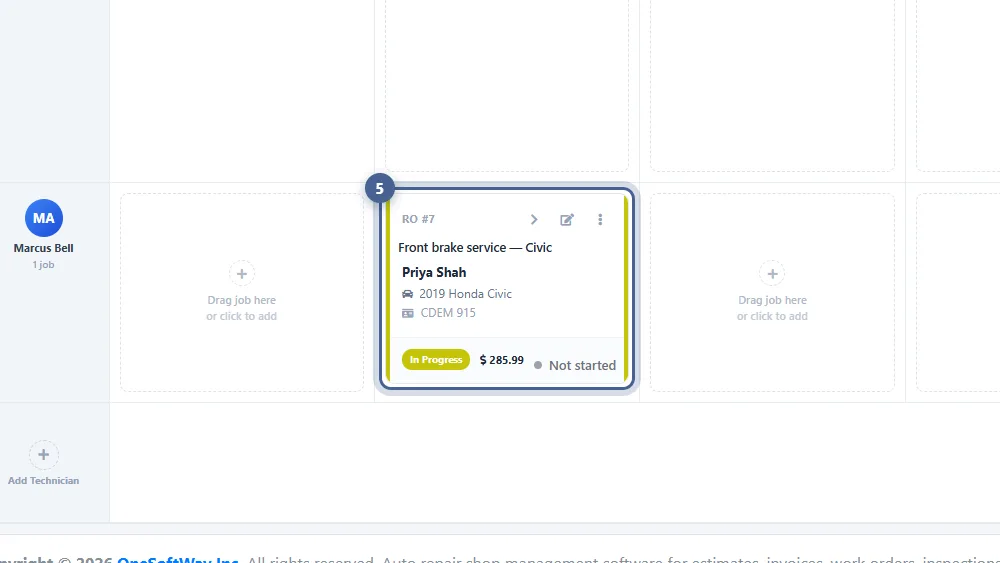
The card sits in In Progress with its new status. When you’re waiting for parts or need the customer to approve more work, move it to Waiting On Parts or Need To Call so nothing is forgotten. When the work is done, drag it to Complete/Invoice — see Creating an Invoice.
- 6
Clock the time on a job
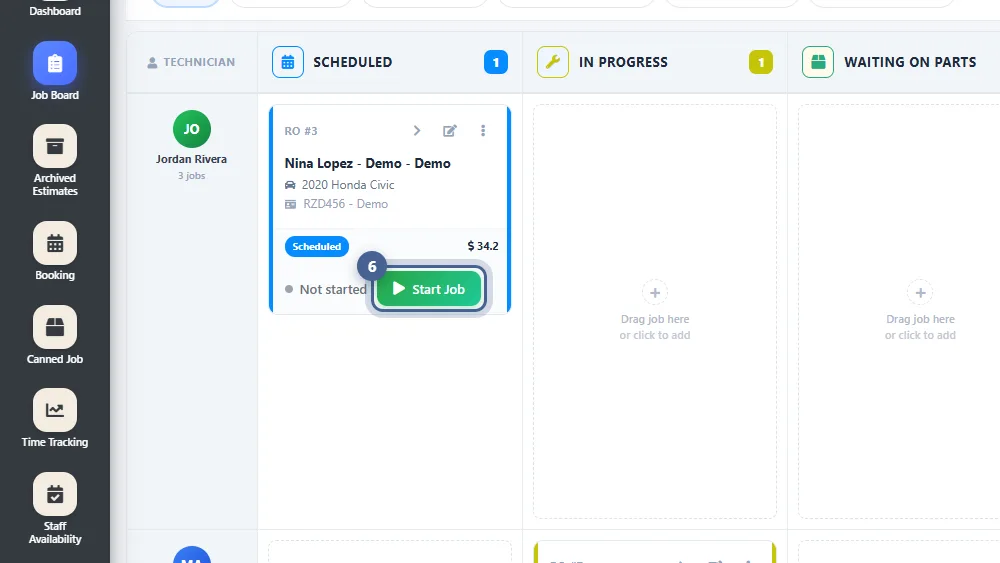
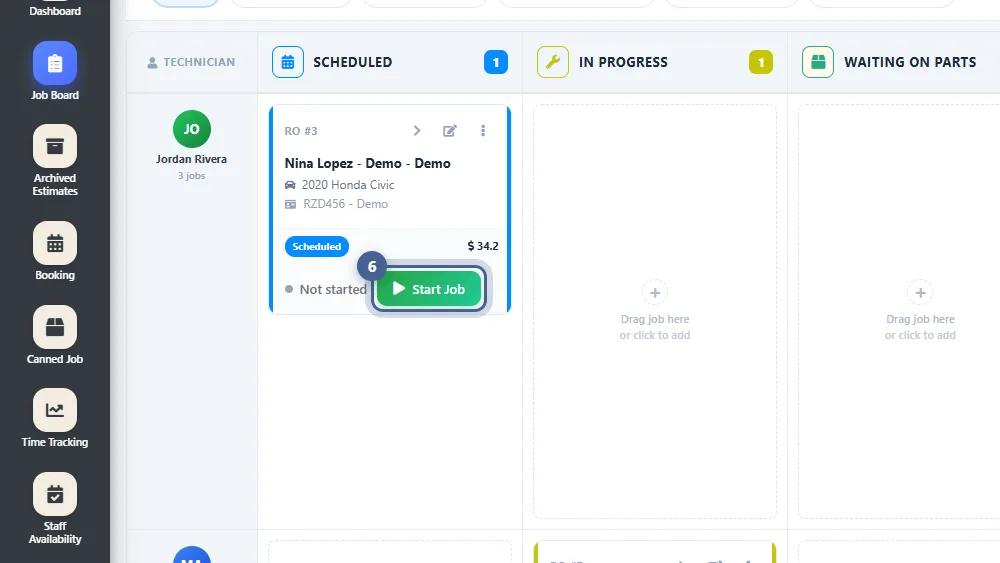
Technicians click Start Job on their own card to start the job clock. While it runs they can take a Break, Resume, or Stop when they finish — so you know how long every job really took.
- 7
Make the board fit your shop
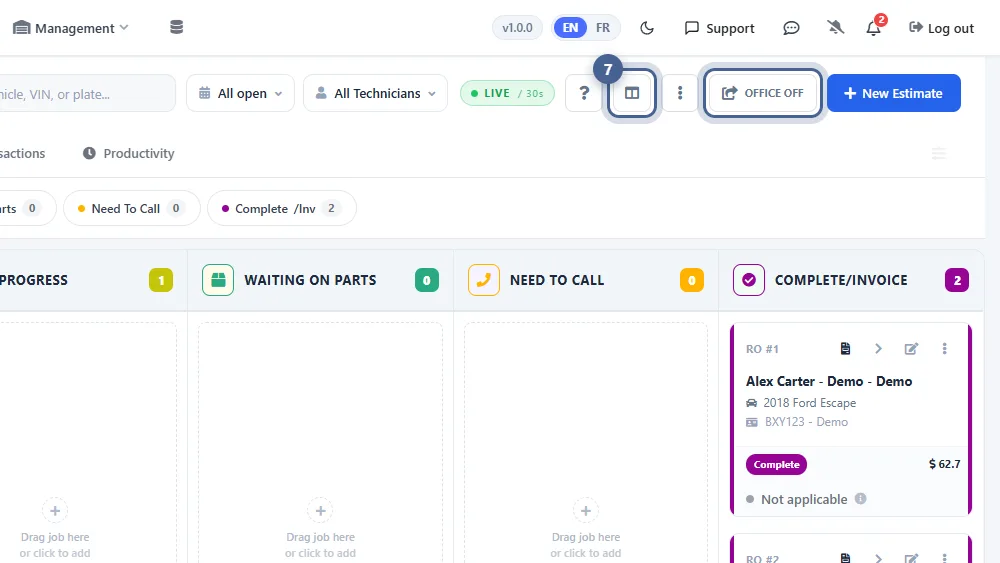
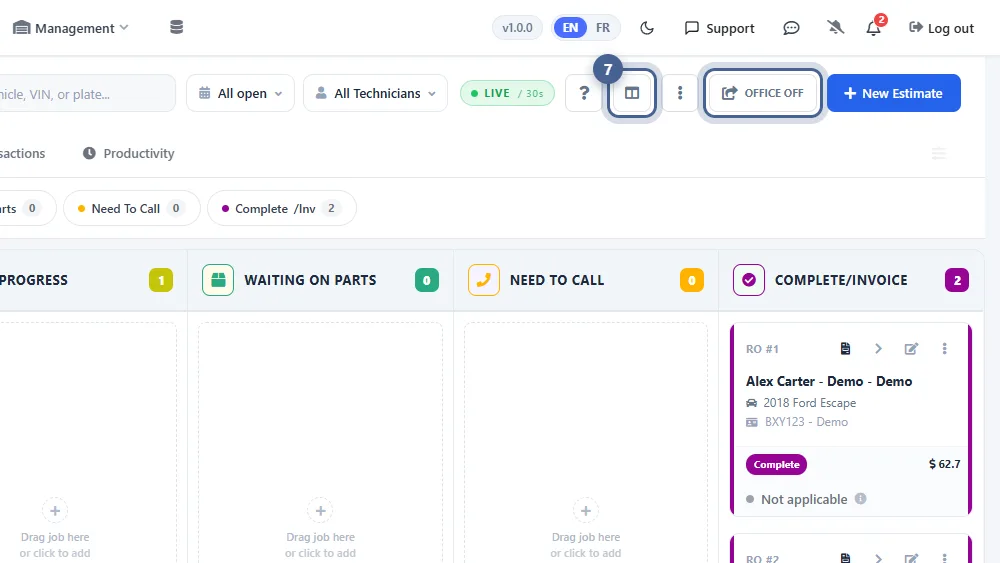
Use the Columns button to add, rename, recolour or reorder the stages. Turn OFFICE on to add an office workflow: finished jobs can be sent to the office and tracked in extra columns such as Office Review, Waiting for Payment and Monthly Account until they are closed.
Screenshots taken from AutoSoftWay in September 2026 using a demo shop with sample data.