


Simplify inspections with reusable checklists — oil change, brakes, full multi-point — so every technician inspects every vehicle the same way.
- 1
Open the DVI Builder
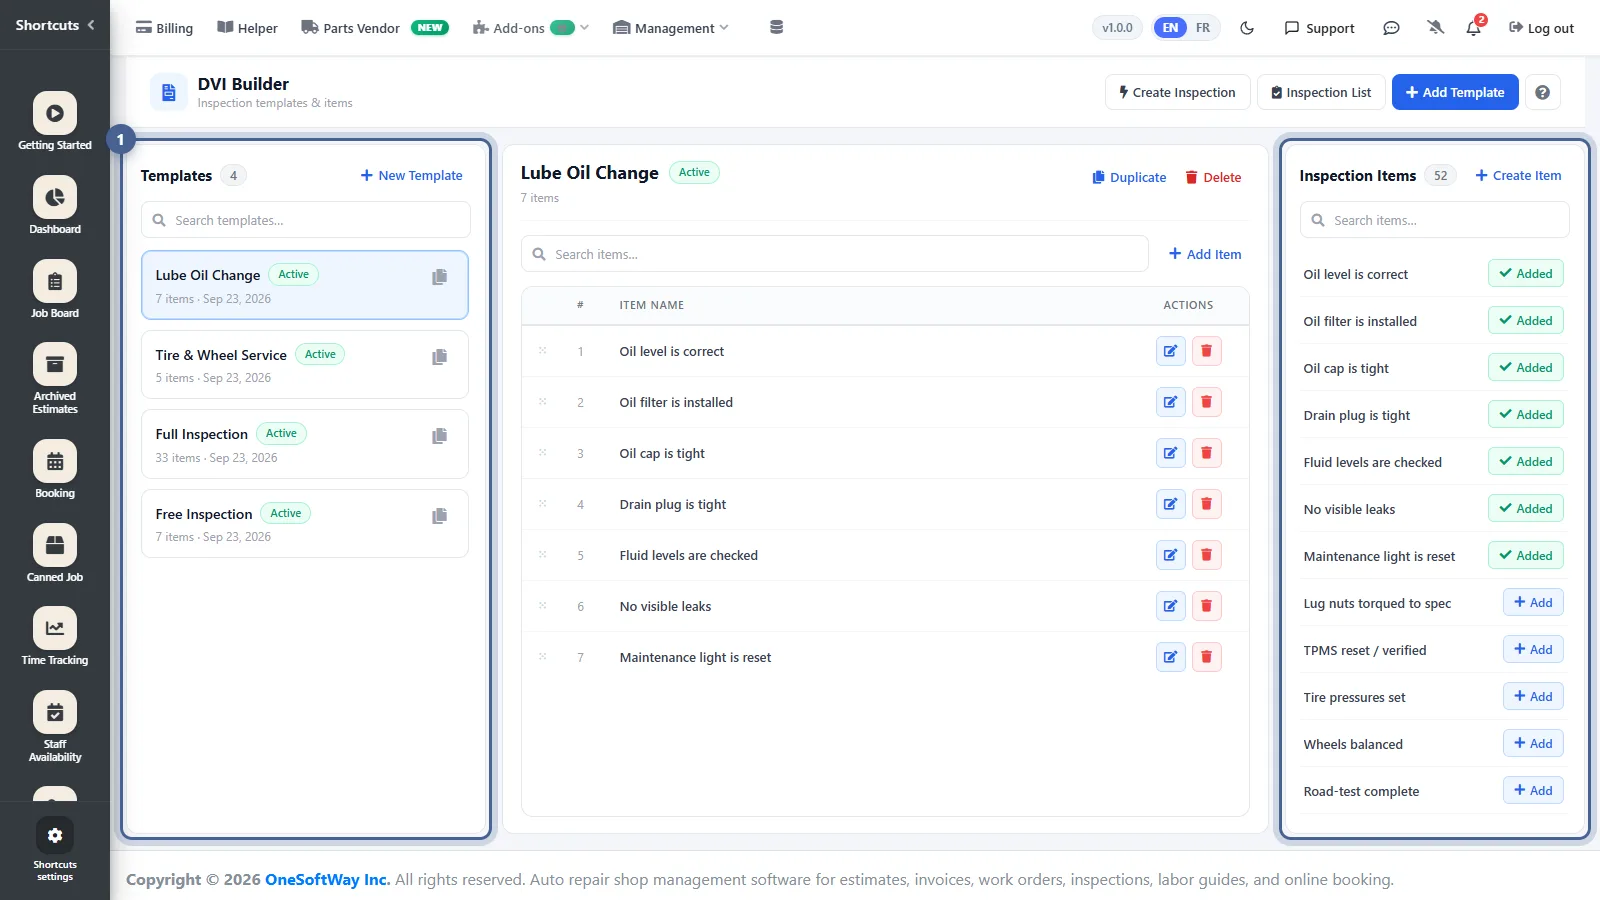
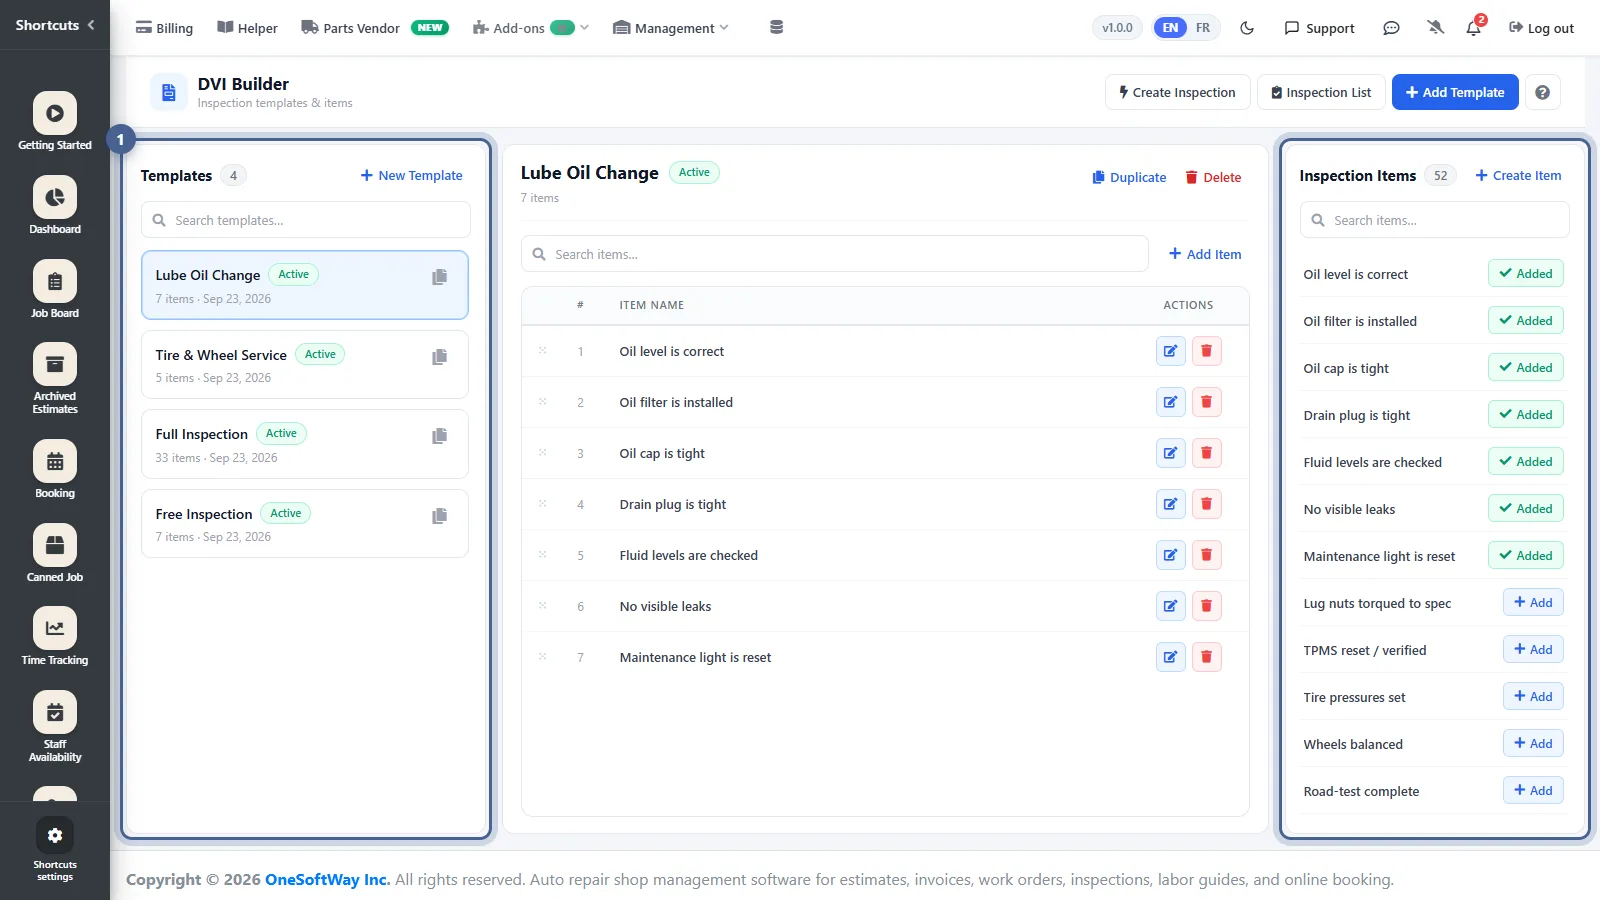
Open DVI Builder from the menu. On the left are your inspection Templates (AutoSoftWay starts you with a few, like Lube Oil Change and Full Inspection); in the middle, the checks in the selected template; on the right, your library of Inspection Items.
- 2
Add any checks you’re missing
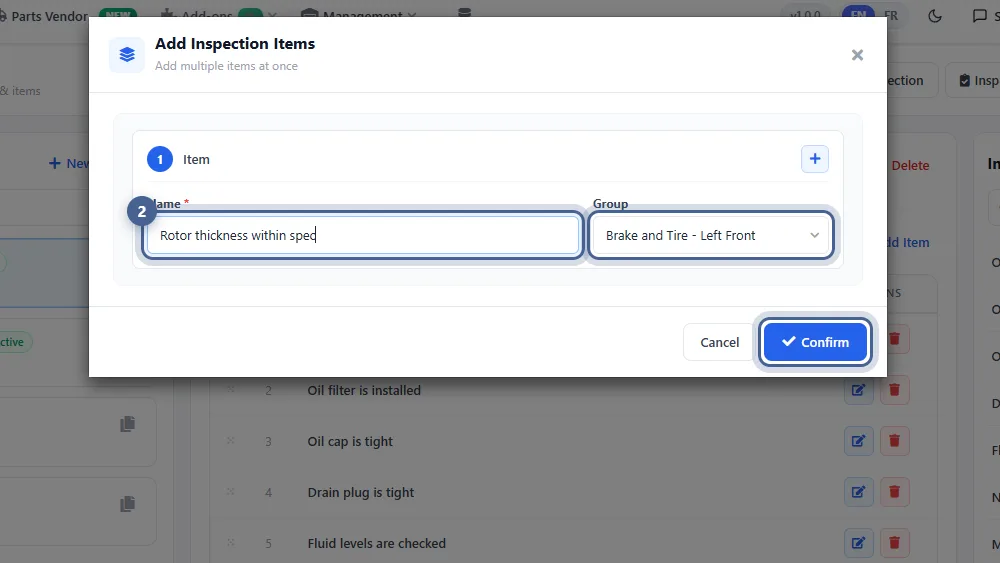
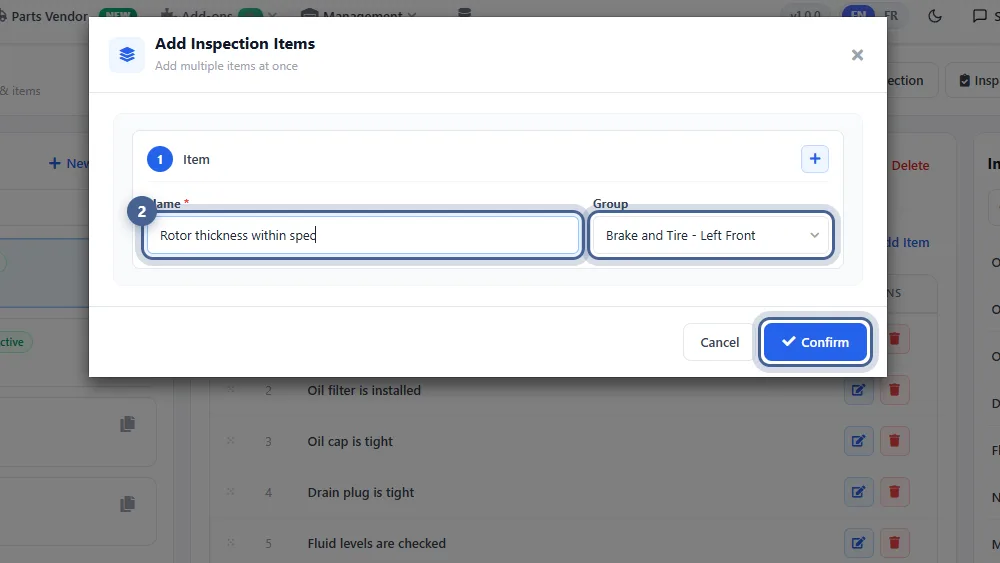
If a check isn’t in the library yet, click Create Item, type its Name and choose a Group (such as Brakes or Tires), then Confirm. Use the + to add several items at once.
- 3
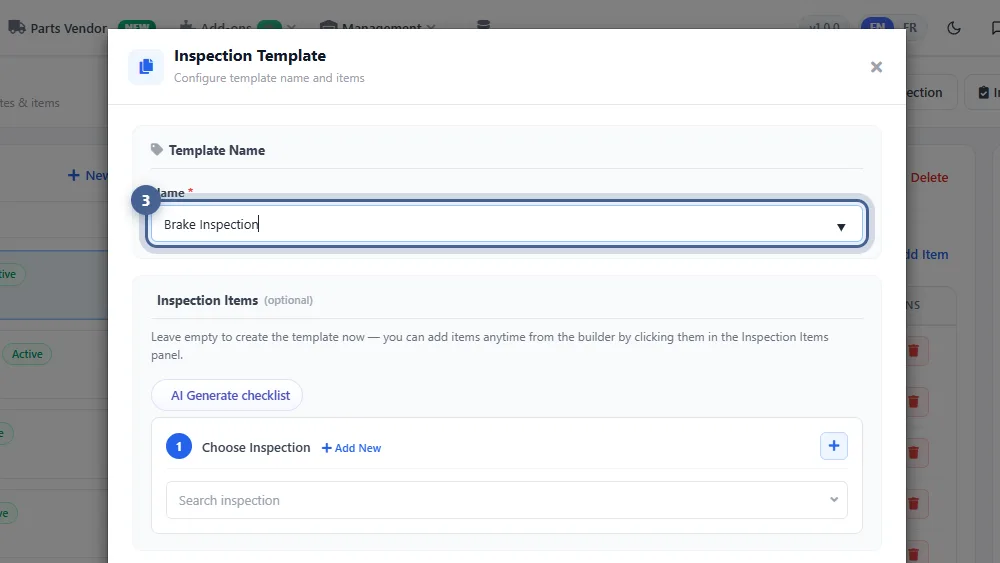
Create the template
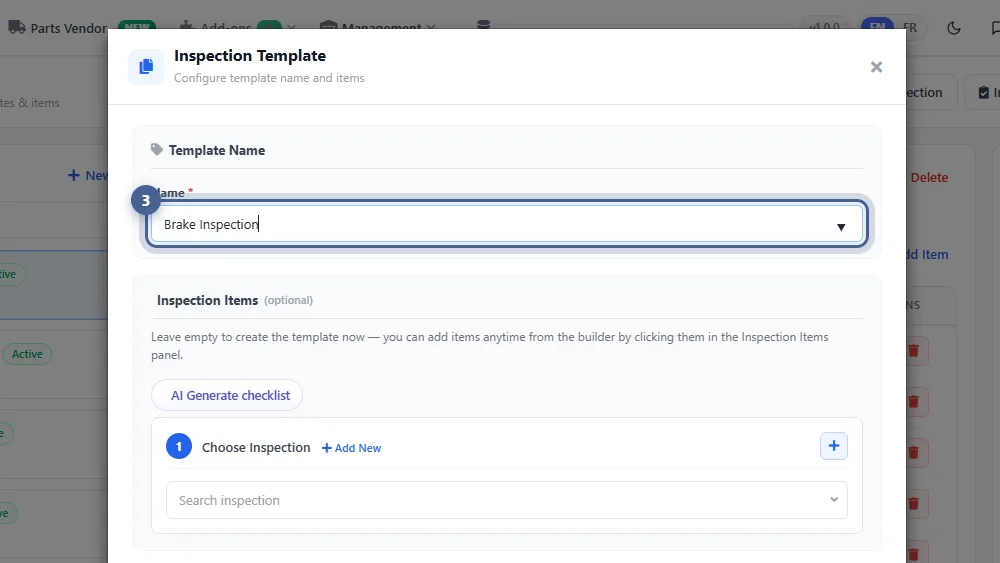
Click New Template and give it a Name — for example “Brake Inspection”. You can pick items right here, or let AI Generate checklist draft one for you. Items are optional at this point.
- 4
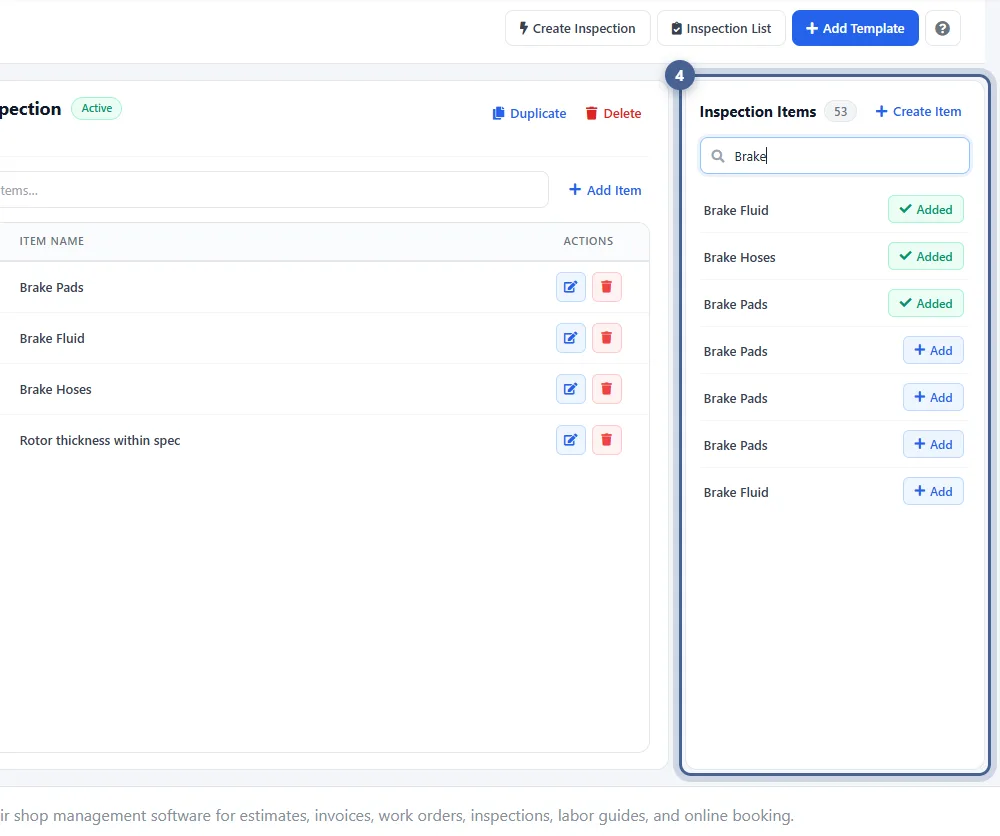
Add checks from the library
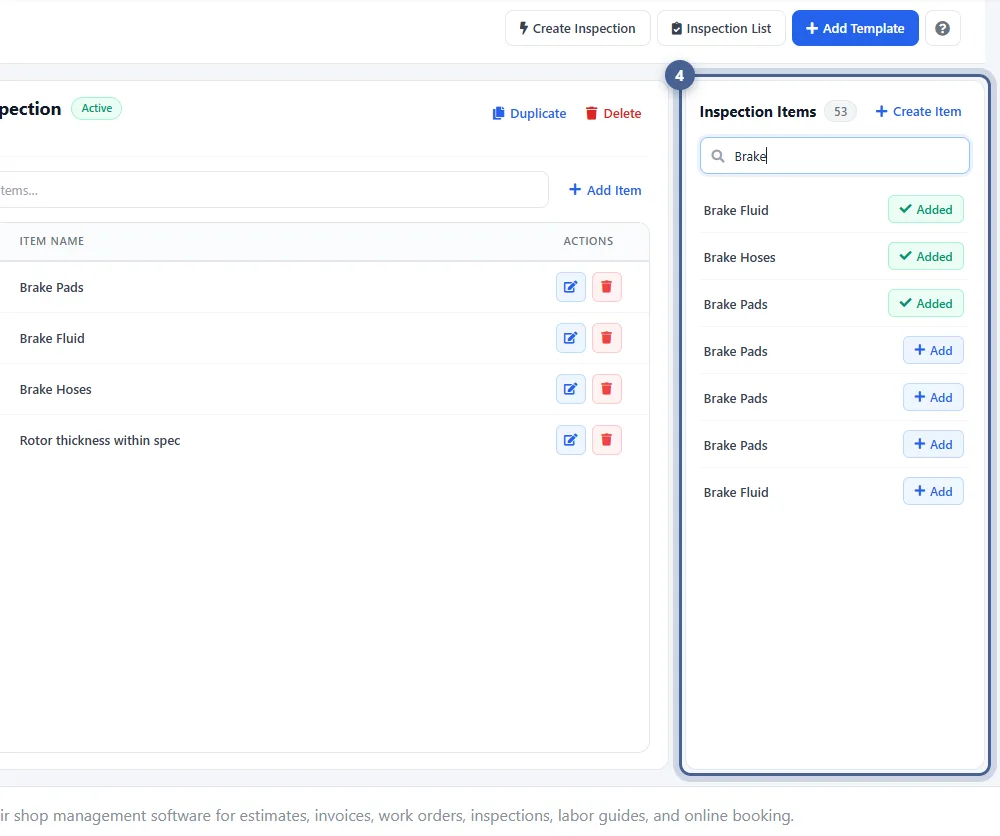
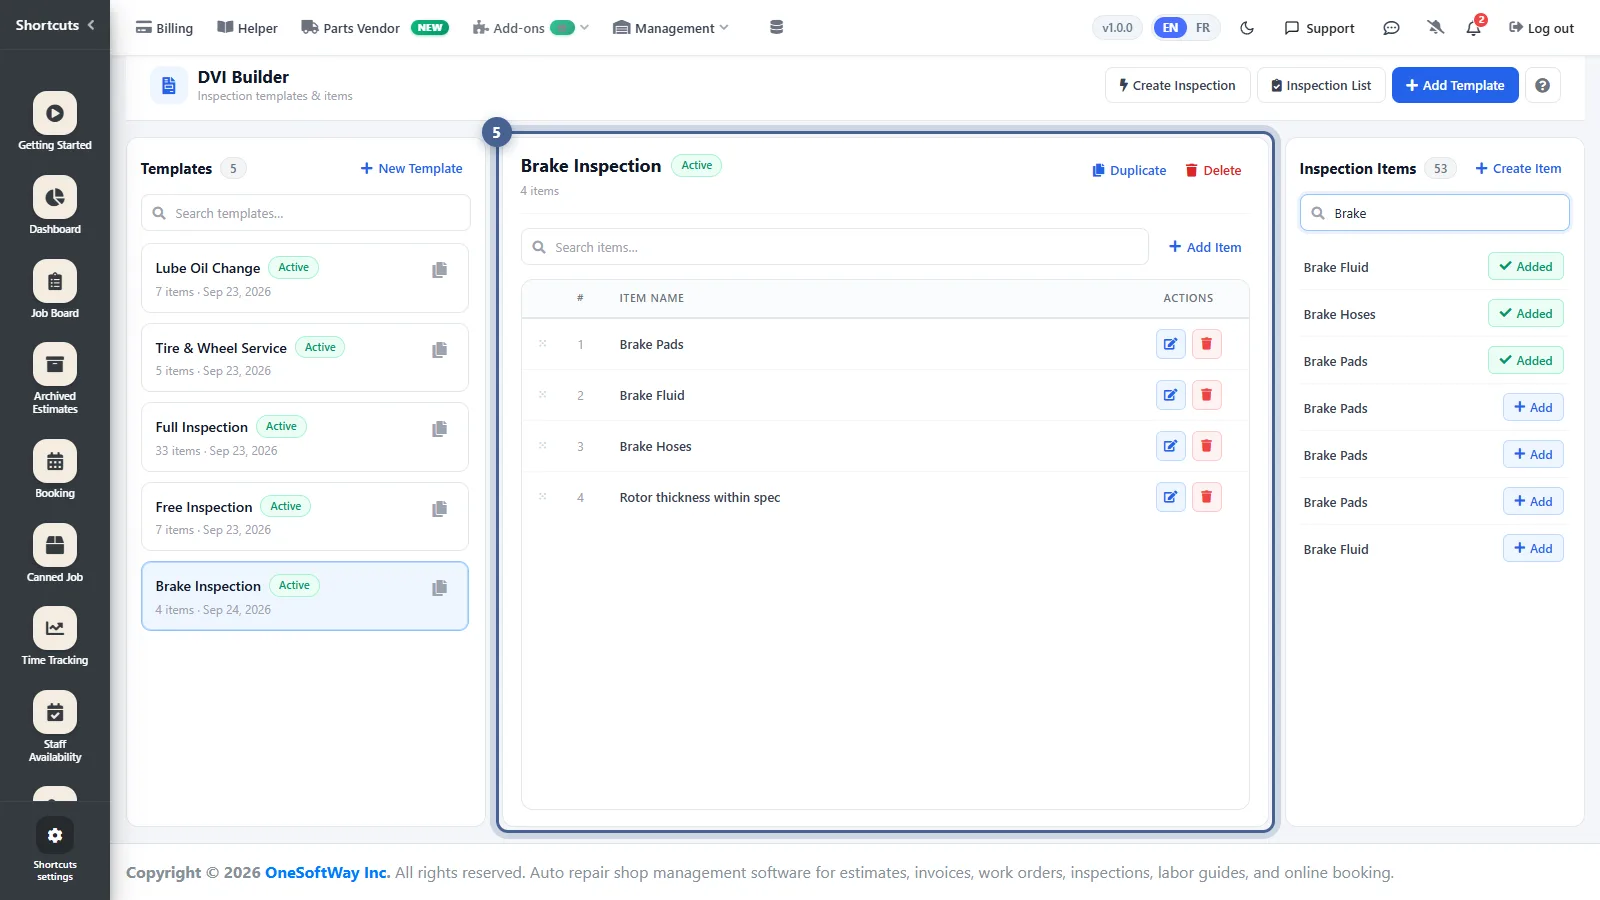
With your new template selected, search the Inspection Items on the right and click + Add next to each check you want. Items already in the template show Added.
- 5
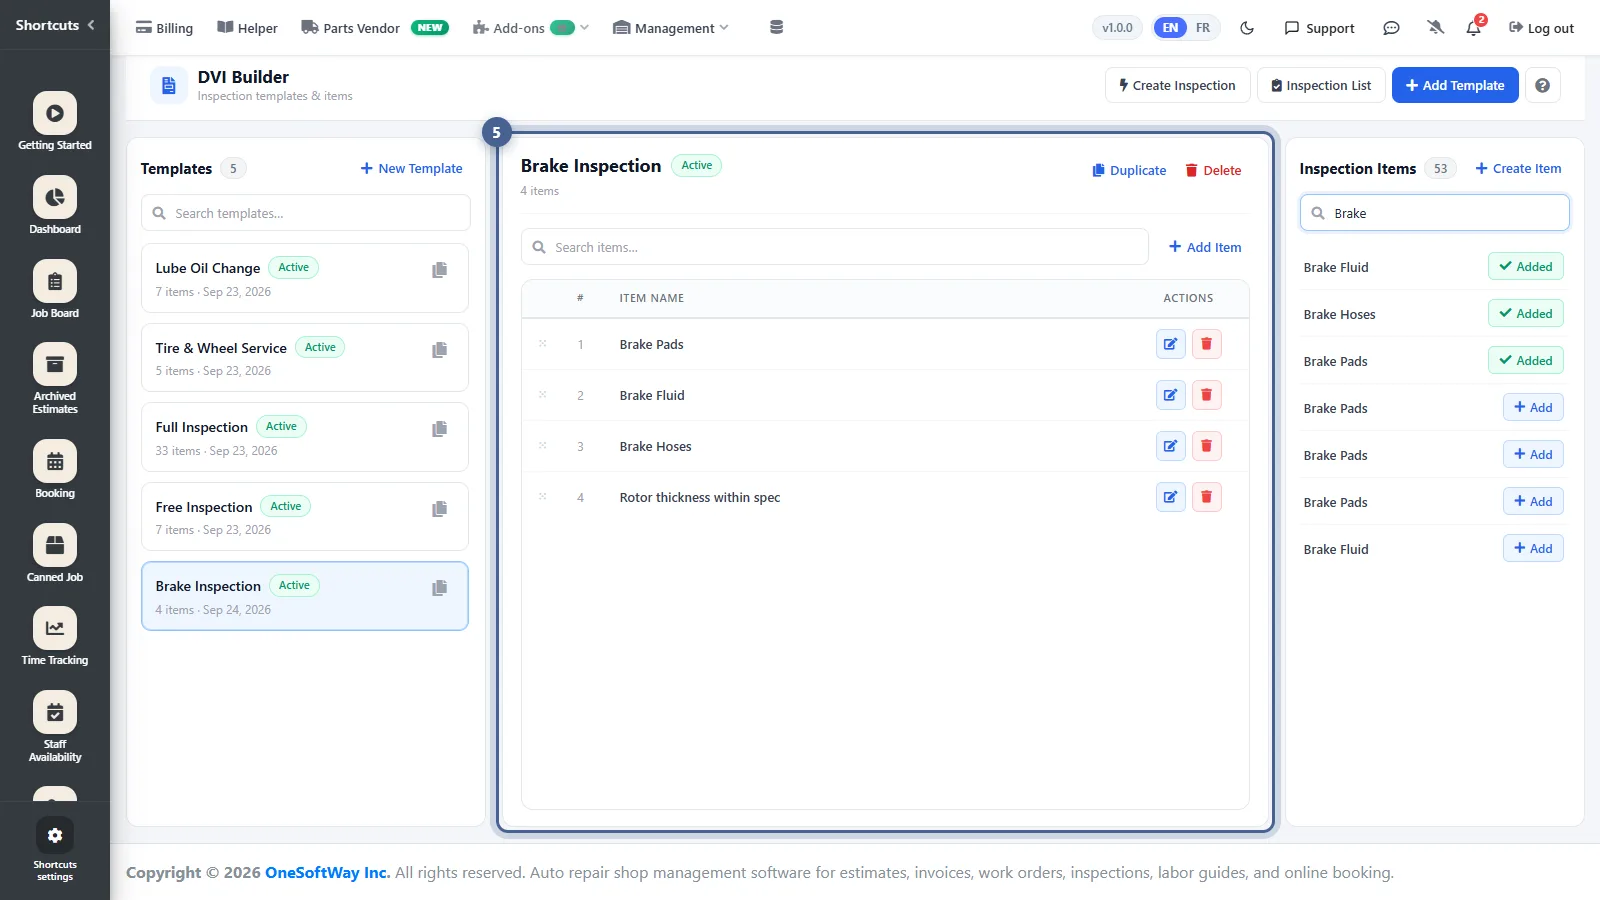
Review and arrange the template
The middle panel lists every check in the template. Drag the handle to reorder them (technicians see them in this order), use the pencil to rename one, or the bin to remove it. Duplicate copies a whole template as a starting point for another.
- 6
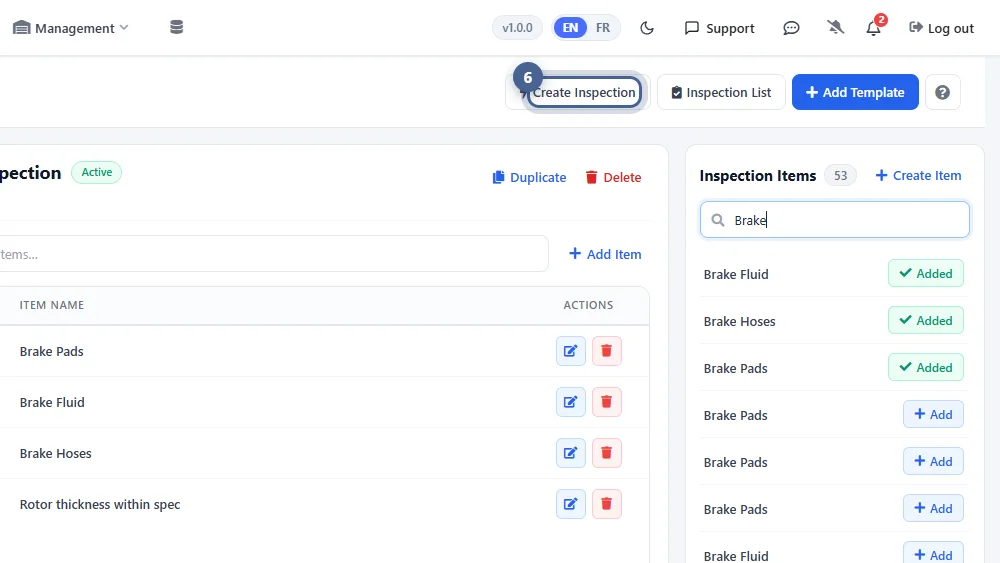
Use it on a vehicle
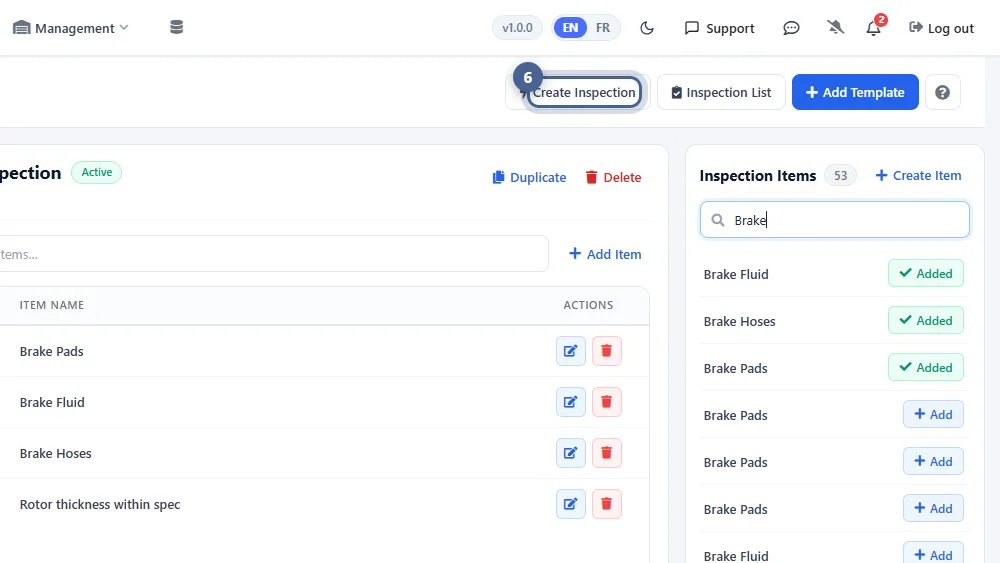
Your template is ready. Click Create Inspection to start a digital vehicle inspection with it — see Creating a Digital Vehicle Inspection for the next steps.
Screenshots taken from AutoSoftWay in September 2026 using a demo shop with sample data.