


Easily inspect a vehicle on a tablet or computer — rate each check, add notes and photos — and send the customer a clear, colour-coded report they can approve.
- 1
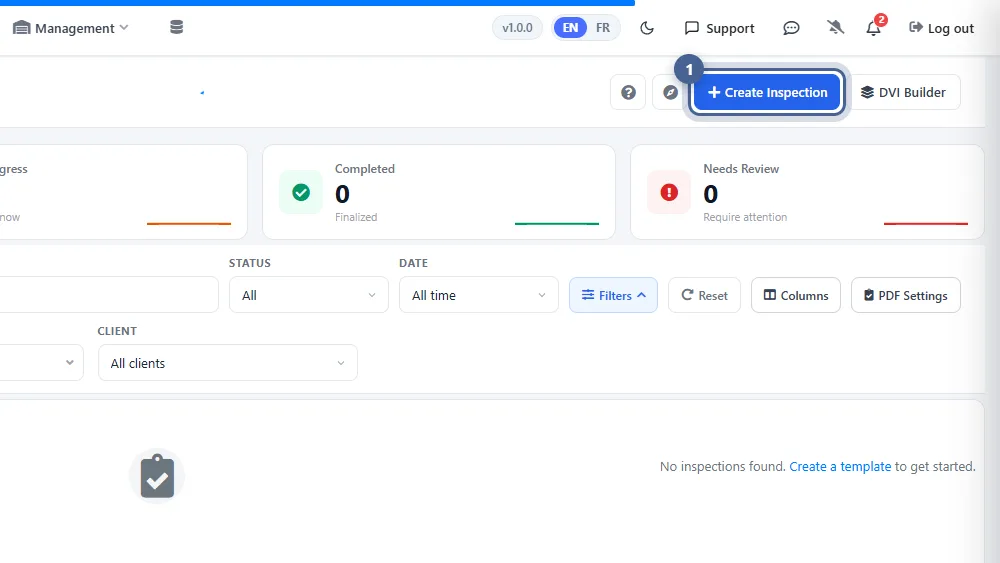
Start a new inspection
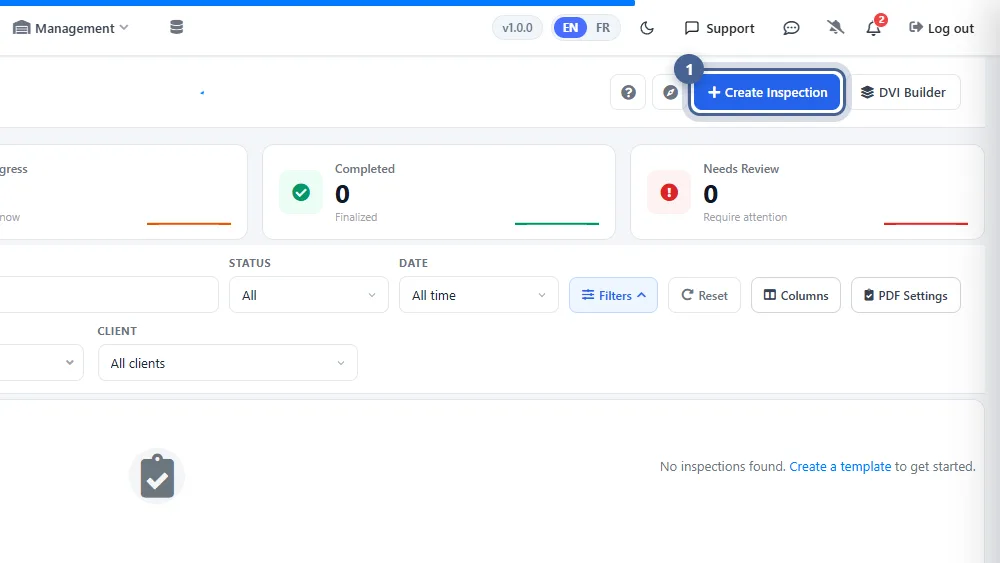
Open Inspections from the menu and click + Create Inspection. (You can also start one from the DVI Builder or from a job on the Job Board.)
- 2
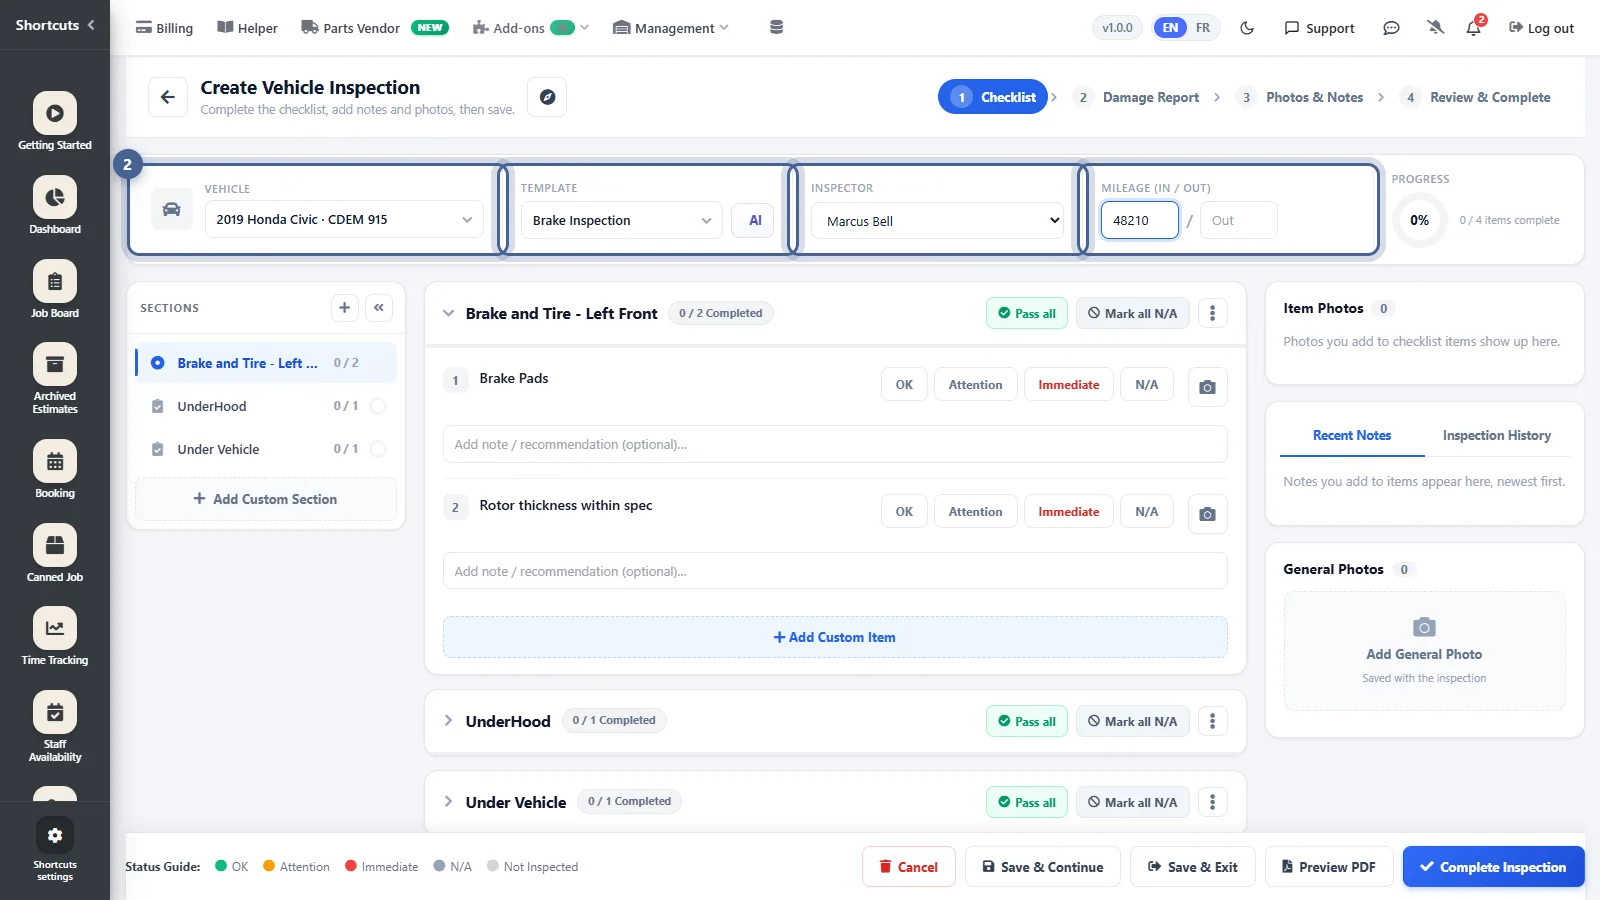
Choose the vehicle and template
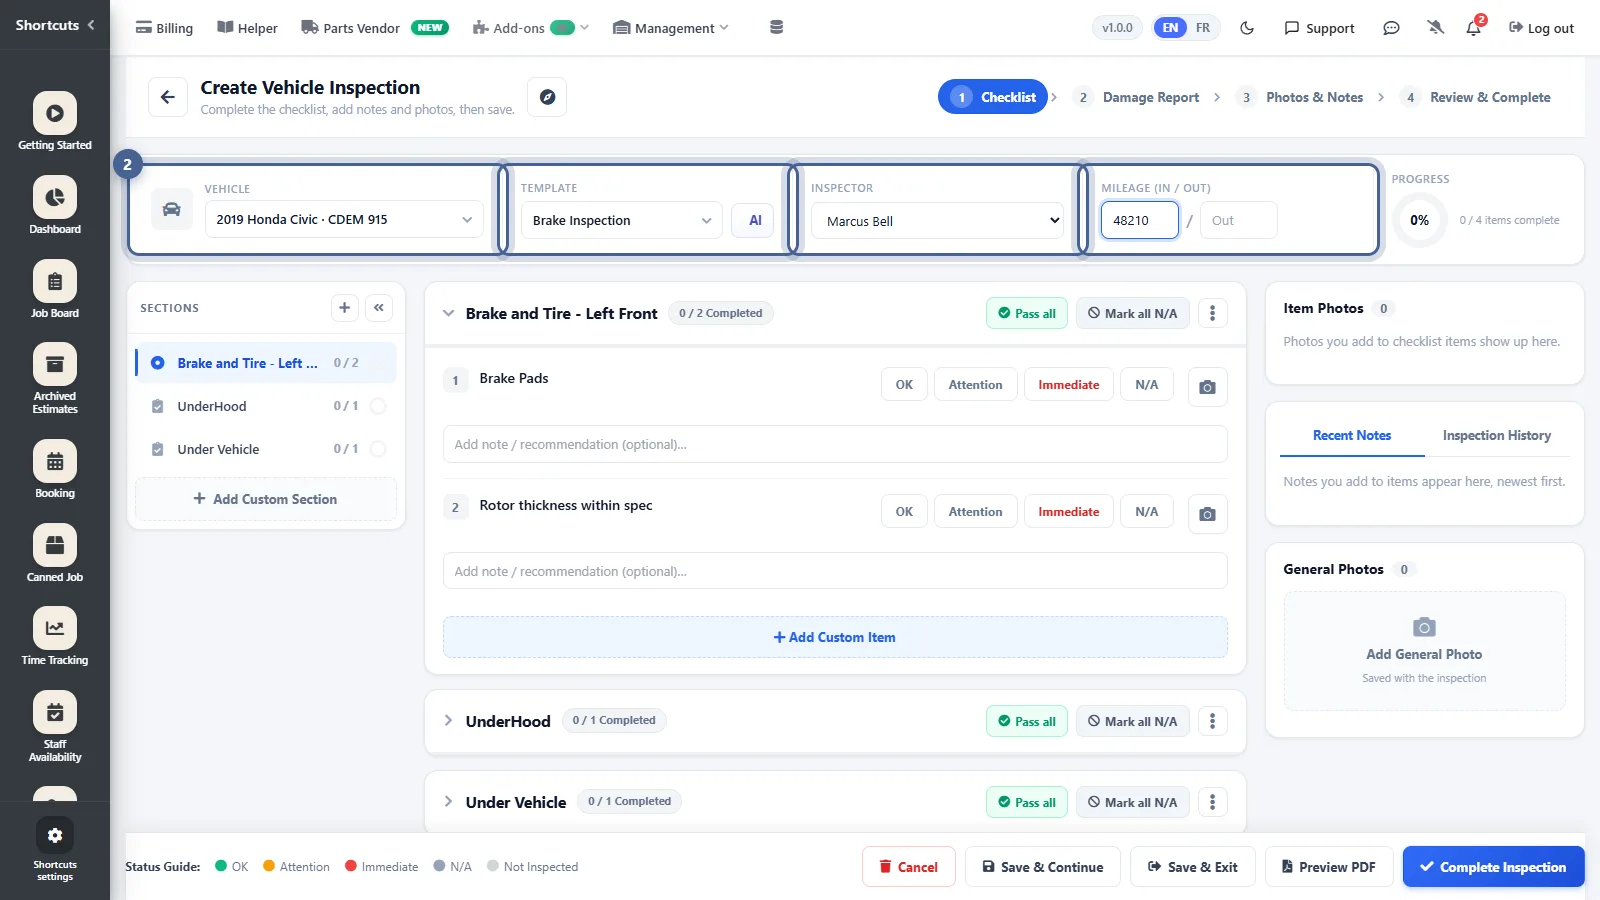
Pick the Vehicle — search by client name or plate — and the inspection Template to use (here, the “Brake Inspection” template). Then set the Inspector and the Mileage In. The checklist loads straight away.
- 3
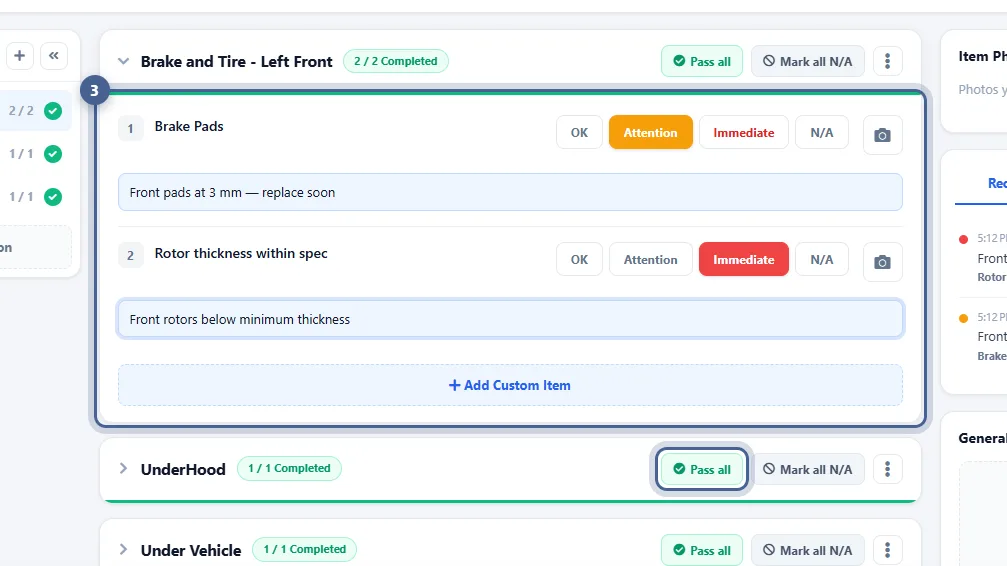
Rate every check
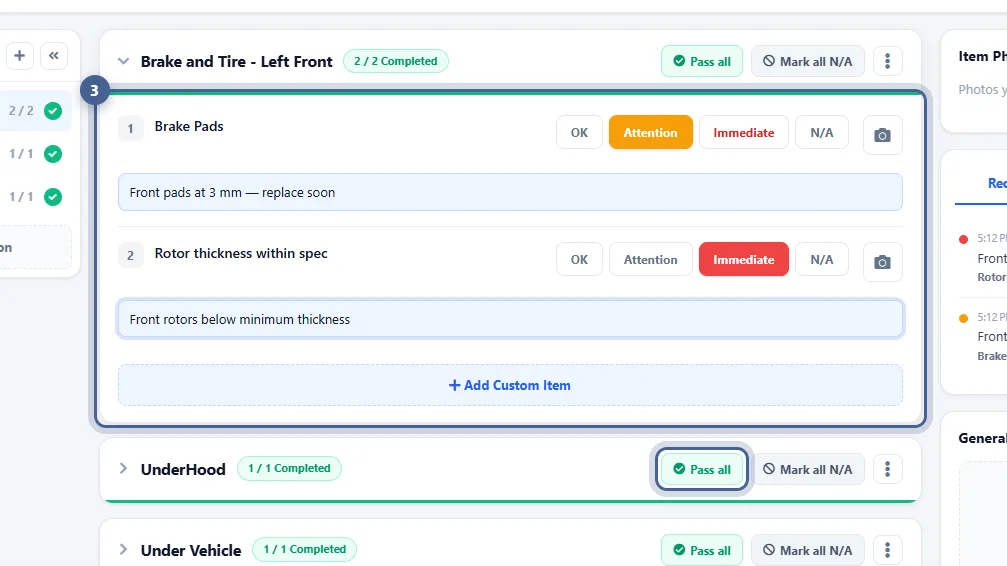
Work down the list and tap a rating for each item: OK (green), Attention (yellow — needs work soon) or Immediate (red — needs work now), or N/A. Add a short note to explain a finding; the customer sees it on the report. Pass all rates a whole section OK in one tap.
- 4
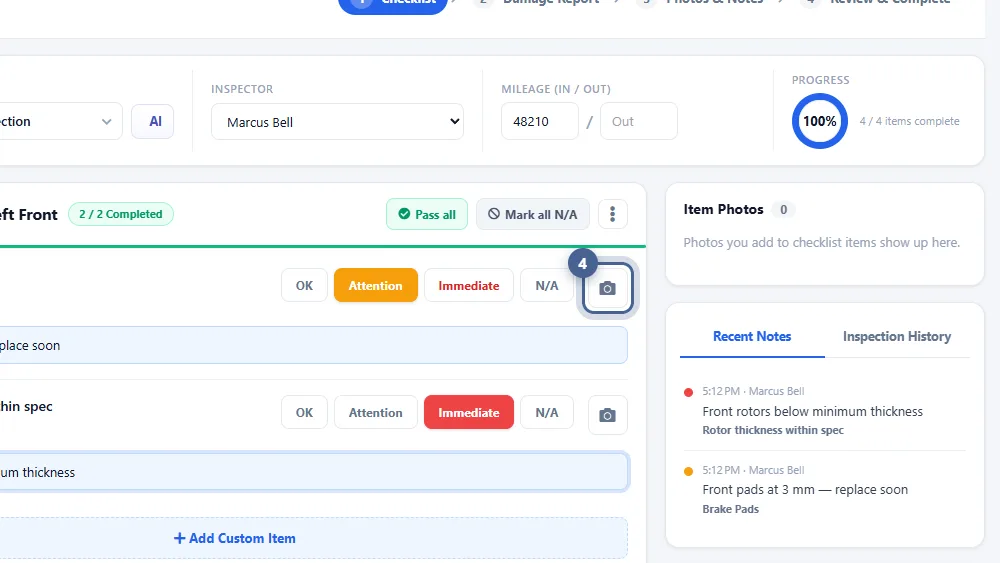
Add photos
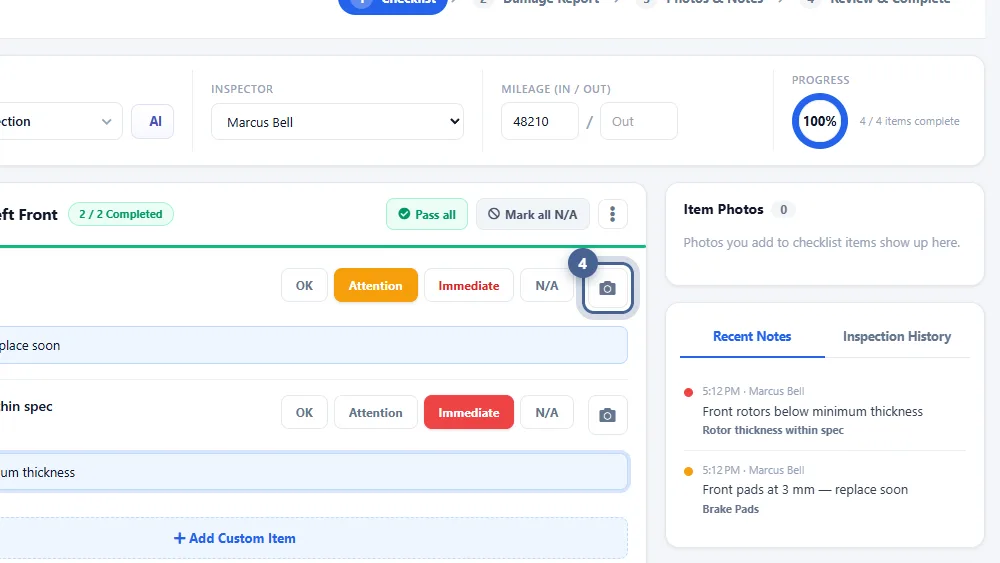
Tap the camera on any item to attach photos — on a phone or tablet it opens the camera. Photos of worn parts are the best way to show the customer why work is needed.
- 5
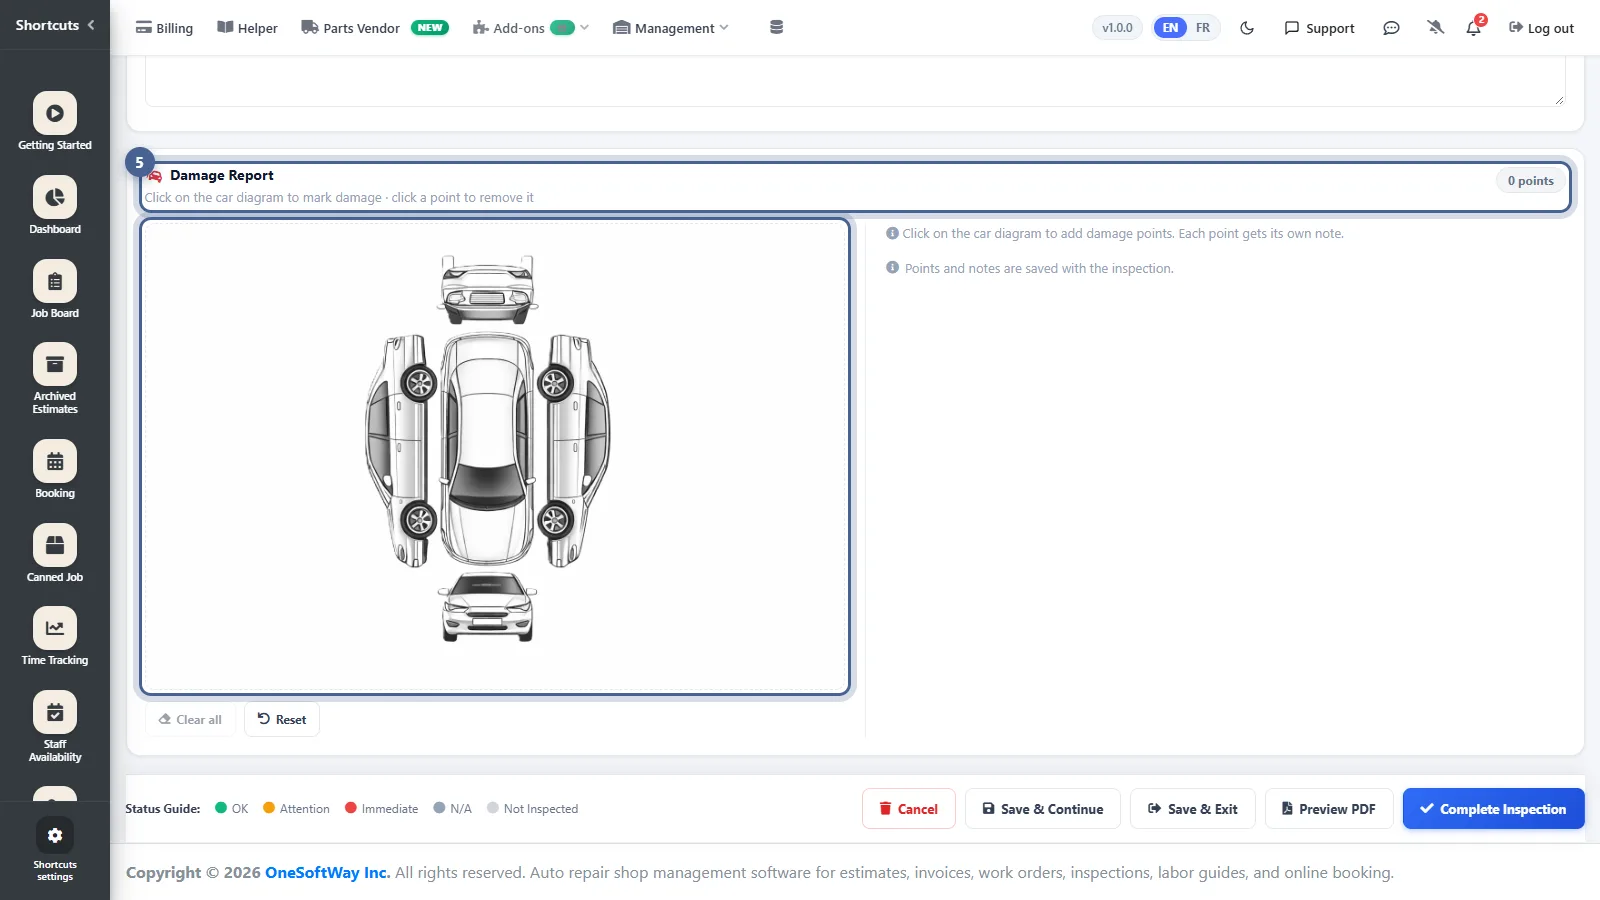
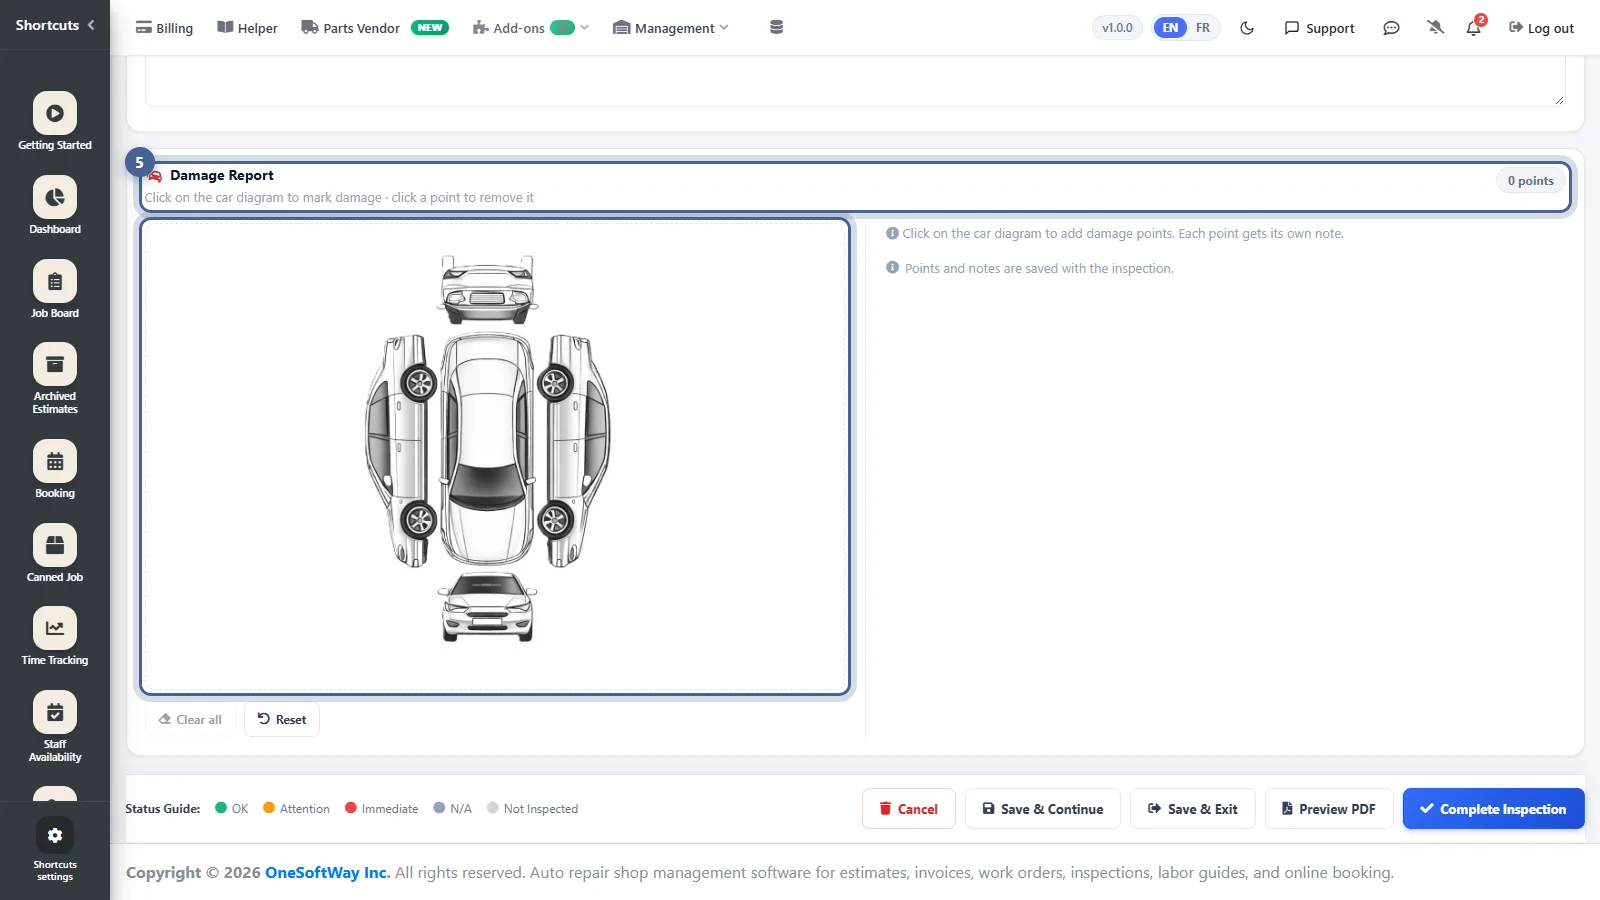
Mark any body damage (optional)
In Damage Report, click on the vehicle diagram to drop a numbered marker where there is existing damage and describe it. It protects you and the customer when the car comes in with dents or scratches.
- 6
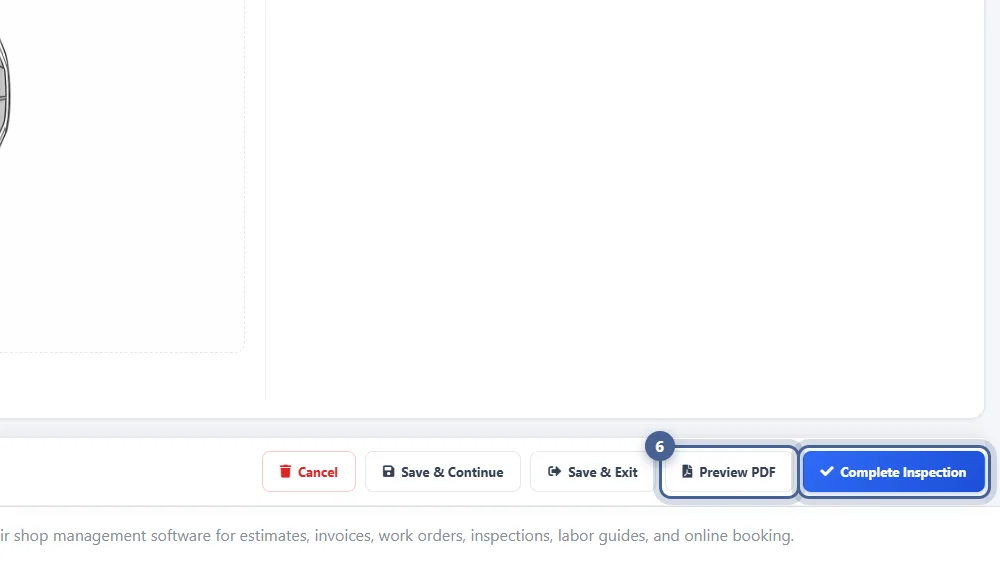
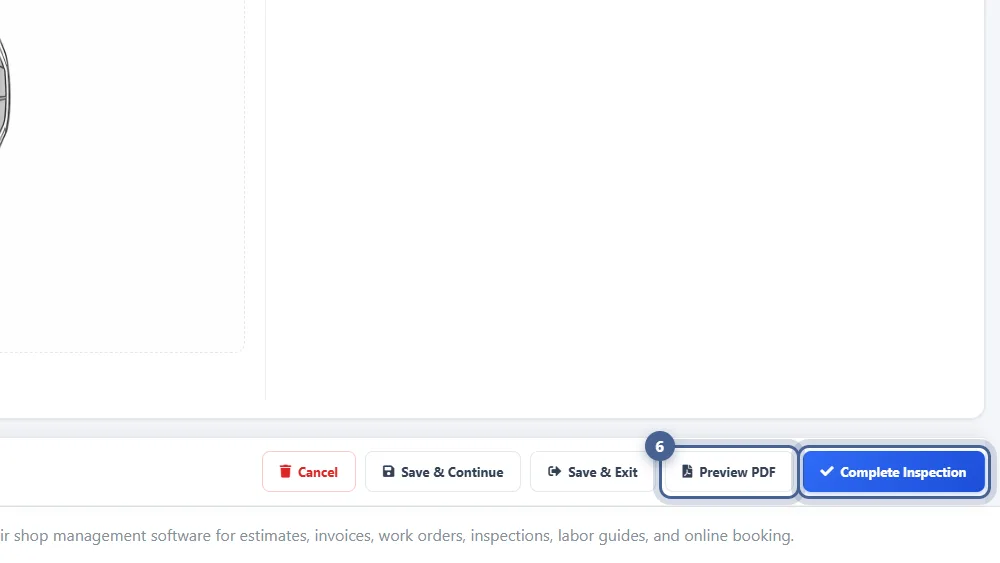
Preview and complete
Click Preview PDF to see the report exactly as the customer will. When you’re happy, click Complete Inspection. Not finished yet? Save & Continue keeps it open for later.
- 7
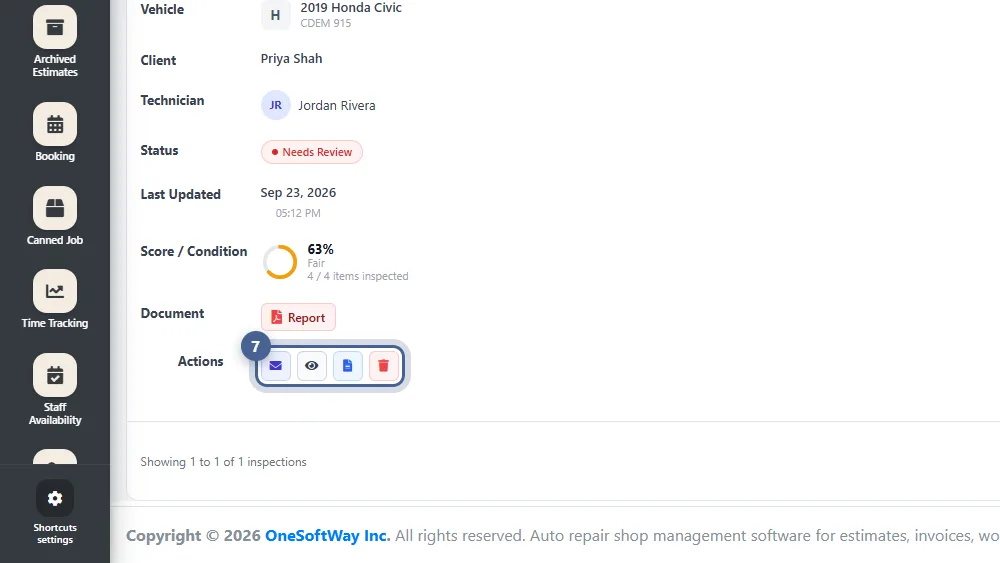
Send the report to your customer
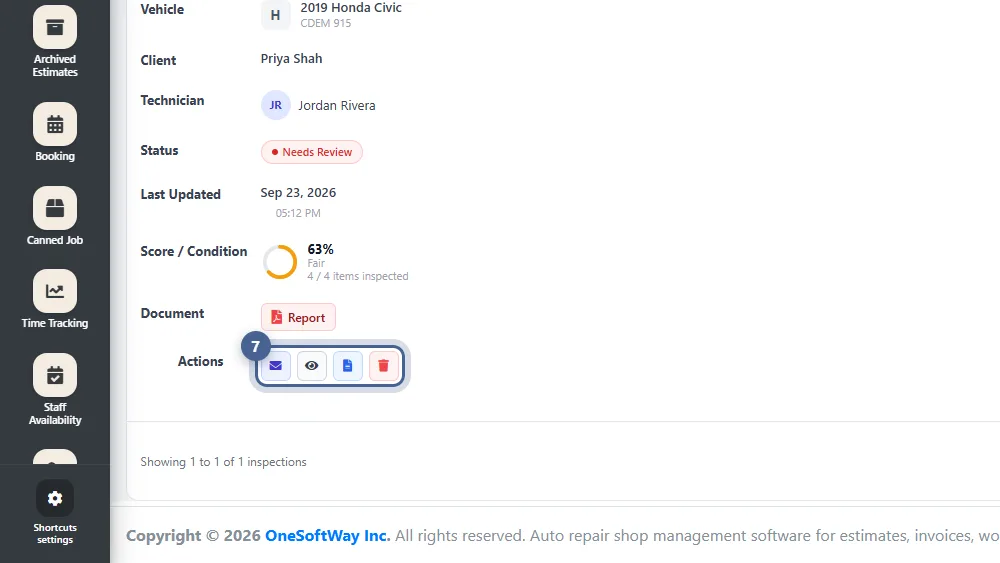
The completed inspection is listed under Inspections. Click Email to send the report to the customer — they can open it on their phone, see every photo and note, and approve the recommended work. View report opens the PDF to print or download.
Screenshots taken from AutoSoftWay in September 2026 using a demo shop with sample data.