Step 1
Starting from the ‘Welcome to AutoSoftWay’, navigate to the sidebar menu on top, click on the ‘DVI’ tab.

Step 2
From the DVI inspection menu, click ‘Create Inspection for Vehicle’ at the top of the page.

Step 3
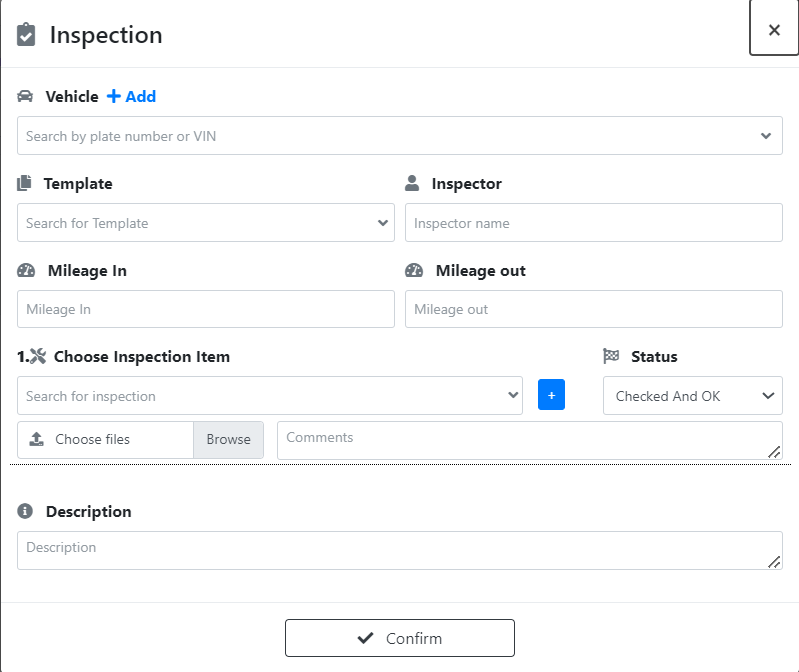
A pop up window should display empty fields for a new template. Proceed to fill the empty fields with the appropriate information

Step 4
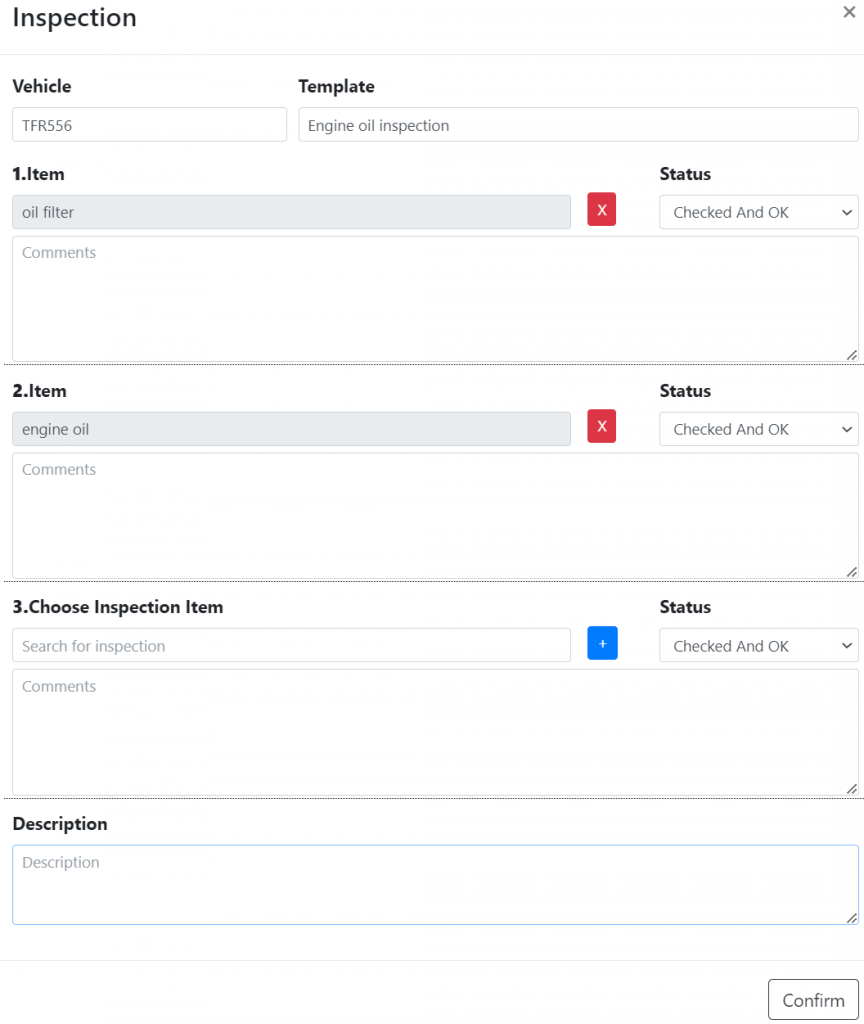
After selecting the appropriate inspection template, the fields will automatically populate the inspected items.

Step 5
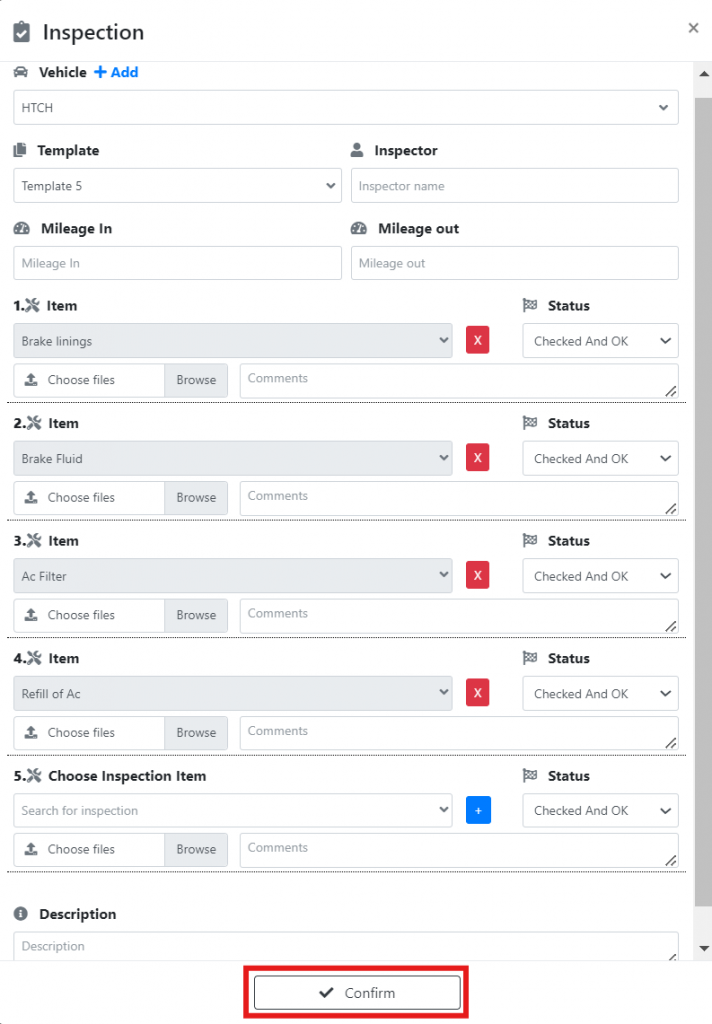
Add a description to the inspection report that includes all relevant details about the customer, vehicle, and inspection process. You can also upload images for each inspected item. Once everything is complete, click ‘Confirm’ to save the report.

Step 6
Your newly created inspection report should now be visible on the inspections page.

You may edit this report at any time by clicking on the edit button, as indicated below:

You may also view the customer’s copy of the report, by clicking on the pdf file, as indicated below:

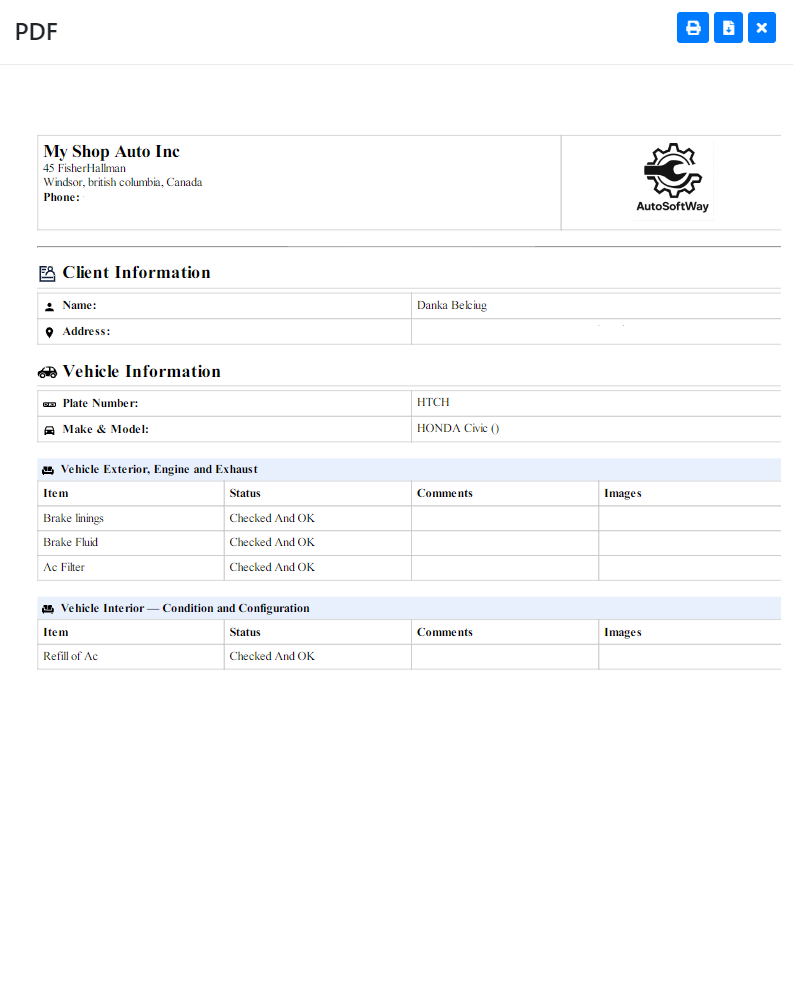
A pop up should display on your screen with the customer’s copy of the report.

