


Creating a professional, accurately priced estimate takes a couple of minutes — client and vehicle, labour, parts — then you send it to the customer to approve.
- 1
Start a new estimate
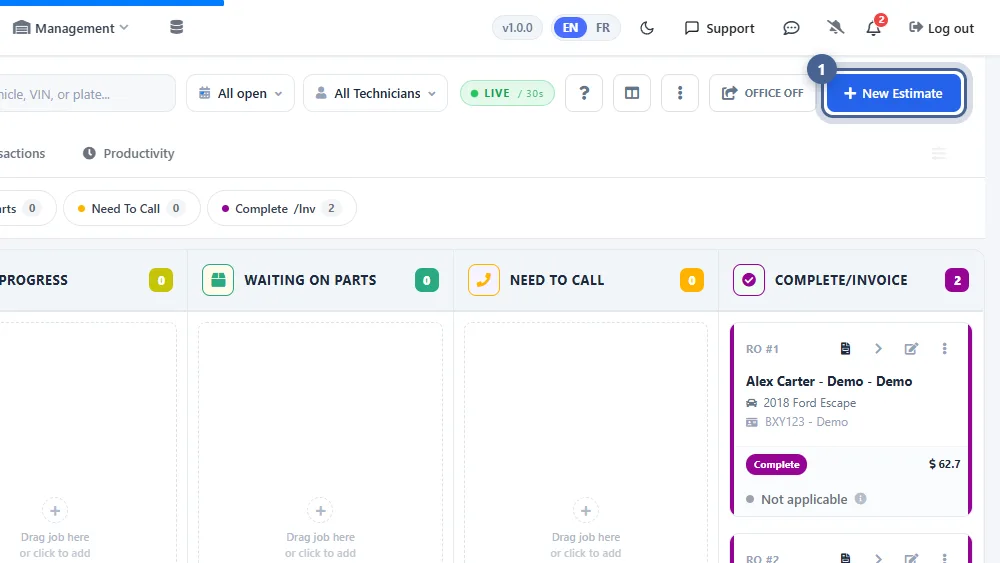
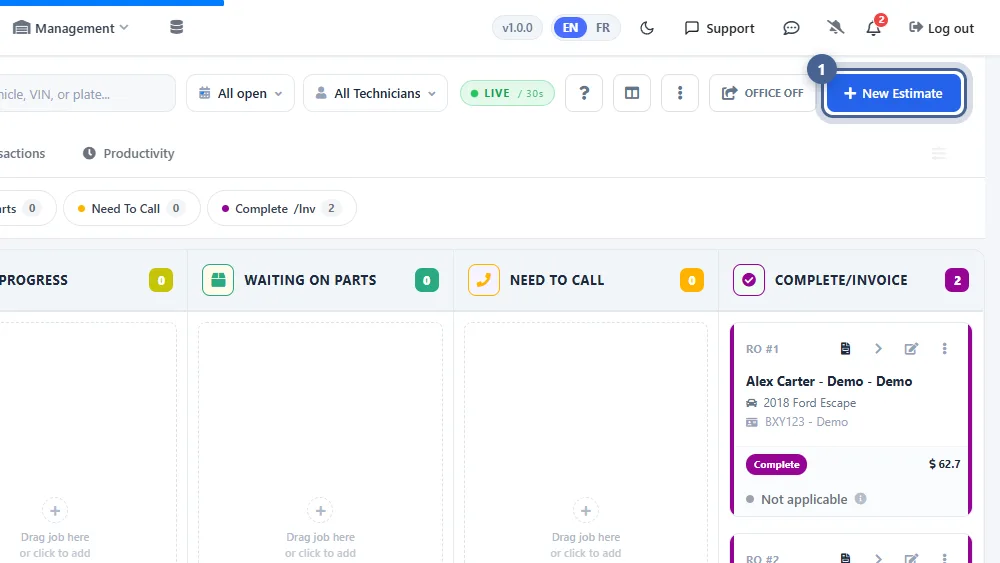
Open the Job Board and click + New Estimate (you can also use Create New Job on the Getting Started page).
- 2
Choose the client and vehicle
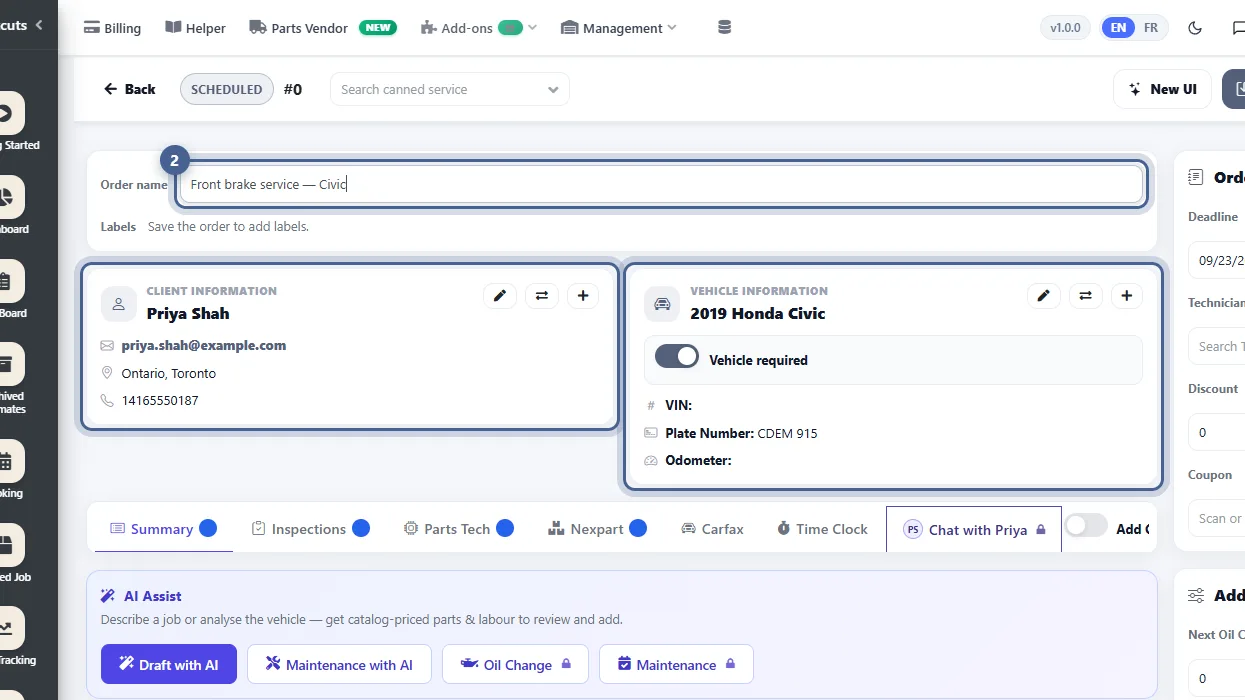
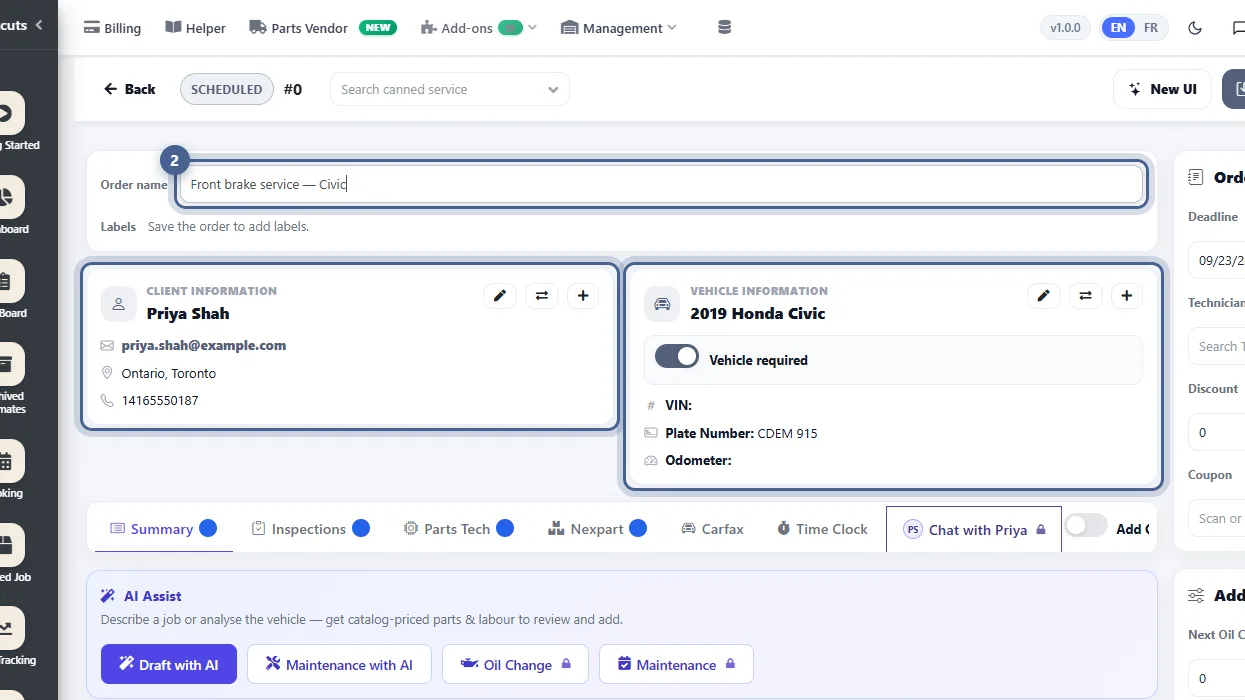
Search for the client by name and pick them, then pick their vehicle by plate (or VIN). New customer? Use the + on each card to add them on the spot. An optional Order name helps you find the job later.
- 3
Set the deadline and technician
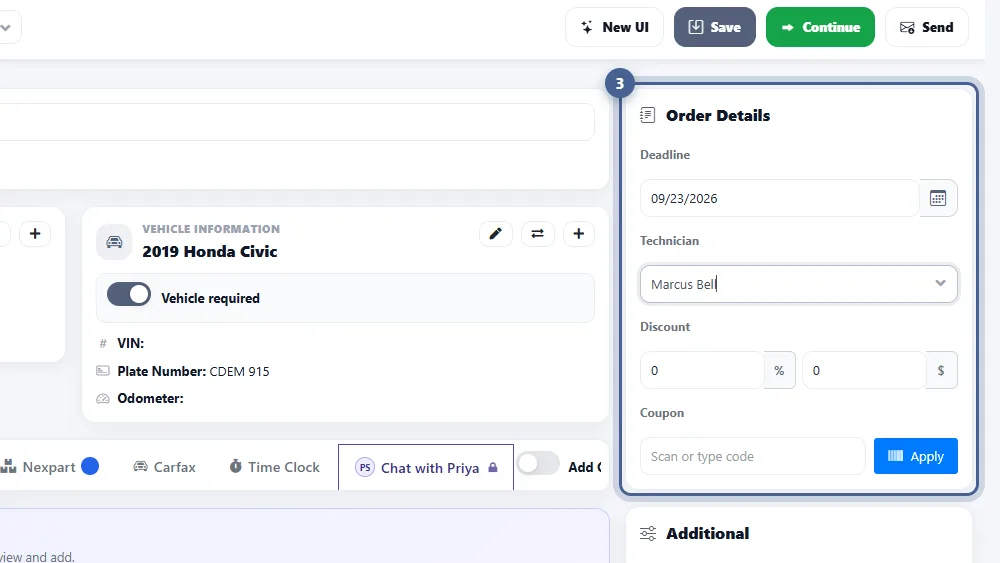
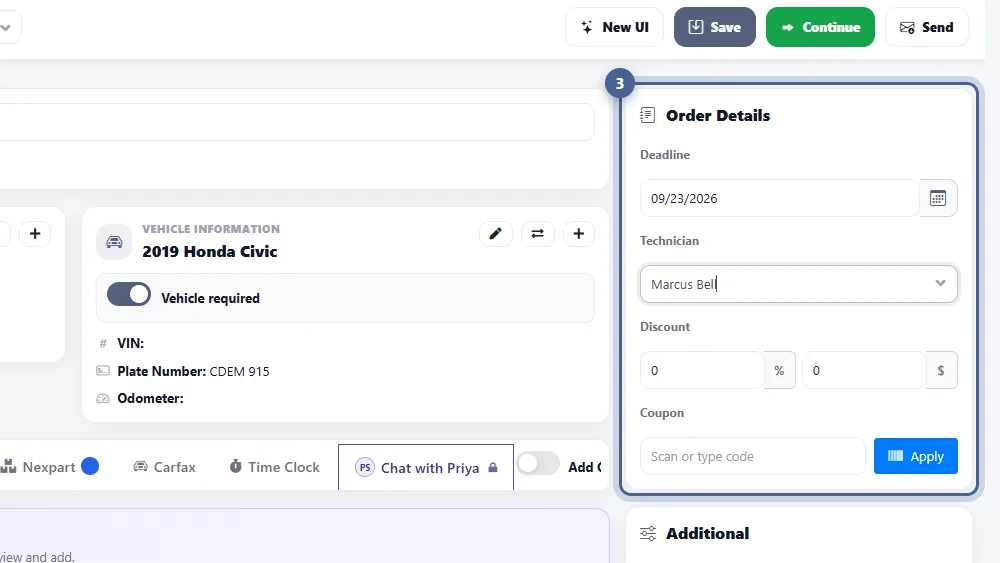
In Order Details, set the Deadline and assign a Technician. You can also add a Discount (percentage or dollar amount) or apply a Coupon code here.
- 4
Add the labour
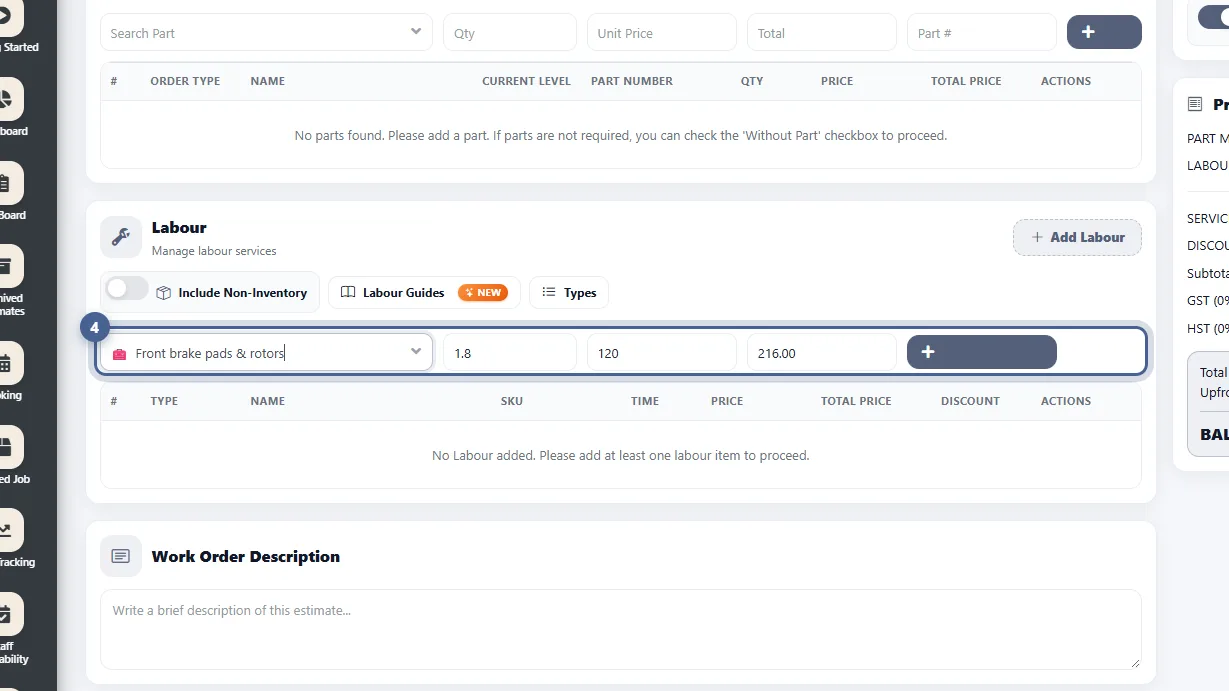
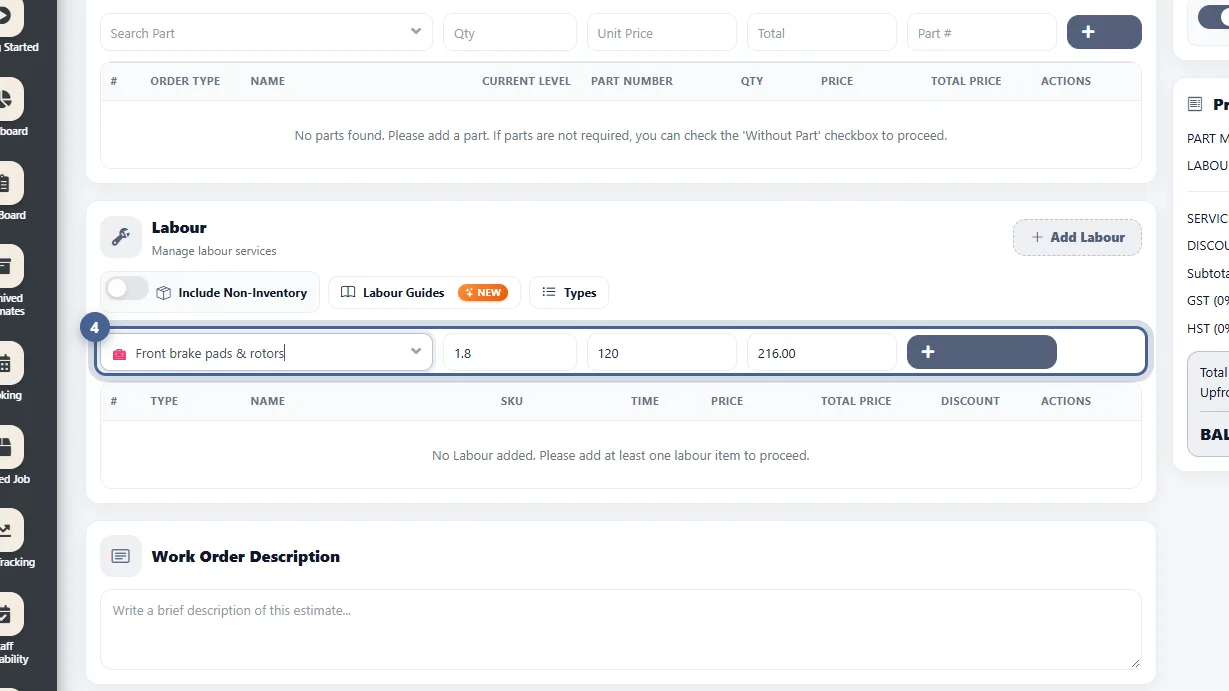
In Labour, start typing a job from your Labour Catalog and pick it — the Time and Price fill in automatically. Adjust them if needed, then click the orange + to add the line. Not in the catalogue? Type a new job name to add a one-off labour line.
- 5
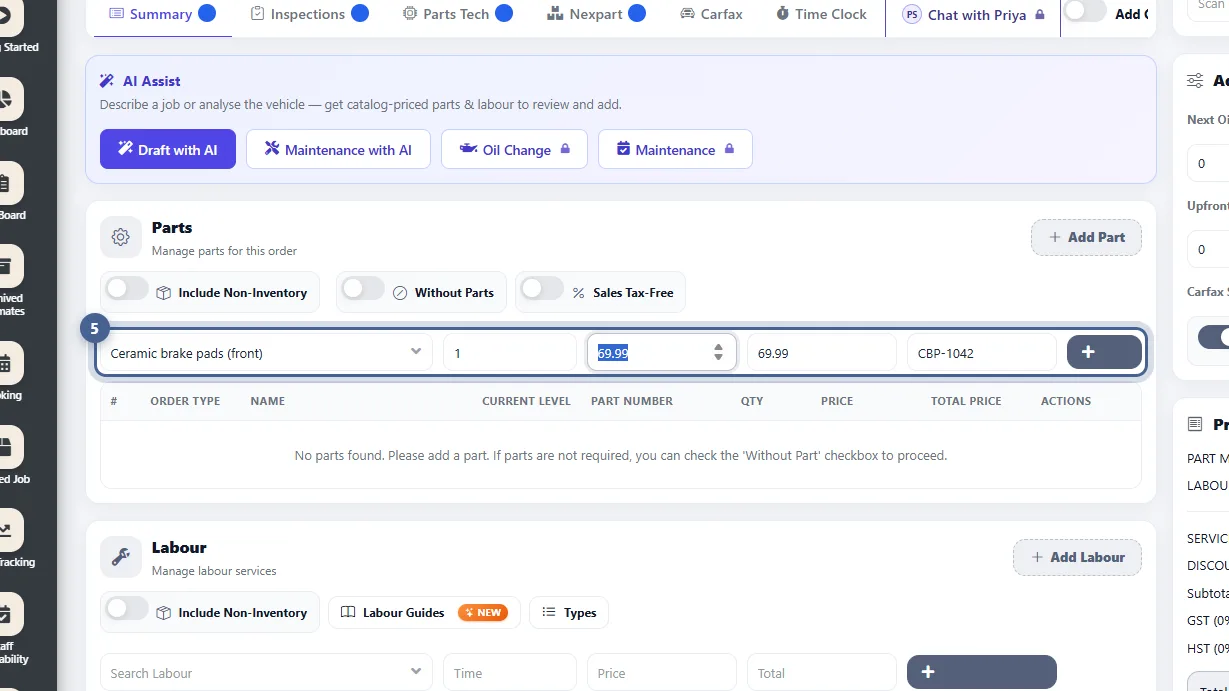
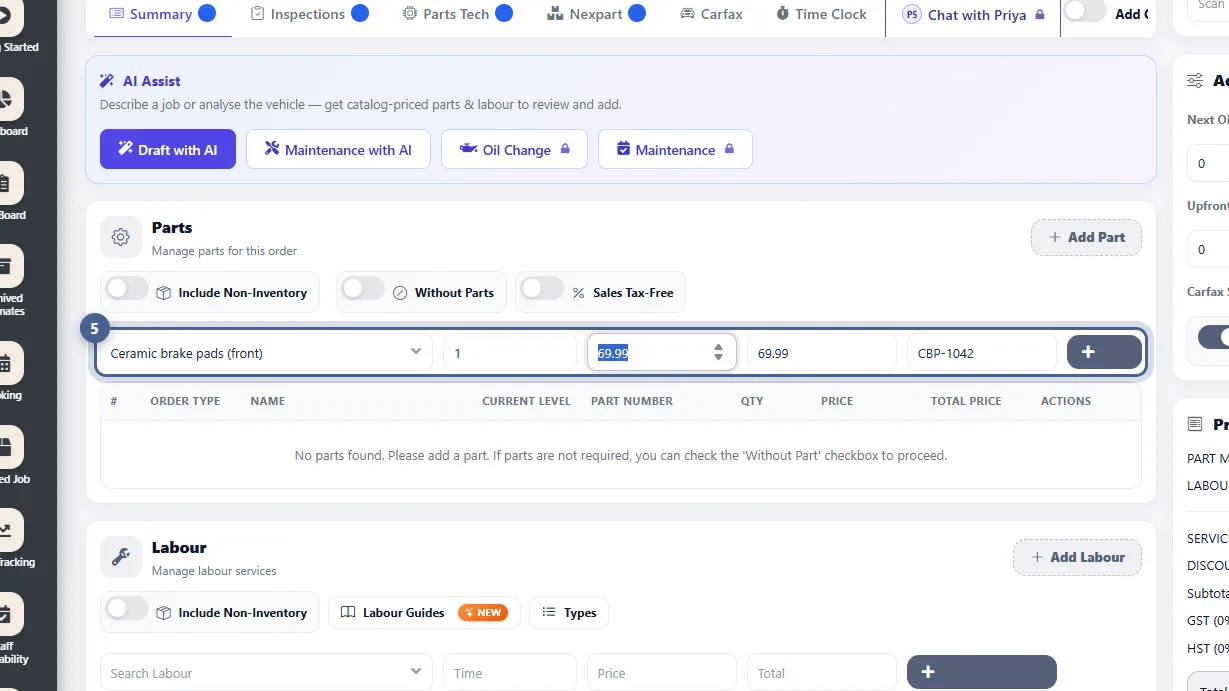
Add the parts
In Parts, search your parts catalogue, pick the part and enter the Qty — the unit price and total come from the catalogue. Click + to add it. You can also order parts directly from PartsTech or Nexpart using the tabs above, and they drop straight into the estimate.
- 6
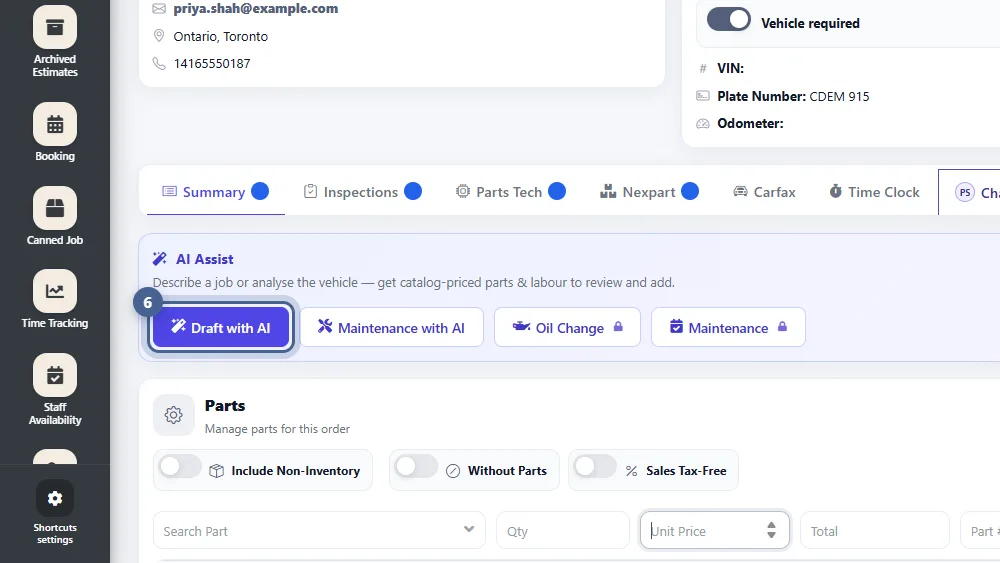
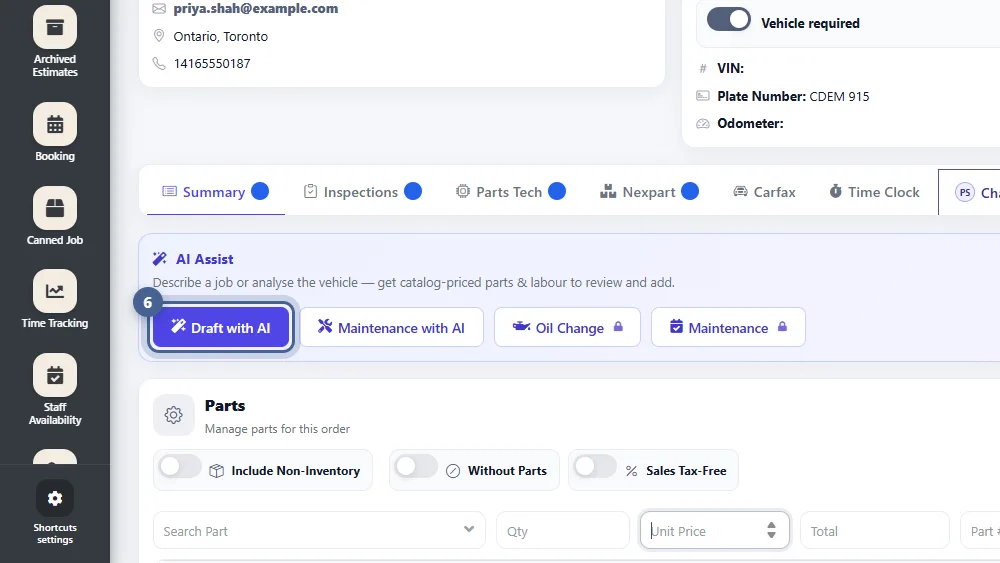
Let AI draft it (optional)
In a hurry? Draft with AI turns a short description — e.g. “front brakes grinding” — into catalogue-priced parts and labour for you to review. Maintenance with AI suggests the manufacturer’s scheduled service for the vehicle’s mileage.
- 7
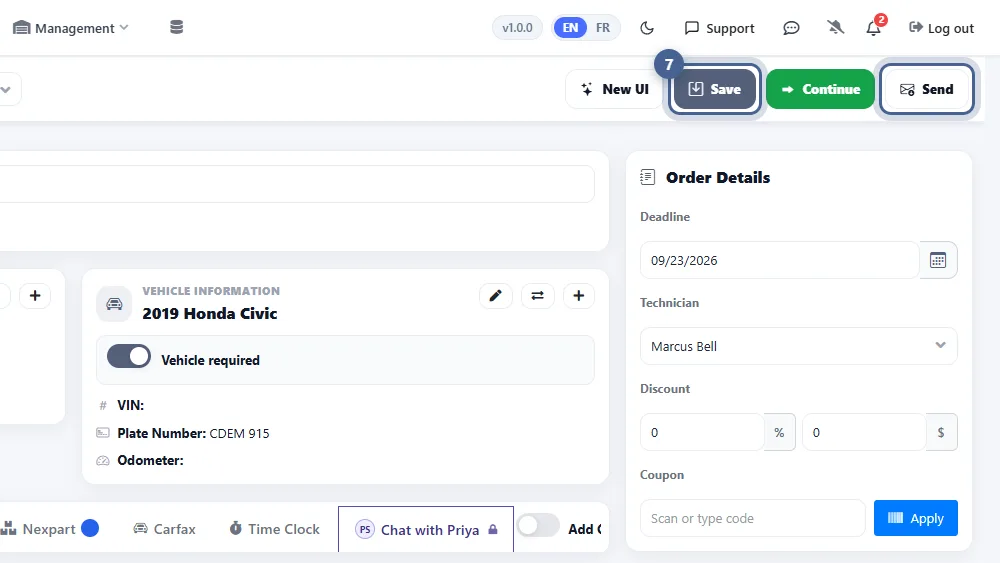
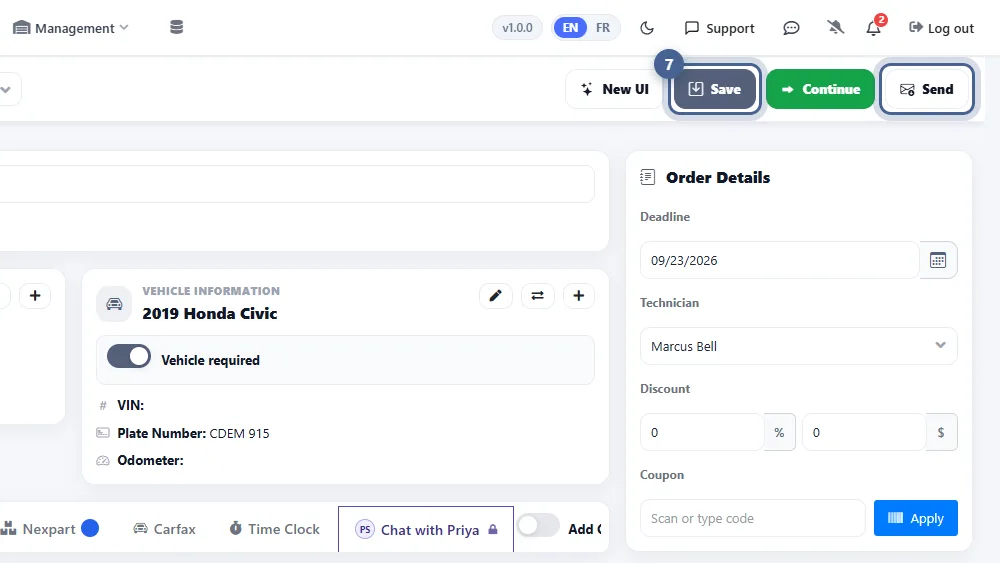
Save — or save and send
Click Save to keep the estimate, or Continue to save and carry on working on the job. Send saves it and texts/emails it to the customer so they can review and approve it from their phone. Totals, taxes and any discount are calculated for you in the summary on the right.
- 8
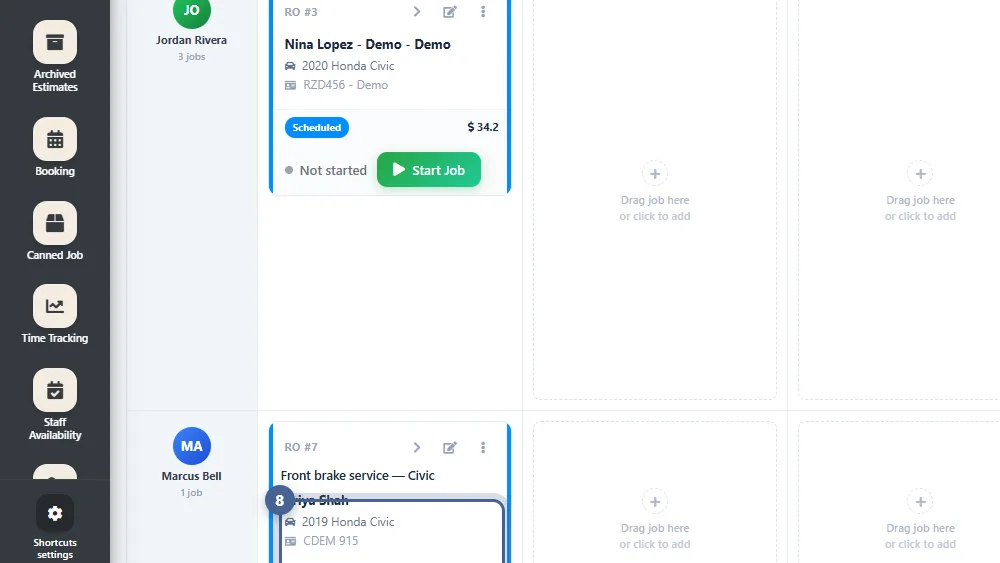
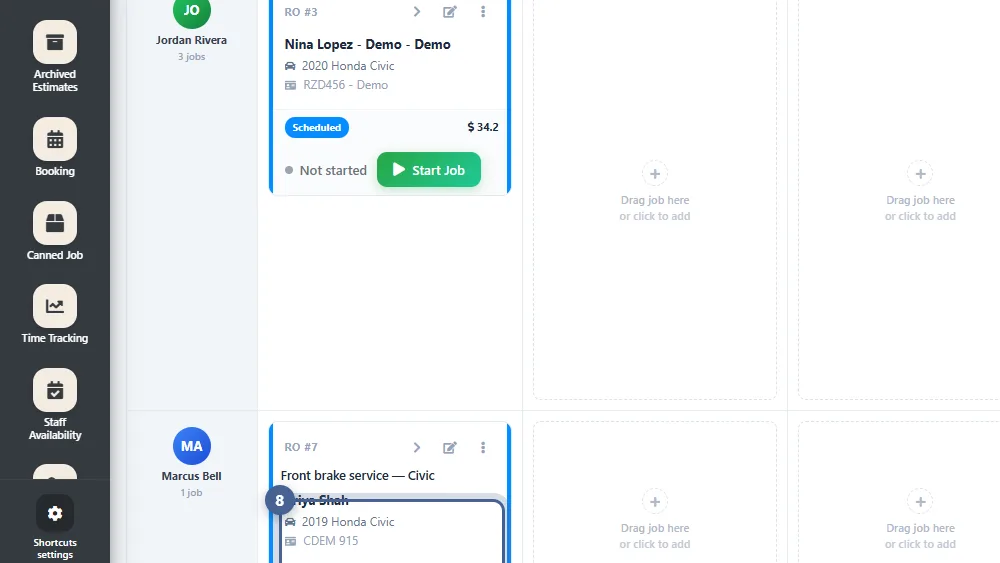
Track it on the Job Board
The estimate appears on the Job Board under Scheduled, assigned to its technician. From here you can start the job, move it between stages, or open it to convert it into an invoice.
Screenshots taken from AutoSoftWay in September 2026 using a demo shop with sample data.