


Managing your product inventory is made simple: build your parts catalogue with costs, prices and stock levels, so estimates price themselves and you always know what’s on the shelf.
- 1
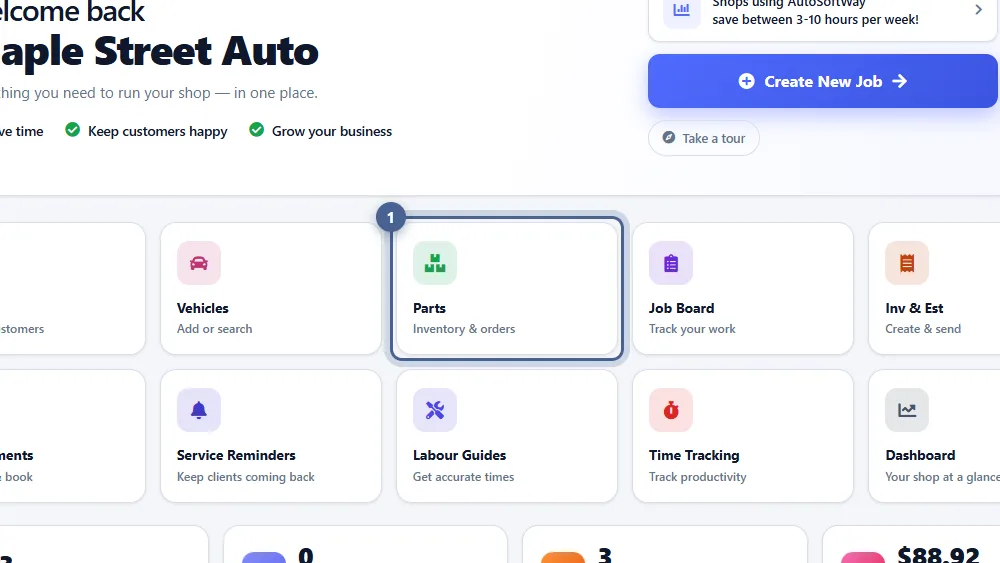
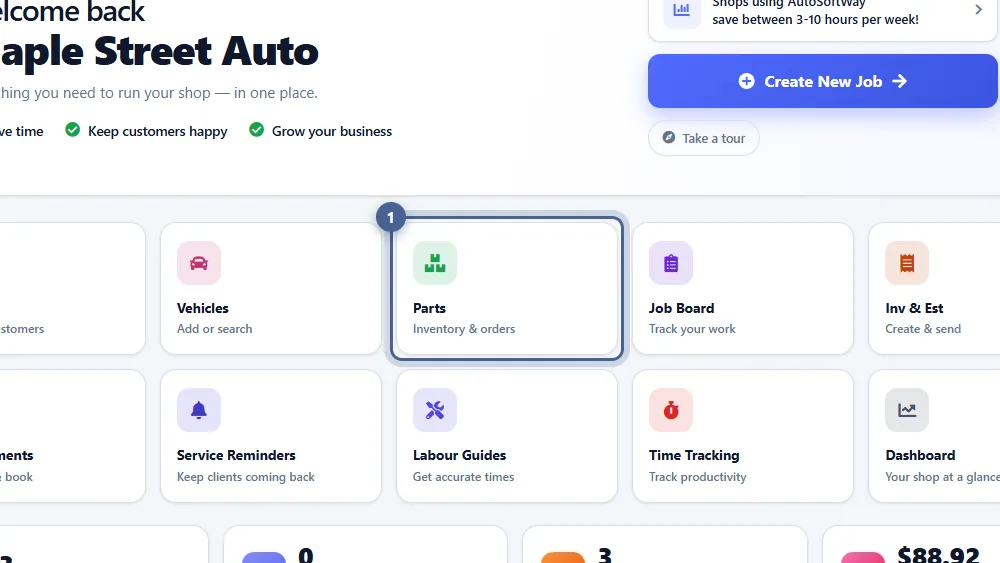
Open Parts
From the Getting Started page, click the Parts tile (or Management → Parts Catalog). This is your parts catalogue: everything you stock or sell, with prices and stock levels.
- 2
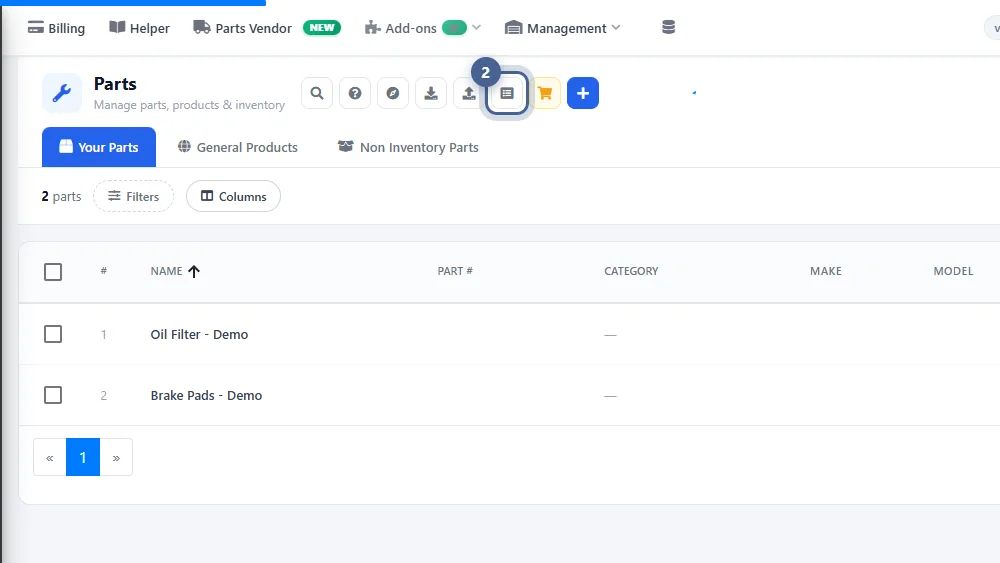
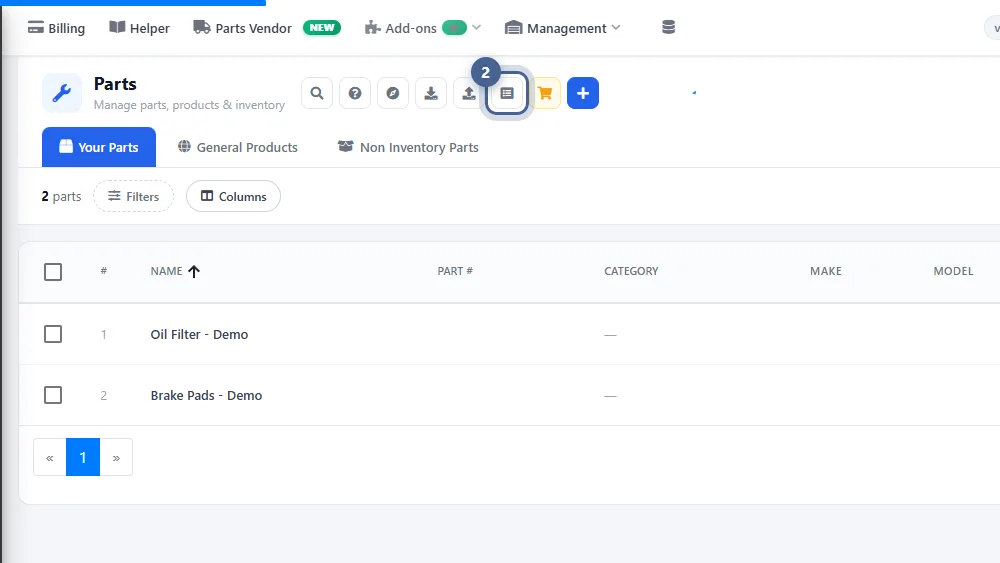
Create a part category (first time only)
Parts are grouped into categories. The first time, click the Categories icon and then Add Category.
- 3
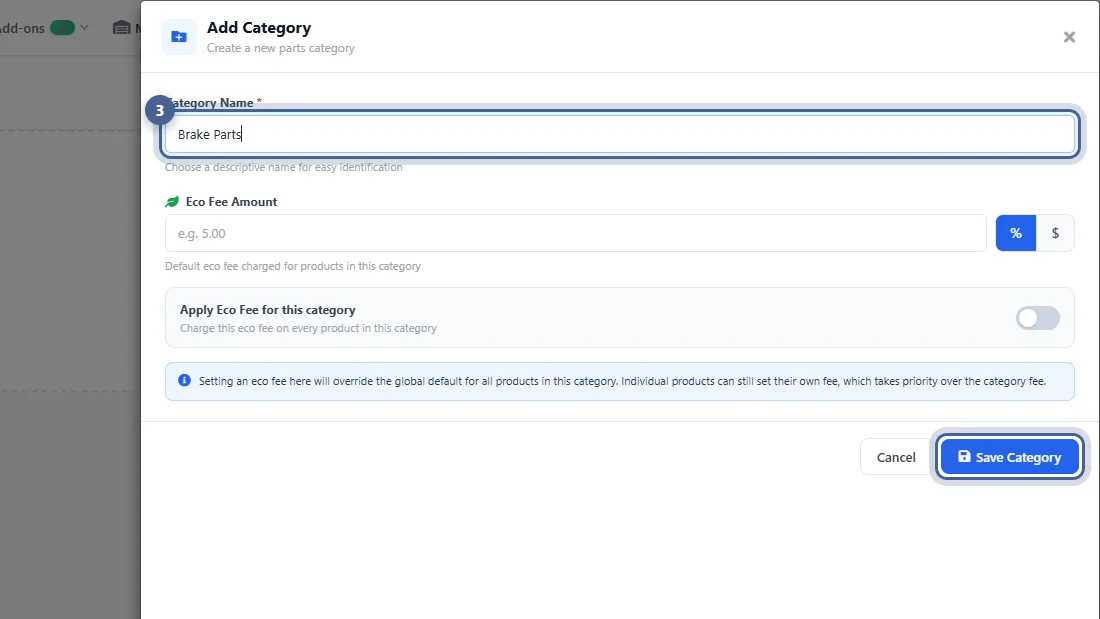
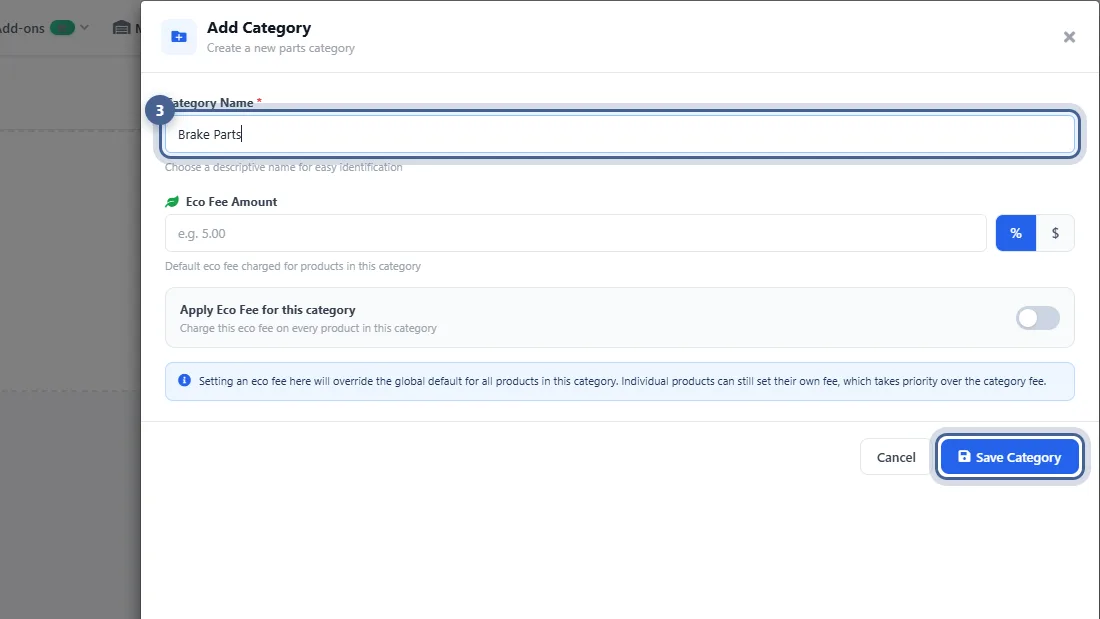
Name the category and save
Enter a Category Name — for example “Brake Parts”, “Filters” or “Fluids” — and click Save Category. An Eco Fee set here applies to every part in the category.
- 4
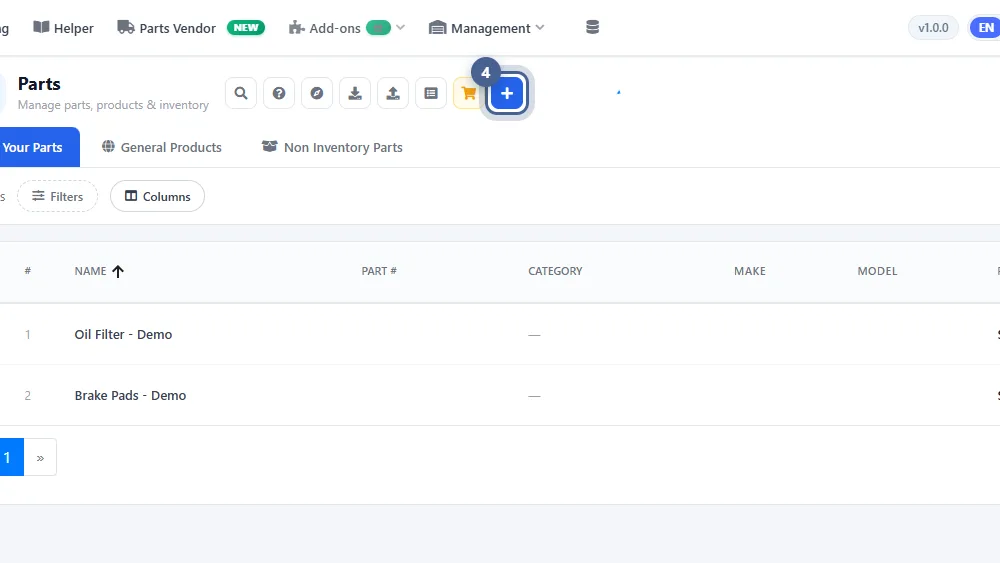
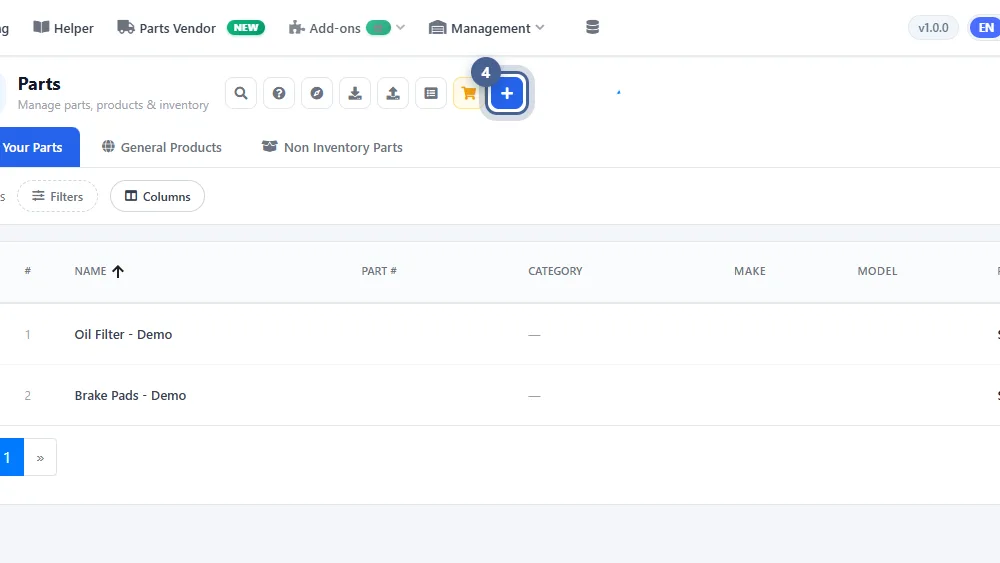
Click “Add part”
Back on the Parts list, click the blue + (Add part). You can also Import parts from a spreadsheet, or add parts straight from a supplier order.
- 5
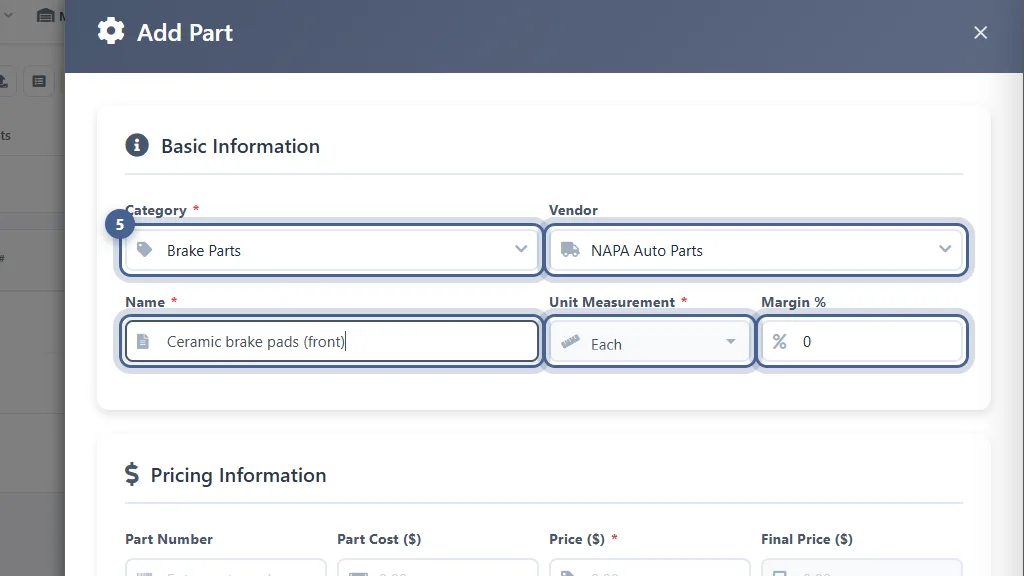
Fill in the basic information
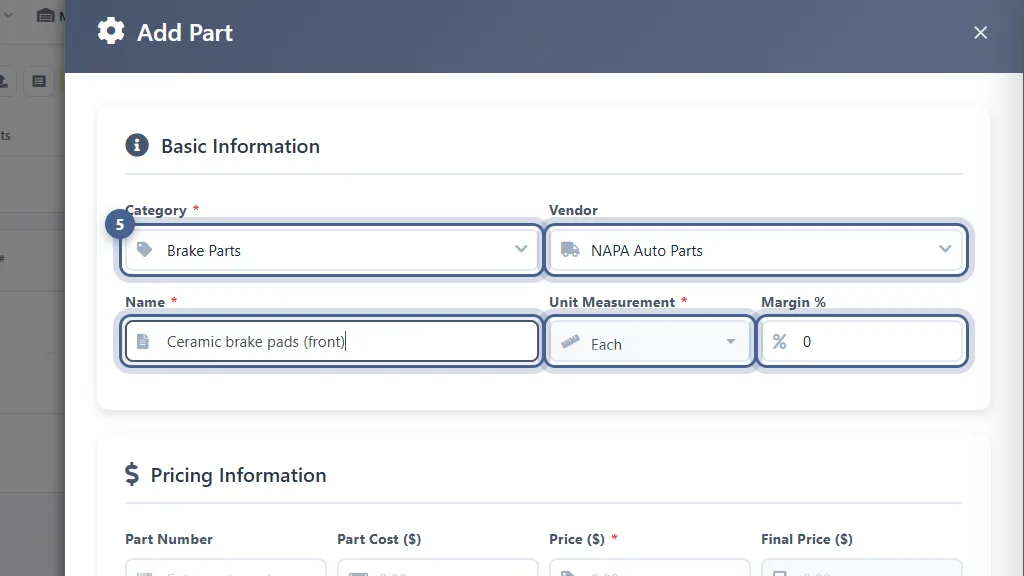
Choose the Category, the Vendor you buy it from, a clear Name, and the Unit Measurement (each, litre, set…). Margin % is optional: set it to mark the part up automatically from its cost.
- 6
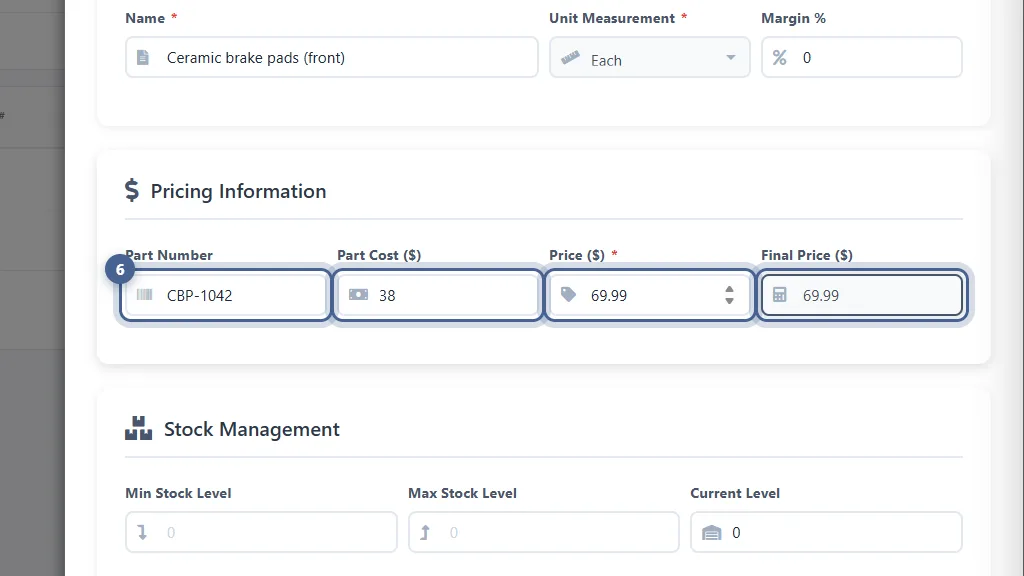
Add the part number and prices
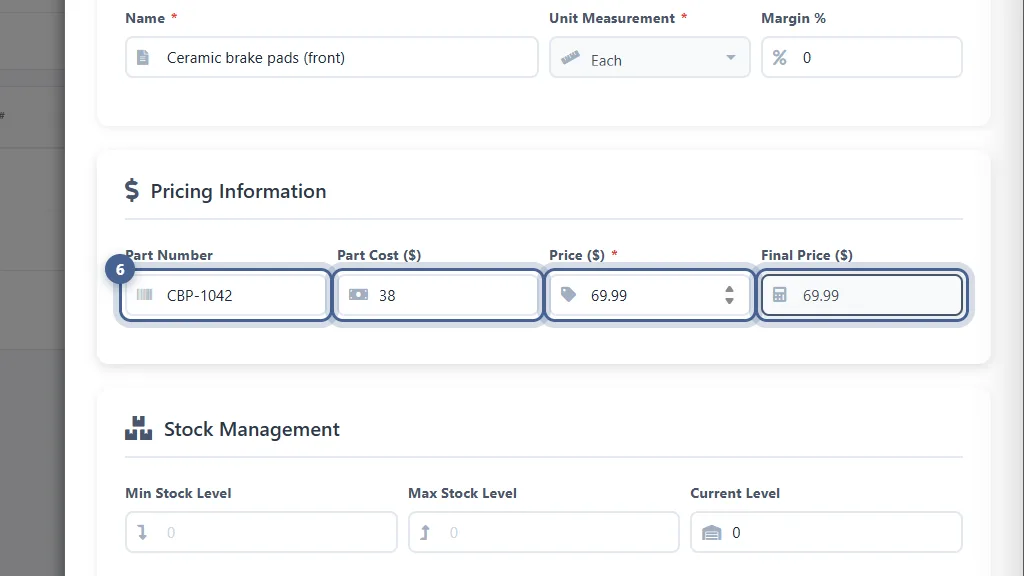
Enter the supplier Part Number, what you pay (Part Cost) and what you charge (Price). Final Price is the selling price including any margin — it’s what appears on estimates and invoices. Keeping cost and price here is what powers your profit reports.
- 7
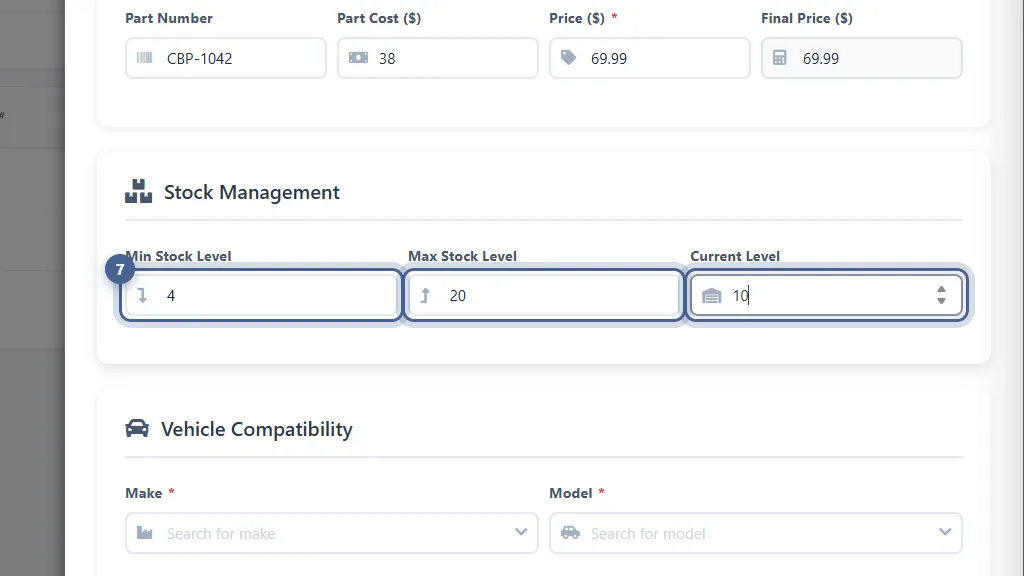
Set the stock levels
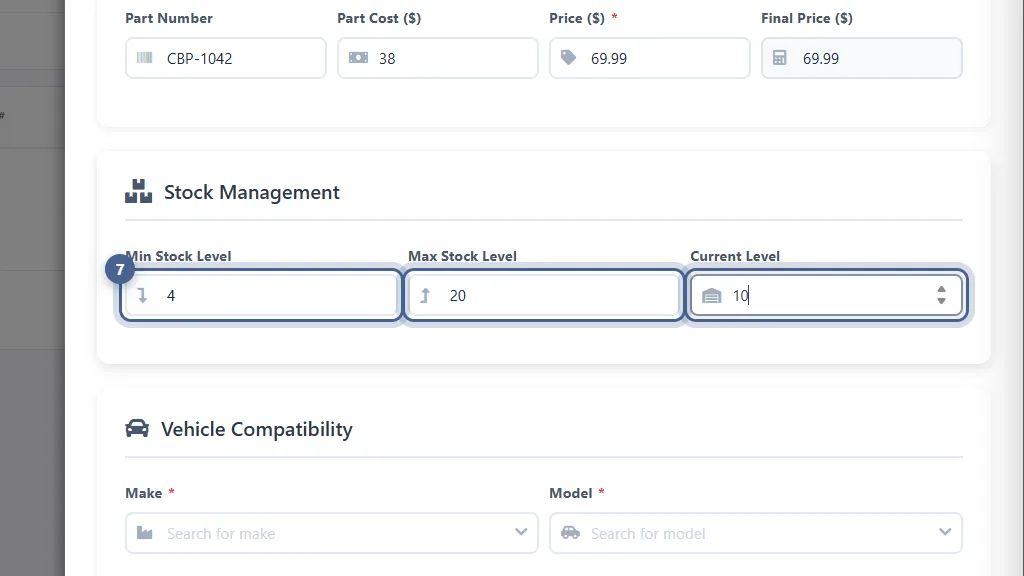
Under Stock Management, enter how many you have now (Current Level) and your Min and Max levels. Stock goes down automatically when the part is used on a job, and AutoSoftWay warns you when it drops below the minimum. Turn on No Tracking Inventory for items you don’t count.
- 8
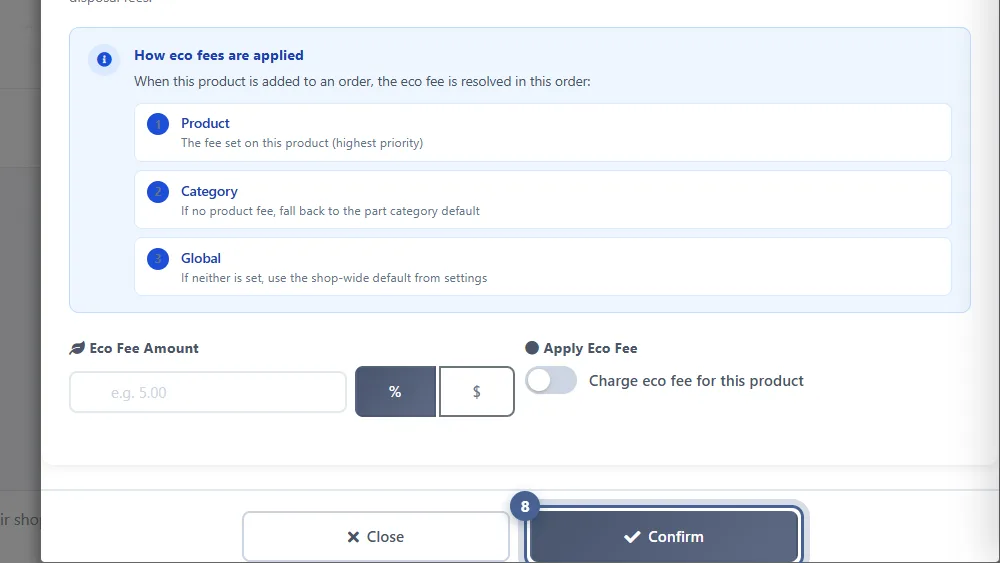
Confirm
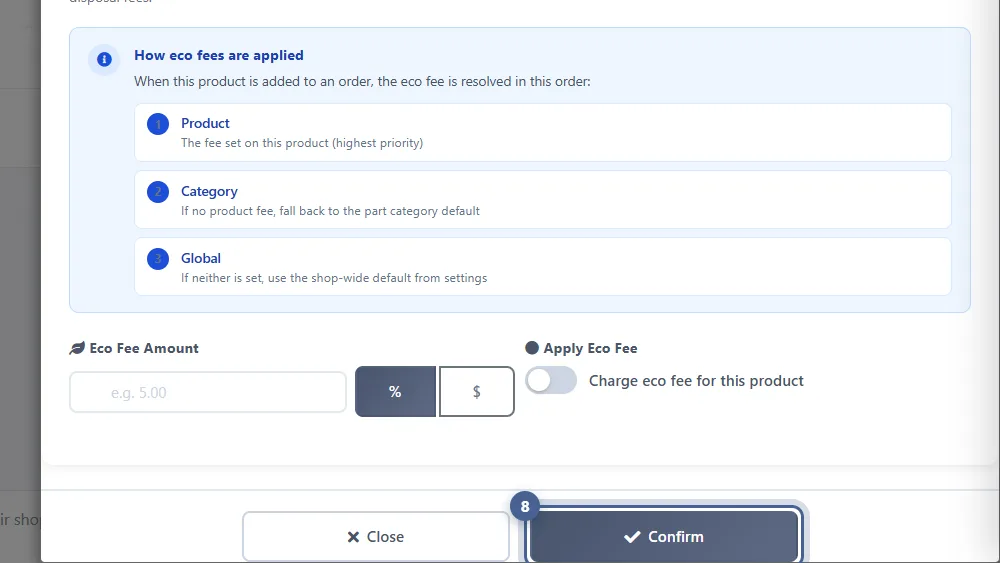
Click Confirm to save the part to your catalogue.
- 9
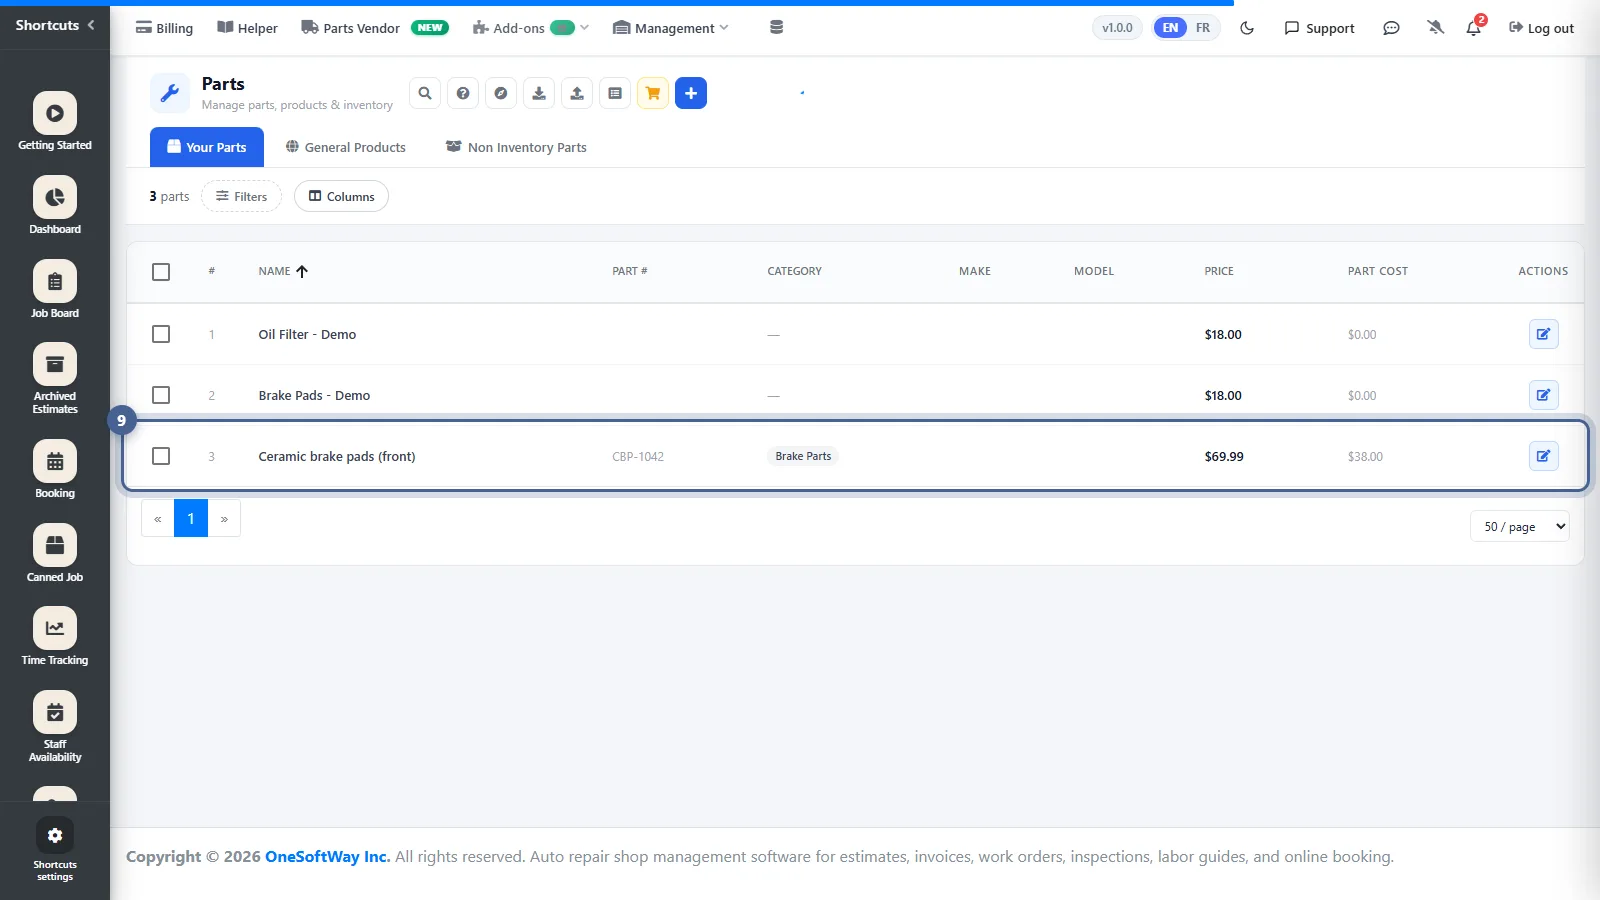
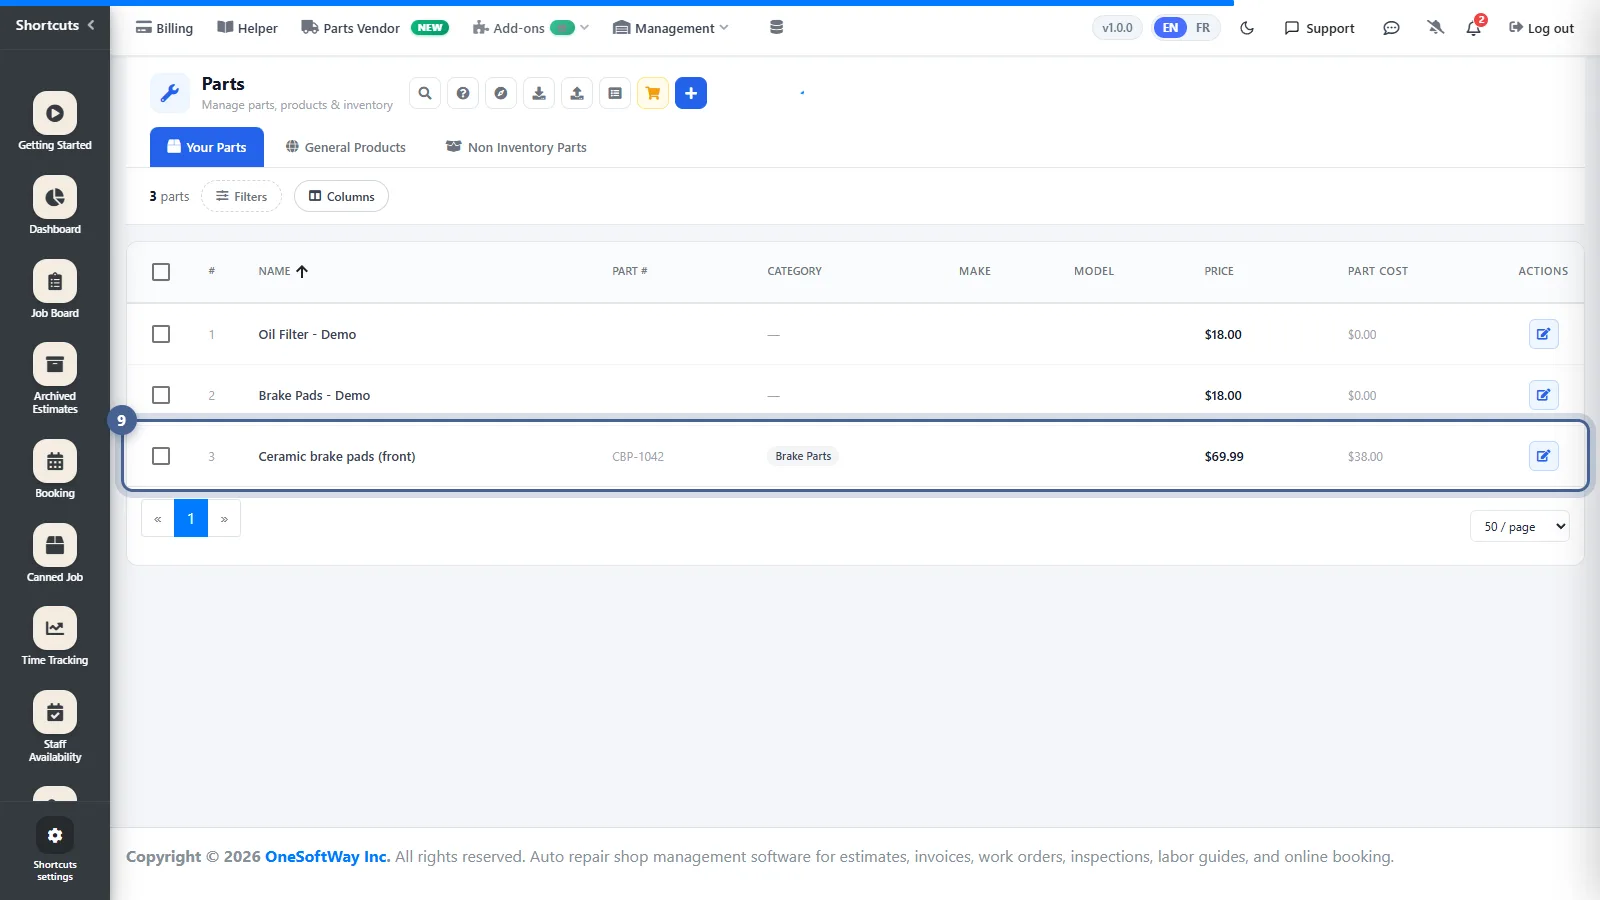
Find the part in your catalogue
The part is now in Your Parts. When you add it to an estimate, just start typing its name or part number and the price fills in.
- 10
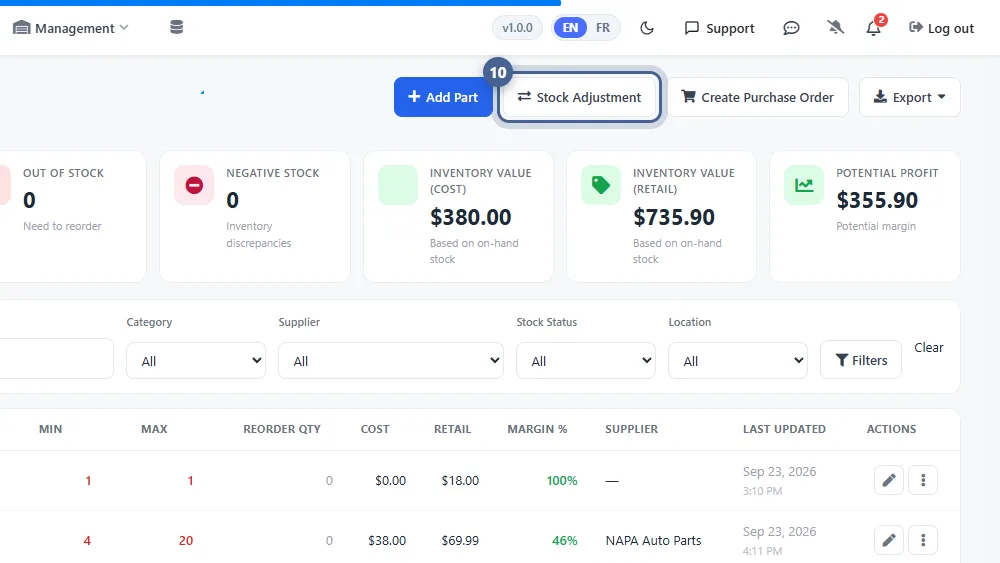
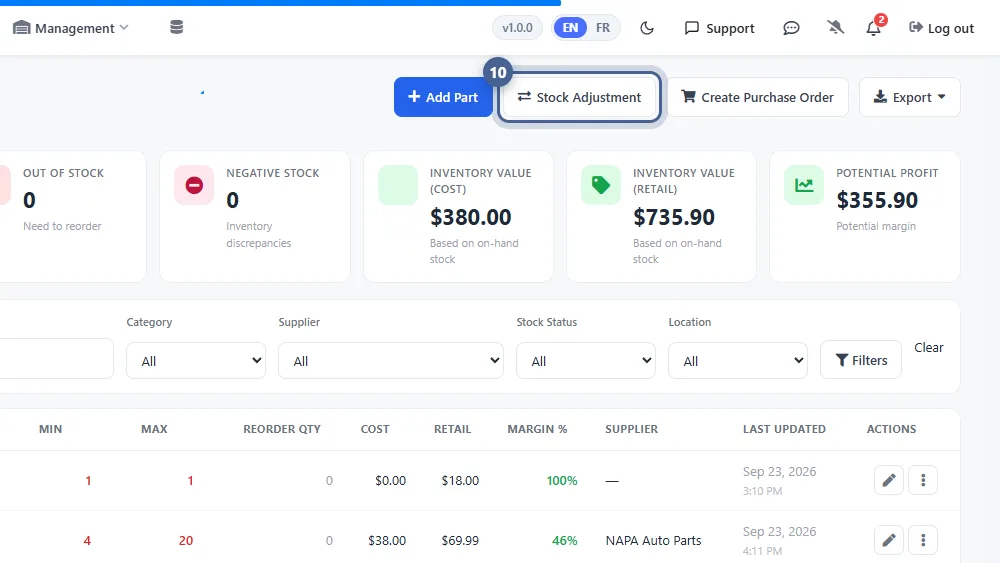
Keep stock accurate in Inventory
Open Inventory (Management → Inventory Overview) for a live view of stock on hand, low-stock items and stock value. Use Stock Adjustment after a count or a return, and Create Purchase Order to reorder from your vendor.
Screenshots taken from AutoSoftWay in September 2026 using a demo shop with sample data.